This guide provides all the essential information on configuring reminders for unpaid invoices in Easy Order Manager+.
Step 1: Log in to your Shopify account.
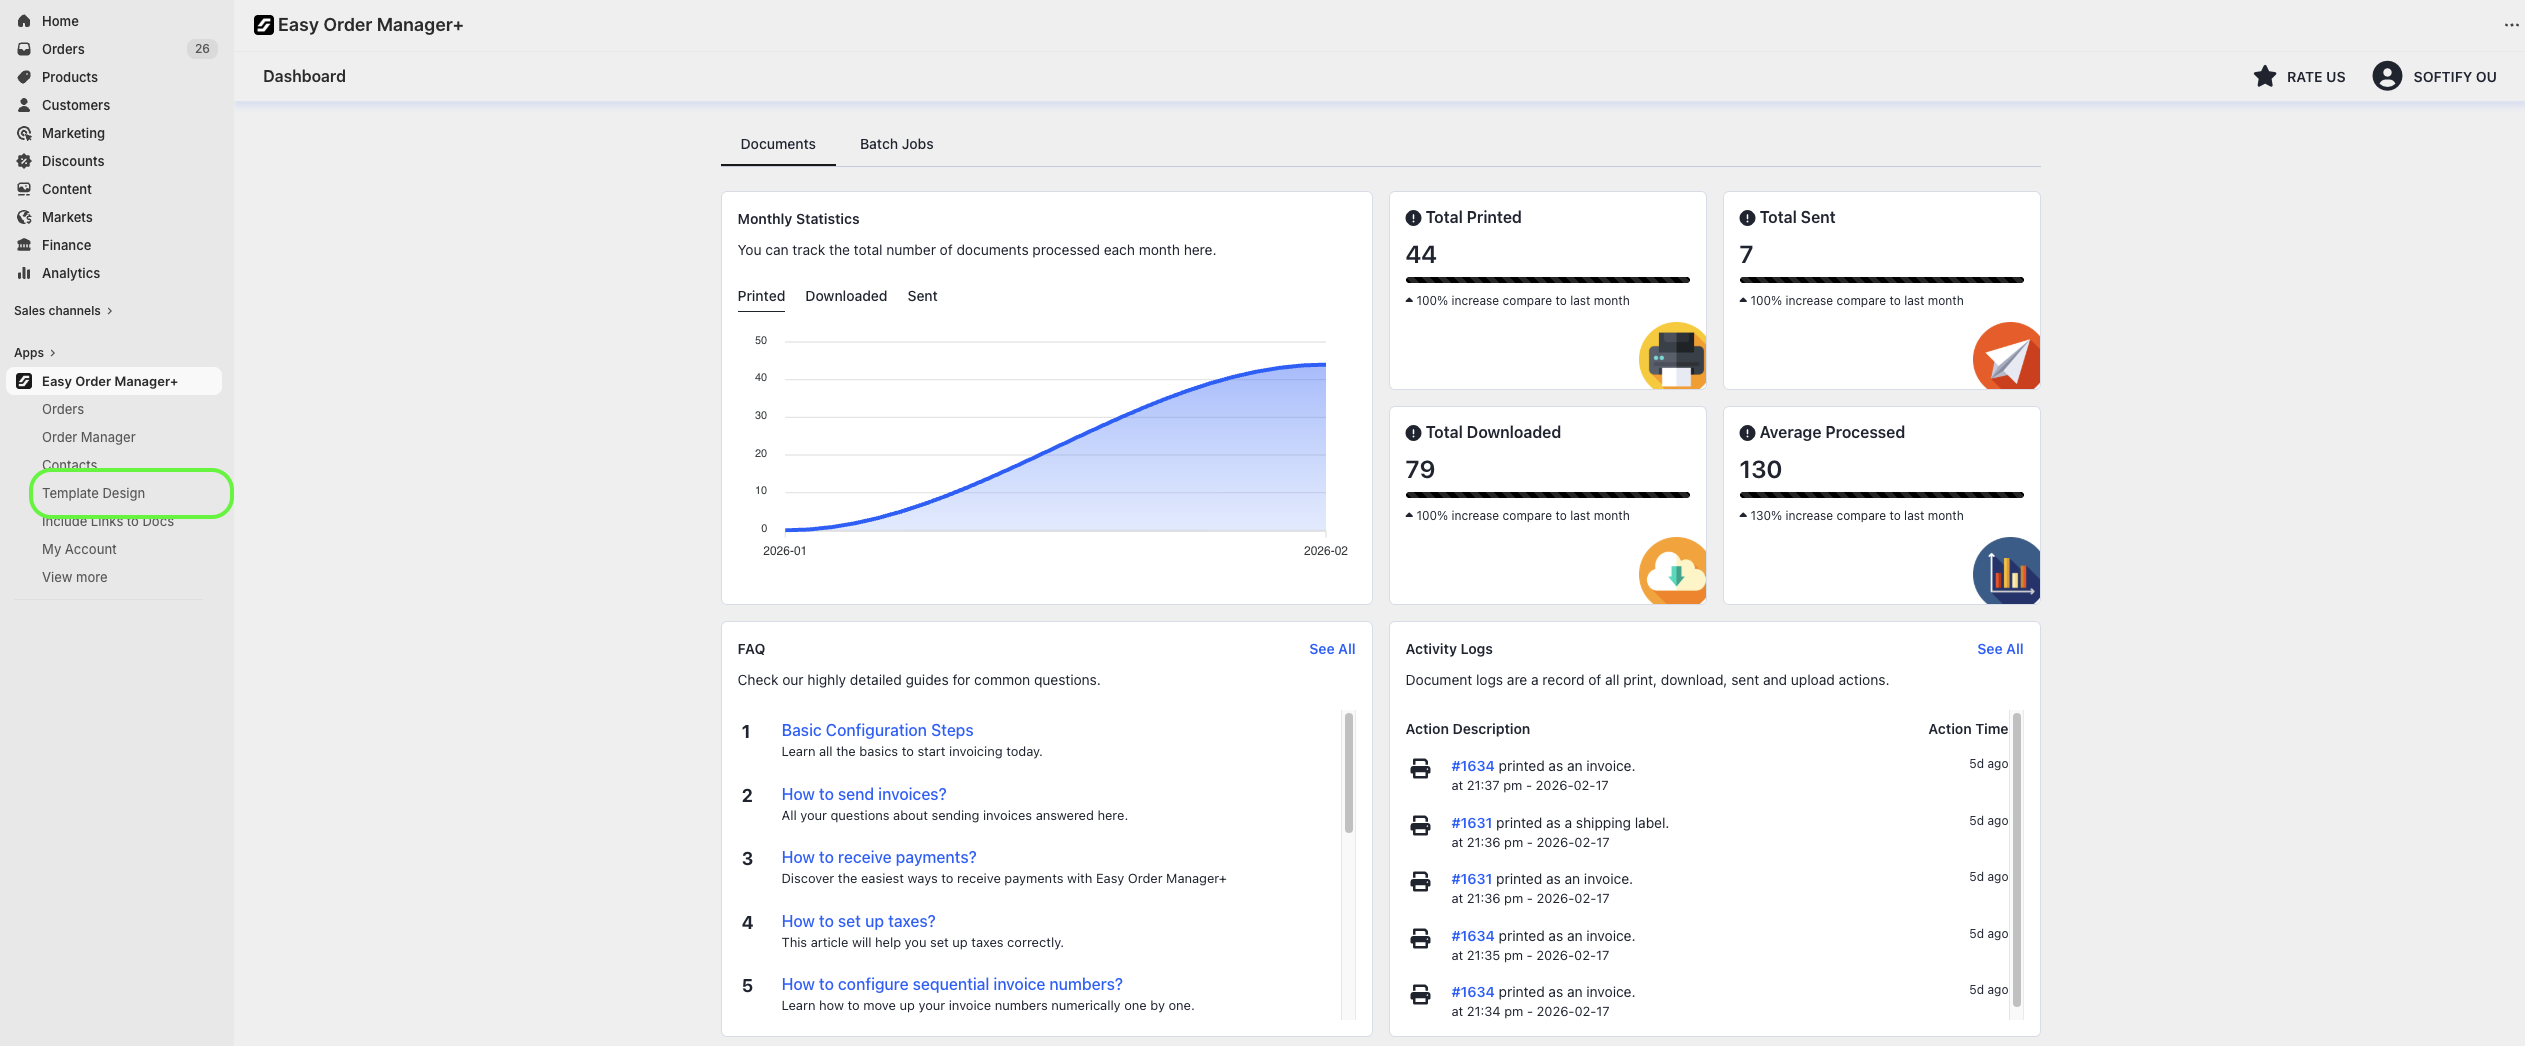
Step 2: Navigate to the Apps section of your Shopify store and select Easy Order Manager+. You will be automatically redirected to the app dashboard.

Step 3: From the dashboard, click on Template Design.
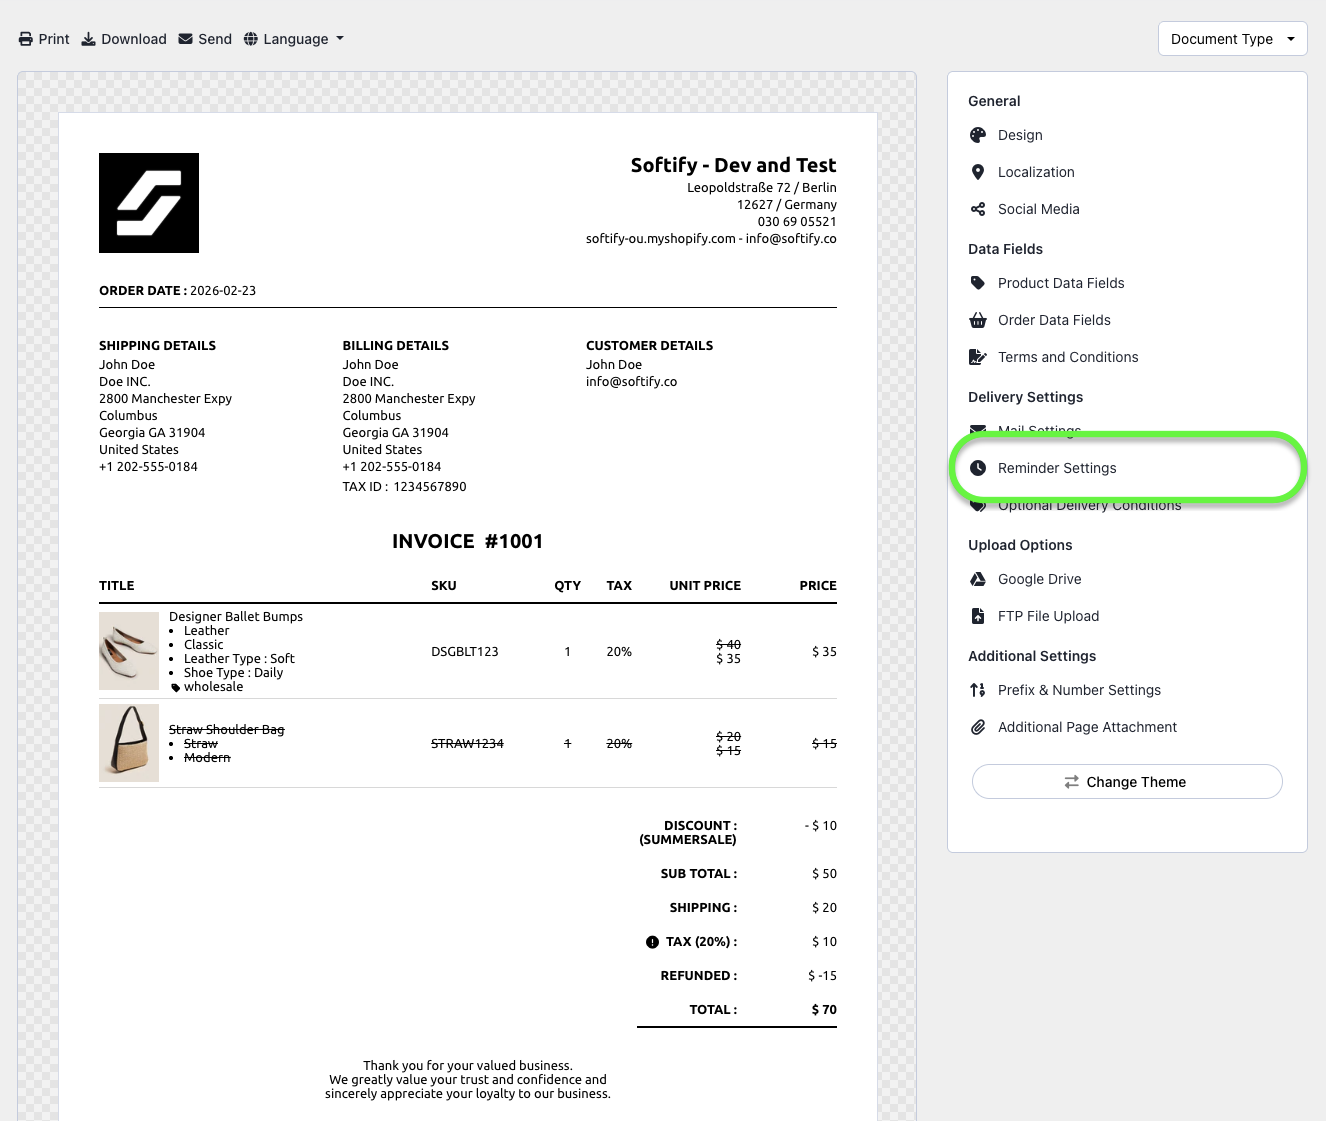
Step 4: Click on Reminder Settings.
Step 5: Customize your reminder settings.
Scheduling Section
- Send Automatic: Set this option to On to enable automatic reminders. By default, it is set to Off.
- How many days after due date? Define how many days after the invoice due date the reminder should be sent.
Note: While you can send unlimited reminders manually, our app can only send reminders up to 5 times automatically based on the number of days you set.
Delivery & Sender Section
- Email Subject: Customize the subject line of the reminder email.
- Sender Name: Specify the name that appears as the sender.
- Sender Email Address: Enter the email address from which reminders will be sent.
- BCC (Blind Carbon Copy): Optionally, add a secondary email address to receive a copy of the reminder—this will not be visible to the customer.
Attachments & Content Section
- Attachment Options: Enable this setting to attach a PDF version of the invoice to the reminder.
- Email Content: Customize the body text of the email.
Email Content Variables
You can use the following variables to customize your reminder email content further:
- {{ reminder_day }}: Use this variable to address or add a condition for the day of the reminder.
For example: Your payment is {{ reminder_day }} days overdue → Your payment is 7 days overdue. - {{ reminder_step }}: Use this variable to print which reminder this is.
For example: This is reminder {{ reminder_step }} of {{ total_reminders }} → This is reminder 1 of 4. - {{ total_reminders }}: Use this variable to print the total number of reminders set.
For example: This is reminder {{ reminder_step }} of {{ total_reminders }} → This is reminder 1 of 4. - {{ is_first_reminder }}: Use this variable to add a condition for the first reminder.
For example: {% if is_first_reminder %} This is your first reminder for your unpaid order. {% endif %} - {{ is_last_reminder }}: Use this variable to add a condition for the final reminder.
For example: {% if is_last_reminder %} This is your final reminder for your unpaid order. {% endif %}
Here is an example reminder content that uses some of these variables:
Payment Reminder for {{ order.name }}
<p>Dear {{ order.customer.first_name }},</p>
<p>Your payment is <strong>{{ reminder_day }} days</strong> overdue.</p>
{% if reminder_day == 3 %}
<p>This is a friendly reminder that your payment is due. Please complete your payment at your earliest convenience.</p>
{% elseif reminder_day == 7 %}
<p>This is your second reminder. Your payment is now 7 days overdue. Please take action immediately.</p>
{% elseif reminder_day == 14 %}
<p style="color: red; font-weight: bold;">FINAL NOTICE: Your payment is 14 days overdue. Further action may be taken if payment is not received.</p>
{% endif %}

Step 6: Once you’ve made your selection, click the Save button at the top center of the screen to apply your changes.
![]()
Need Additional Help?
- Visit the Help Center section within your Easy Order Manager+ dashboard to create a ticket.
- Or click here to email us directly.
We’re always happy to help!