This guide provides all the essential information about configuring sequential invoice numbers for custom invoices.
Step 1: Log in to your Shopify account.
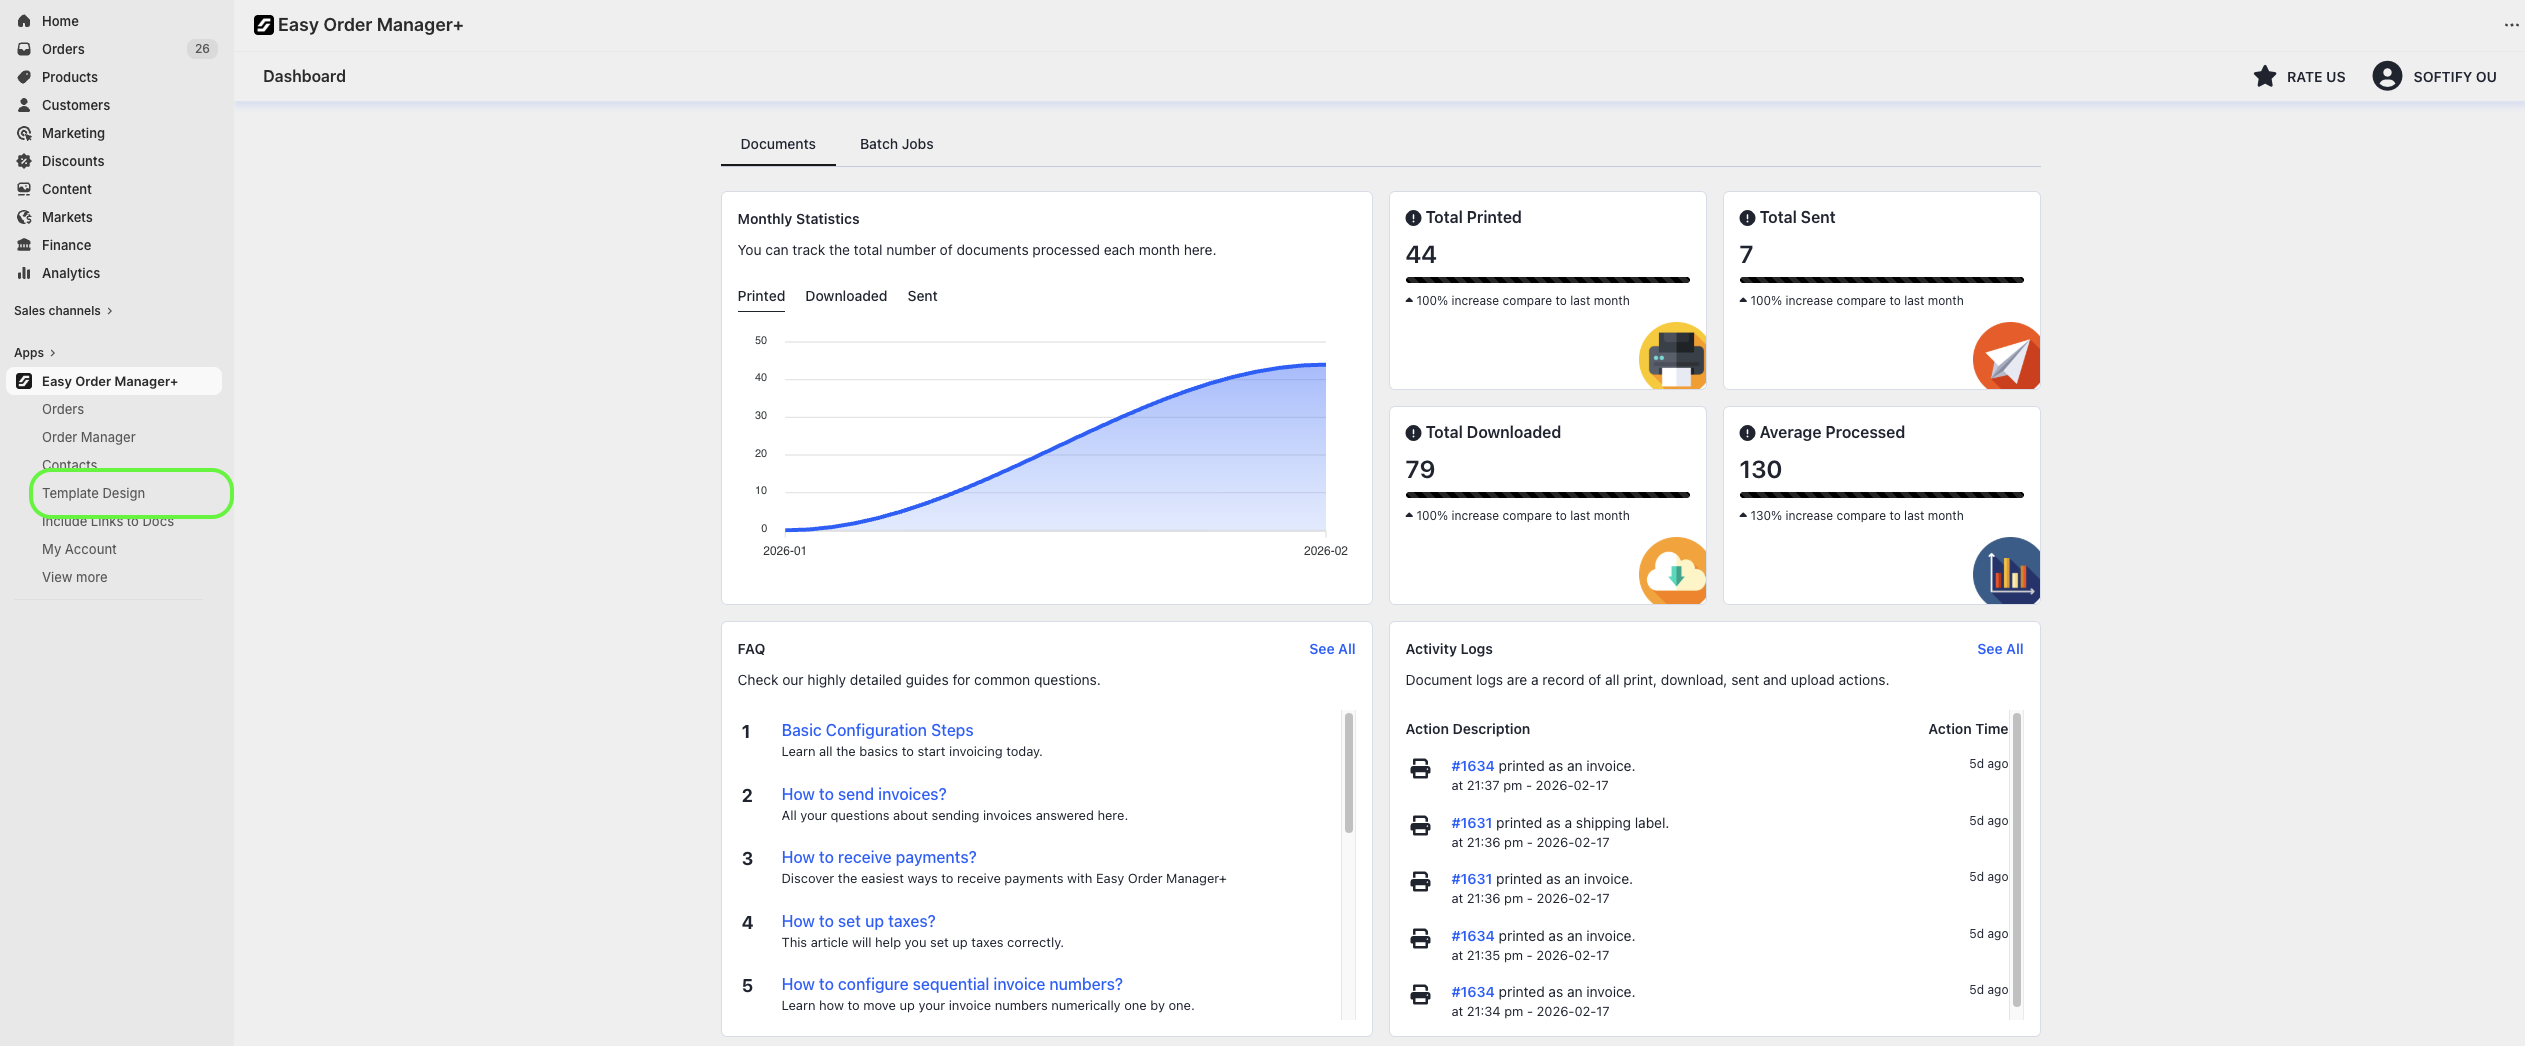
Step 2: Navigate to the Apps section of your Shopify store and select Easy Order Manager+. You will be automatically redirected to the app dashboard.

Step 3: From the dashboard, click on Template Design.
Step 4: In the Document Type dropdown menu, select Custom Invoice.
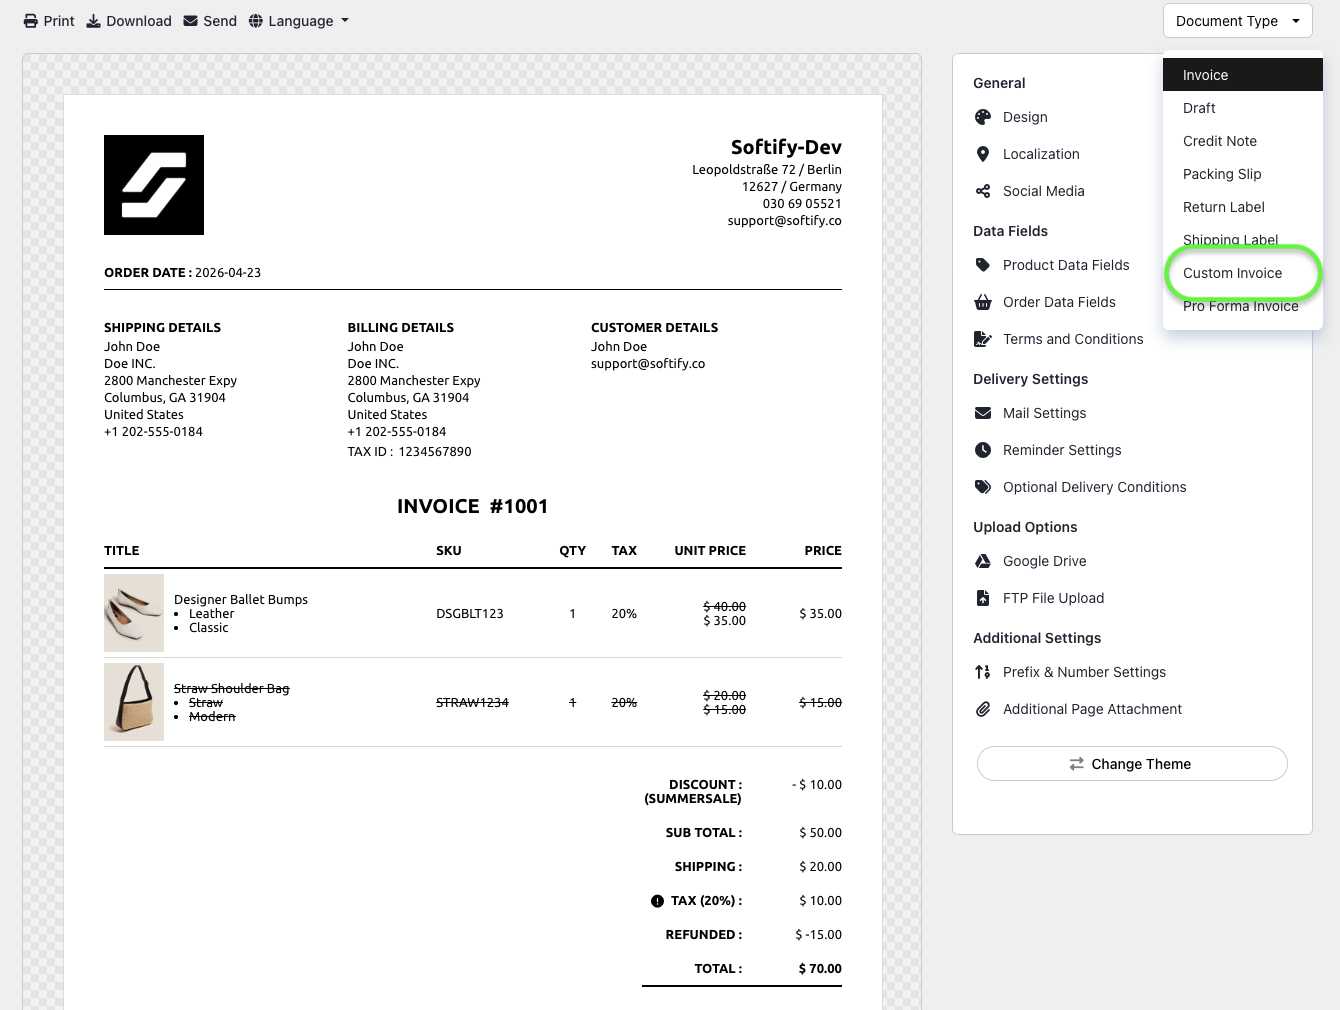
Step 5: Click on Prefix & Number Settings.

Step 6: In the Prefix & Number Settings section:
- Enter your preferred starting number in the Invoice Start Number field.
- Optionally, add a Prefix and/or Suffix to your invoice numbers.
Note: Custom invoice numbers will be assigned automatically when an order is converted to a custom invoice or when you create a new custom invoice.

Step 7:Once you’ve made your selection, click the Save button at the top center of the screen to apply your changes.
![]()
Need Additional Help?
- Visit the Help Center section within your Easy Order Manager+ dashboard to create a ticket
- Or contact us by email
We’re always happy to help!