This guide provides all the essential information on creating refund invoices, also known as Credit Notes in Easy Order Manager+.
You can create a credit note in three different ways:
- Manually
- Automatically
- By converting an order to a credit note
Important: Easy Order Manager+ supports most refund policies. If your store uses a custom policy that isn’t currently supported, please visit the Support section in your Easy Order Manager+ dashboard to create a ticket, or email us at support@softify.co.
How to Create a Credit Note Manually
Step 1: Log in to your Shopify account.
Step 2: Navigate to the Apps section of your Shopify store and select Easy Order Manager+. You will be automatically redirected to the app dashboard.

Step 3: Click on the Orders tab.
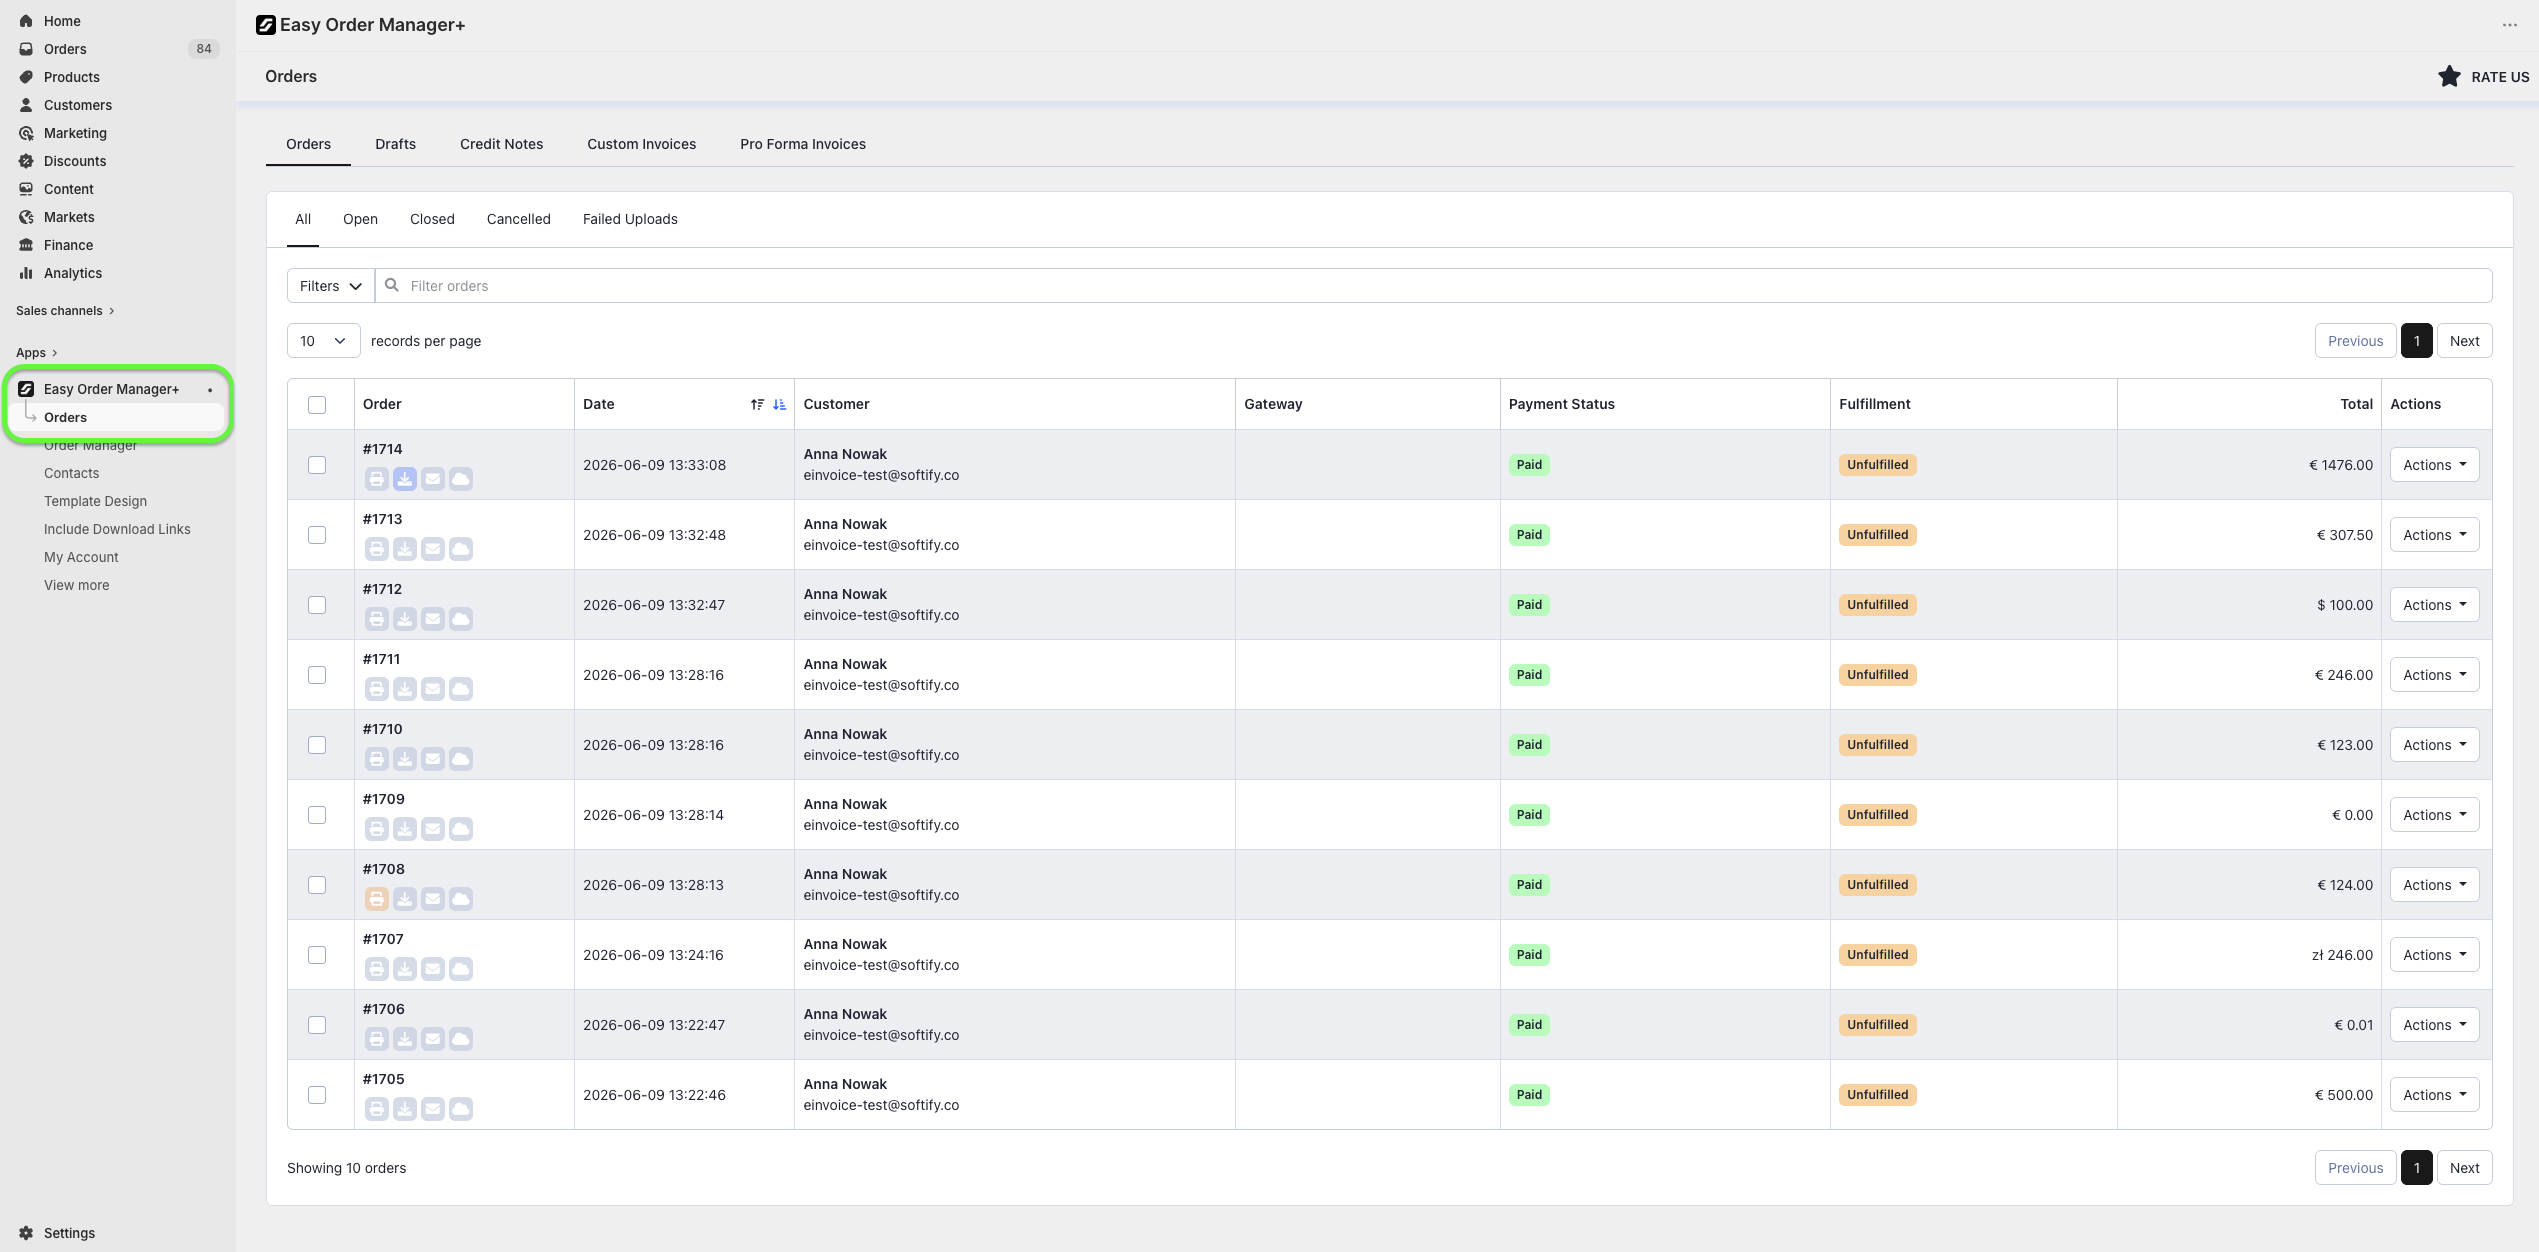
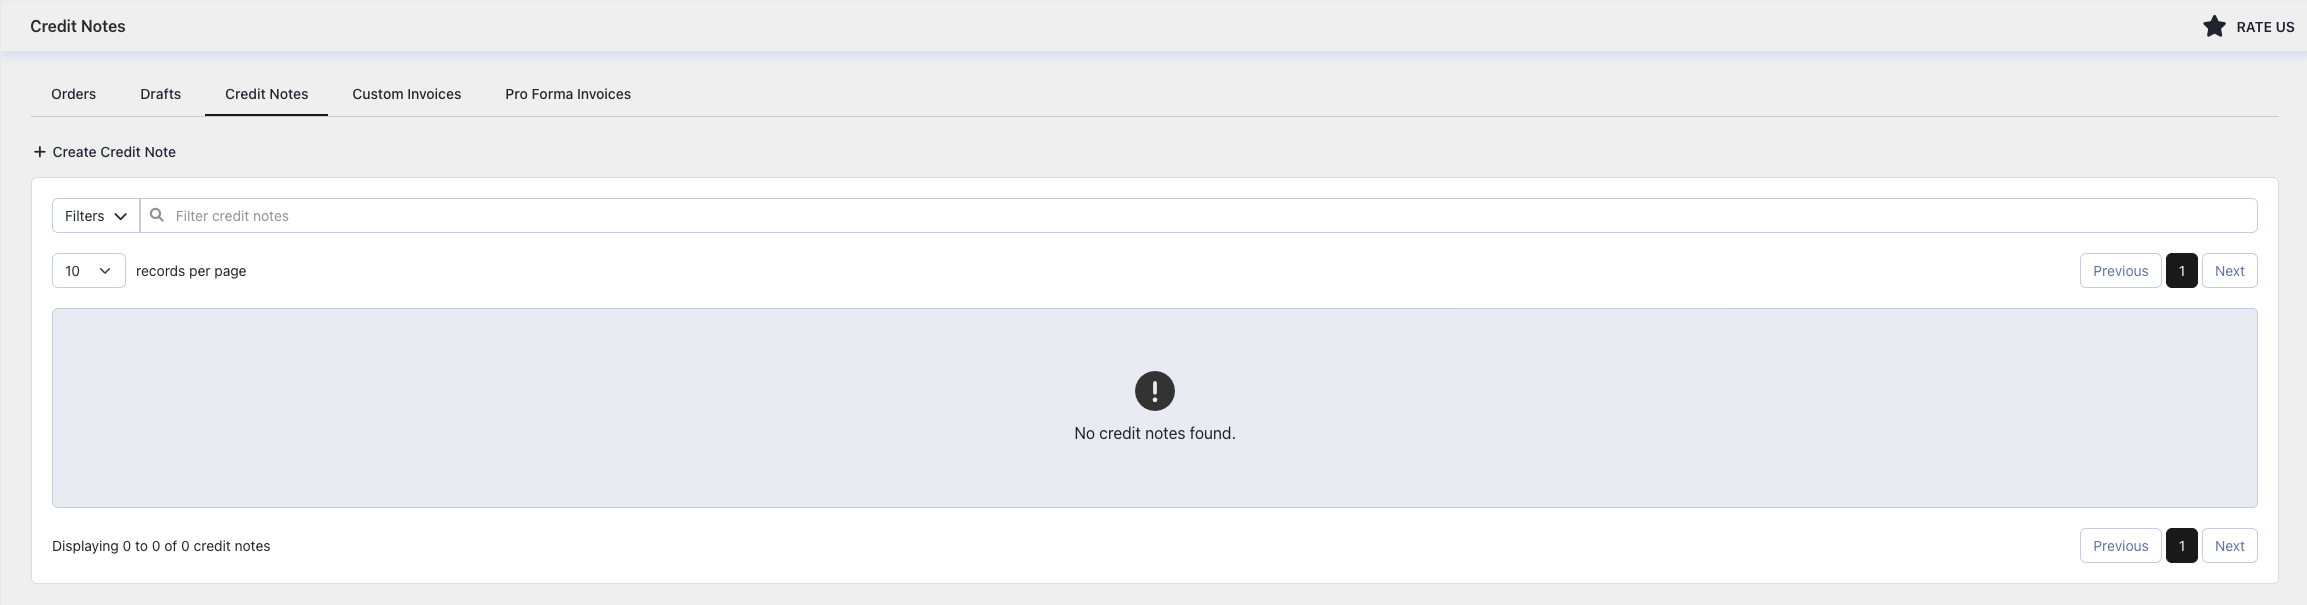
Step 4: Select the Credit Notes tab, then click the Create Credit Note button.
If you haven’t customized your credit note template yet, you can learn how to do that here.
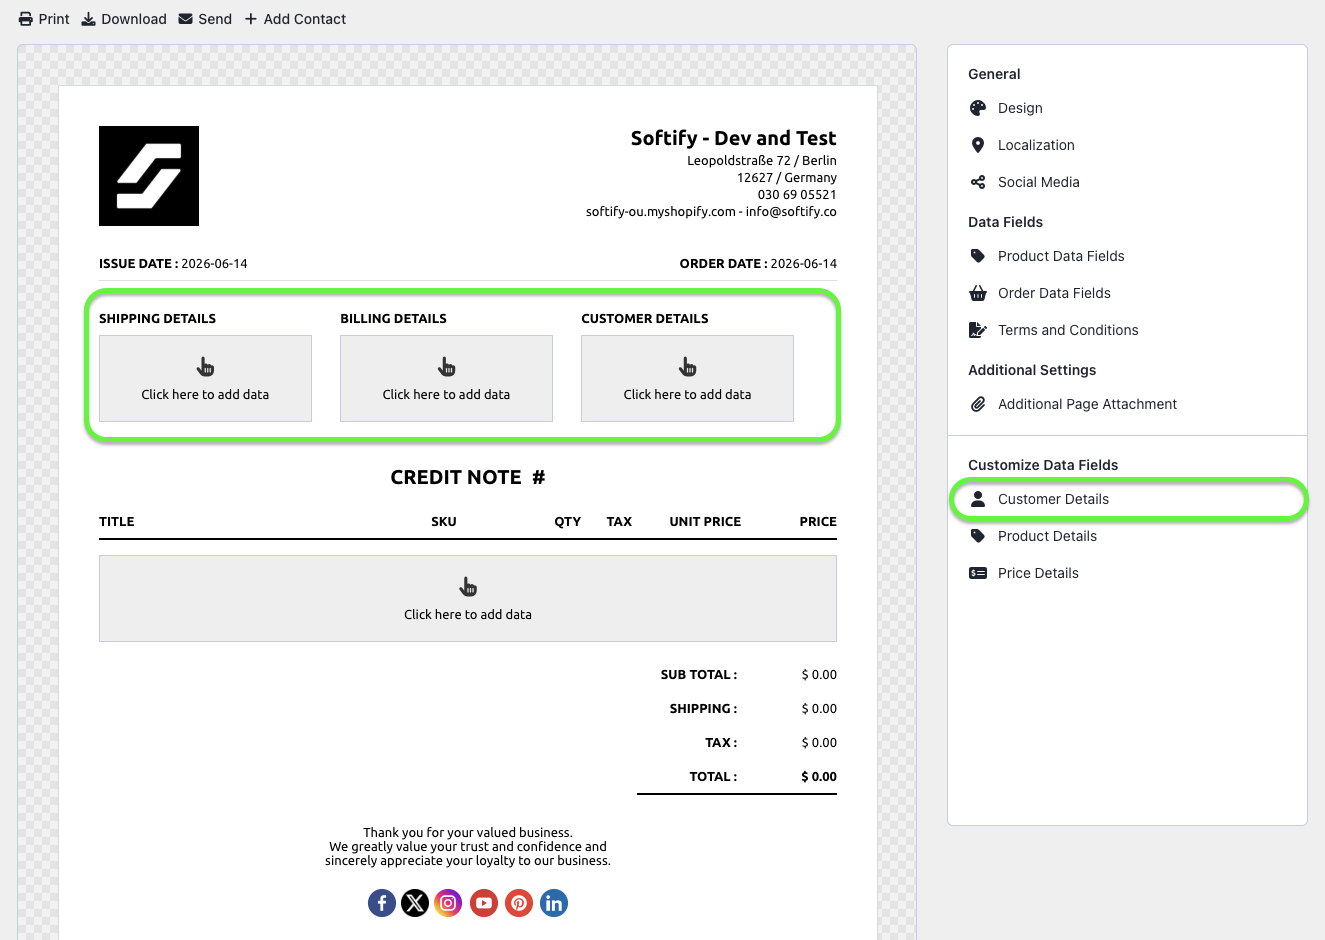
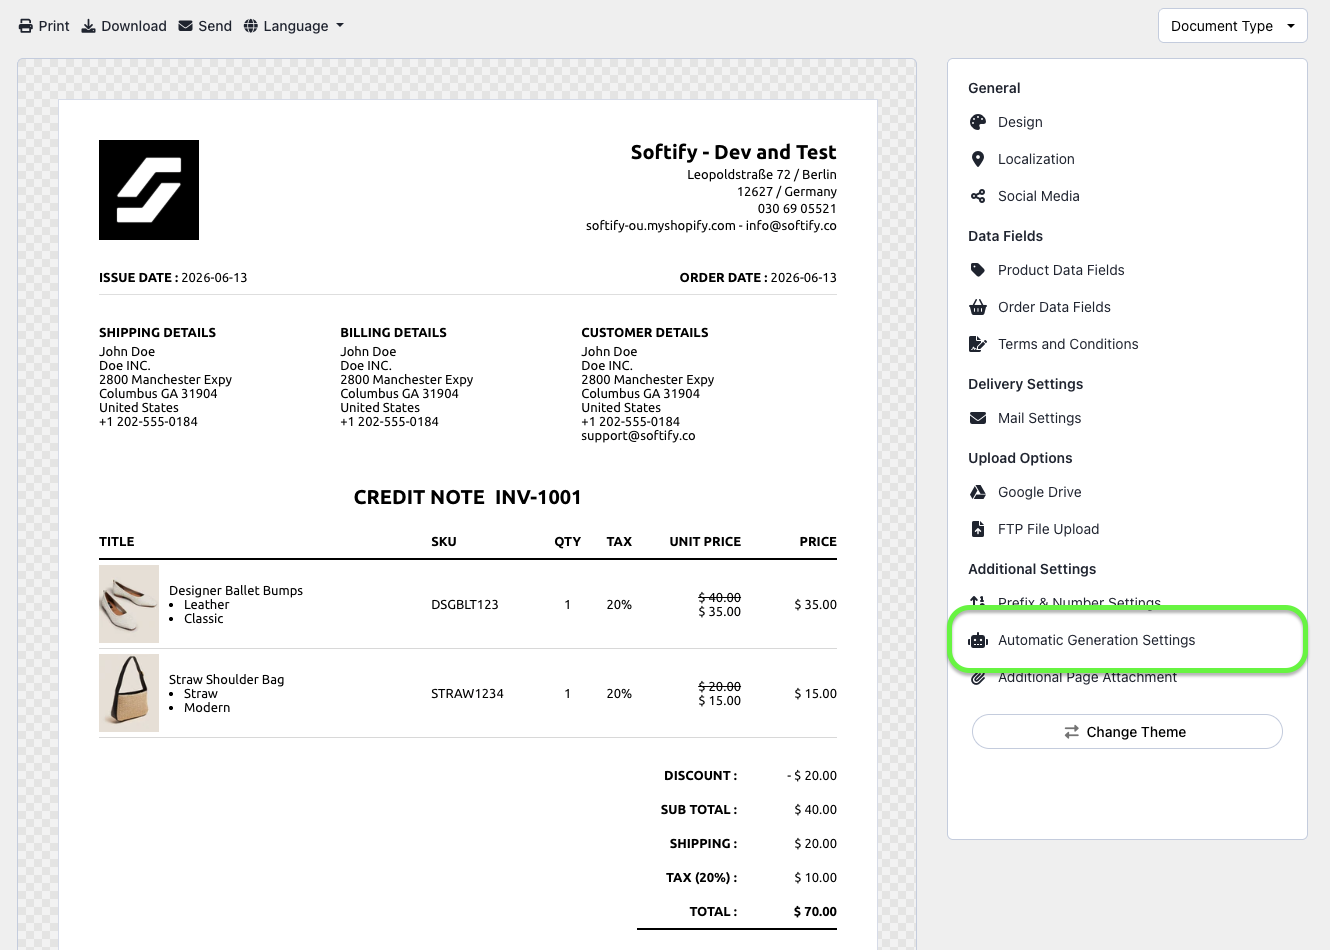
Step 5: Click on Customer Details or select from Shipping Details, Billing Details, or Customer Details to begin entering recipient information.
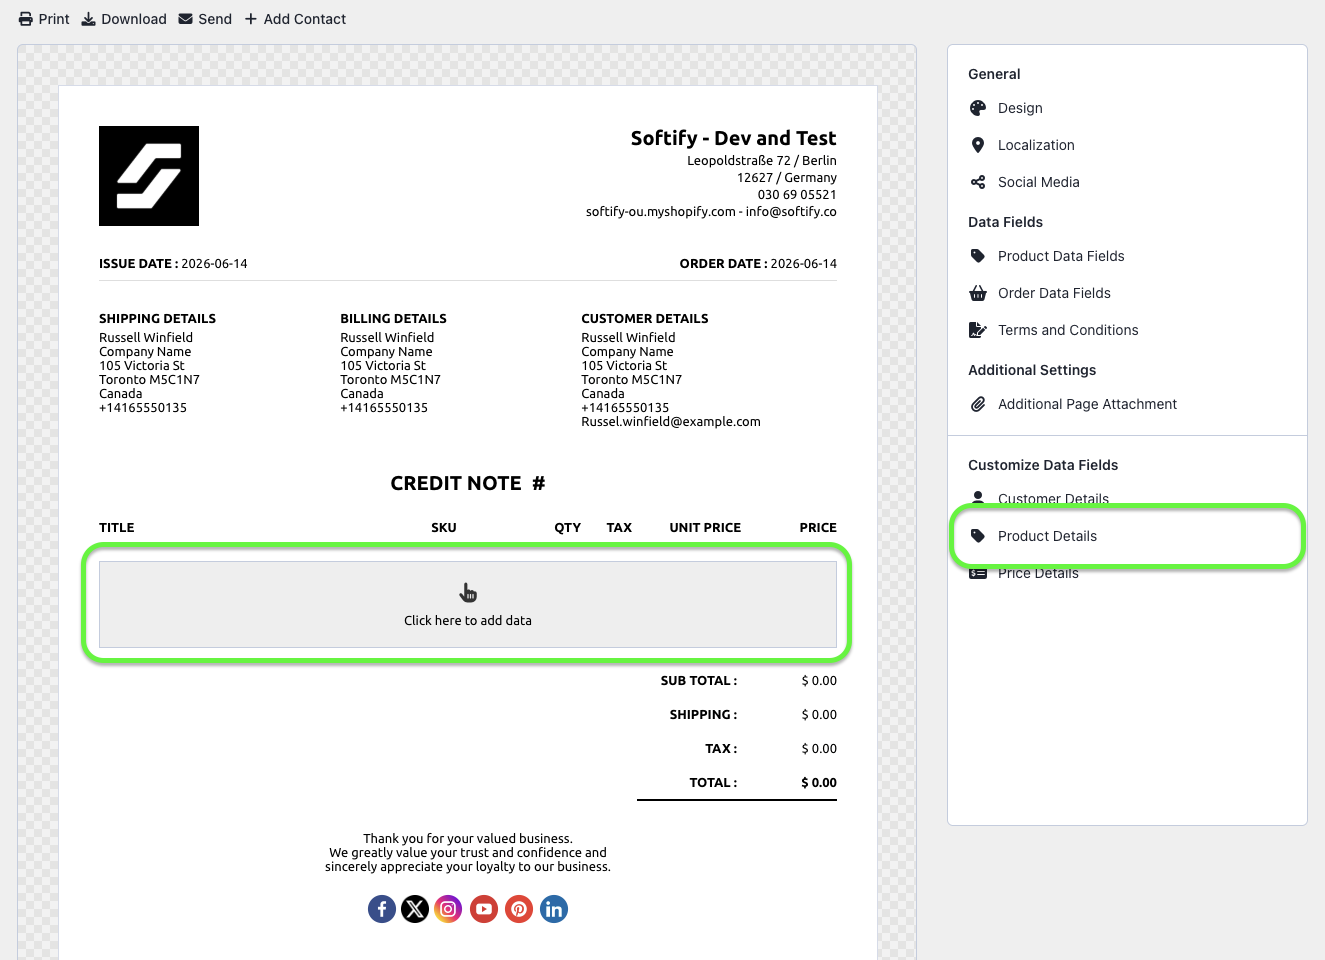
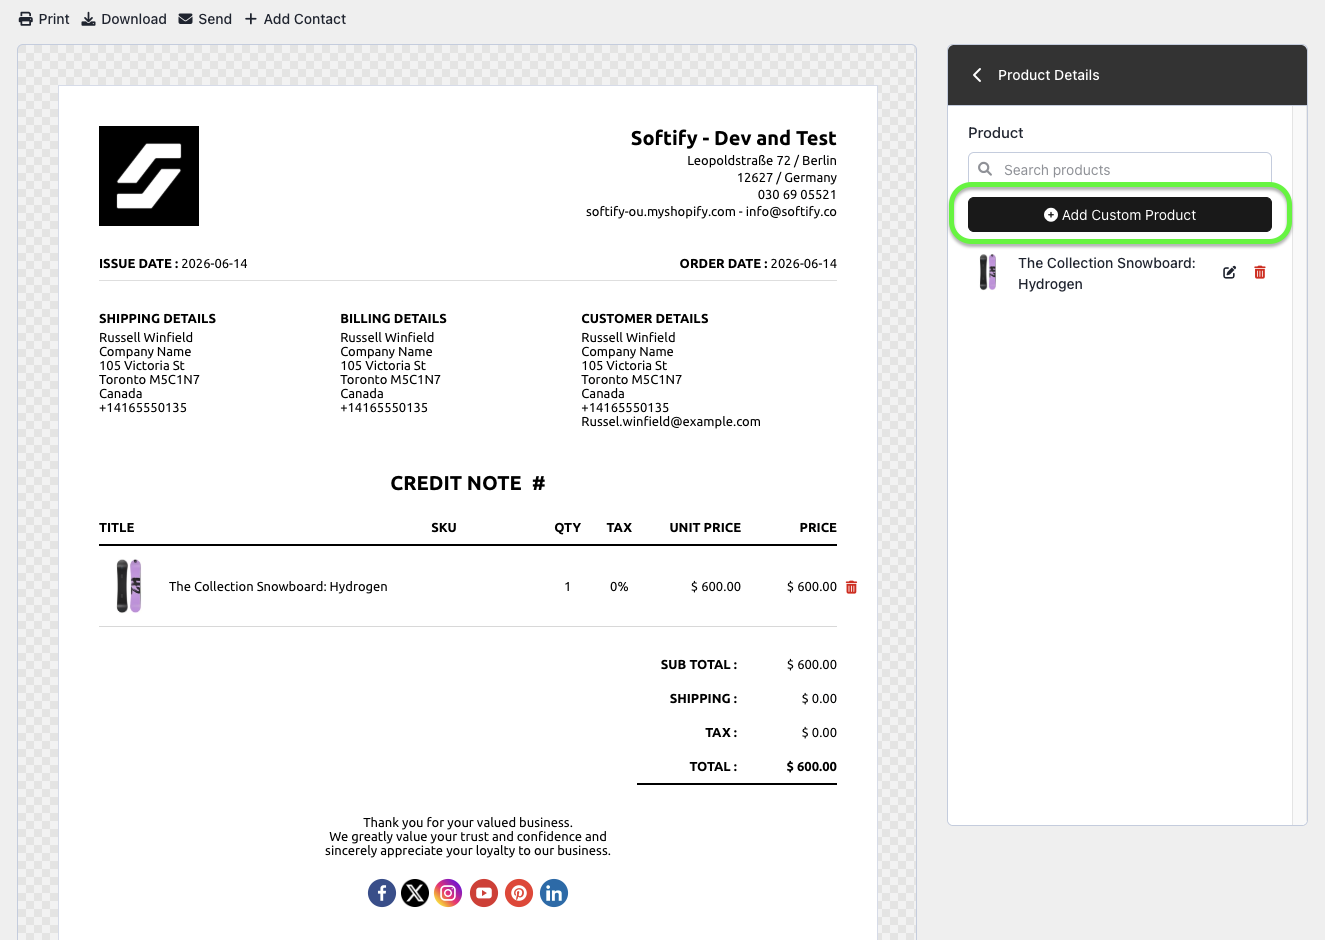
Step 6: Add products to your credit note:
- Click on Product Details or the Product Line to begin adding products.
- Use the Search field to locate existing products, then click the Plus (+) button to add them.
- Edit product details by clicking on the product name or using the Edit button.
You can control how tax is applied to your products from the Product Price Tax Settings in the Localization section.
Need to include a product that isn’t listed in your store? Click Add Custom Product to add a new line item manually.
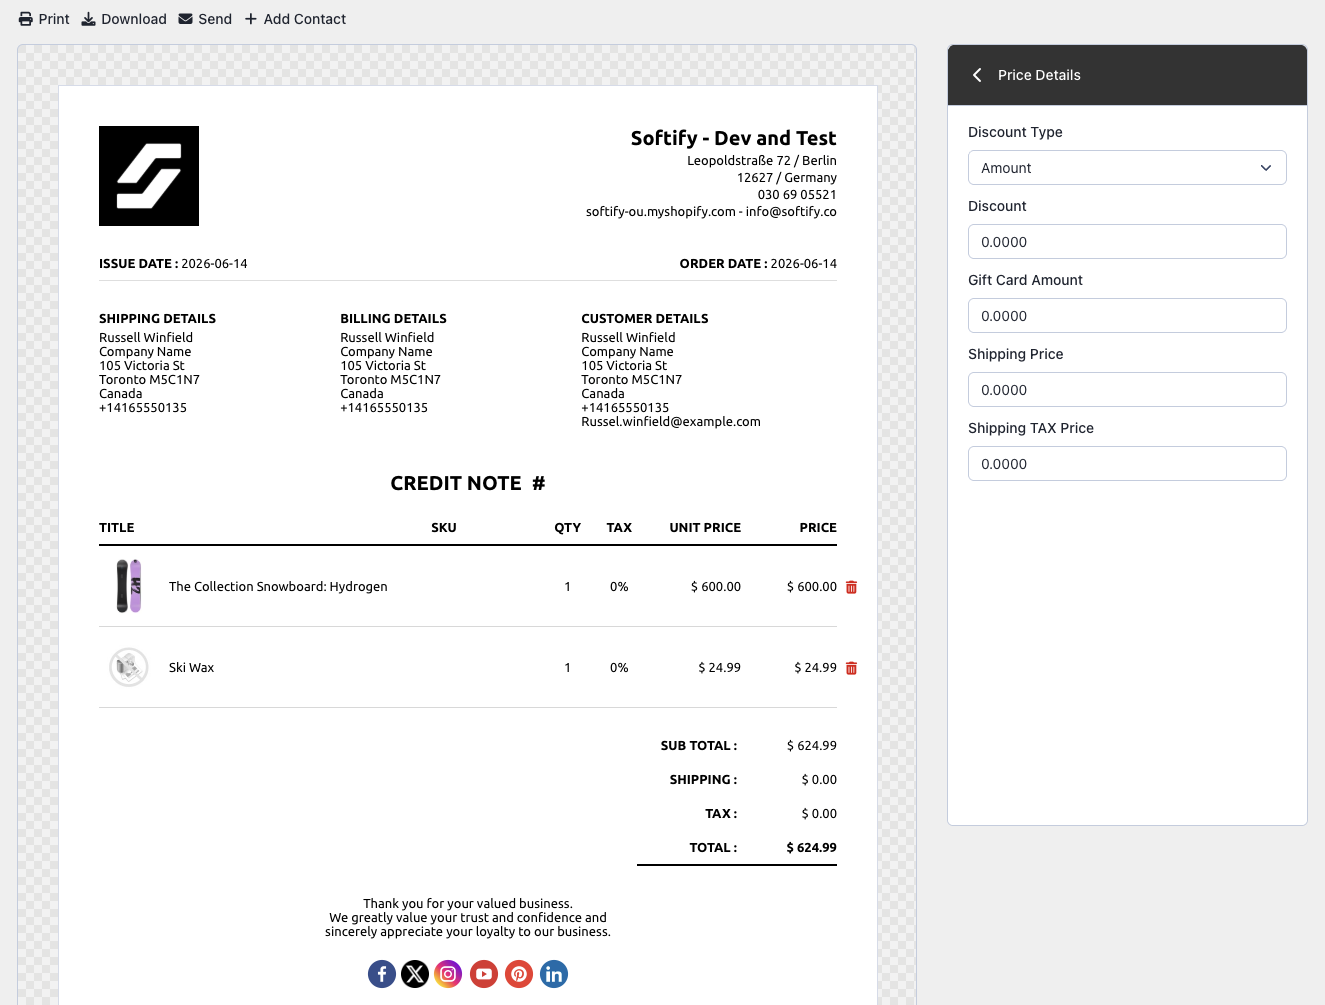
Step 7: Add pricing adjustments if needed. Click on Price Details to enter discounts, gift card amounts, or shipping charges.
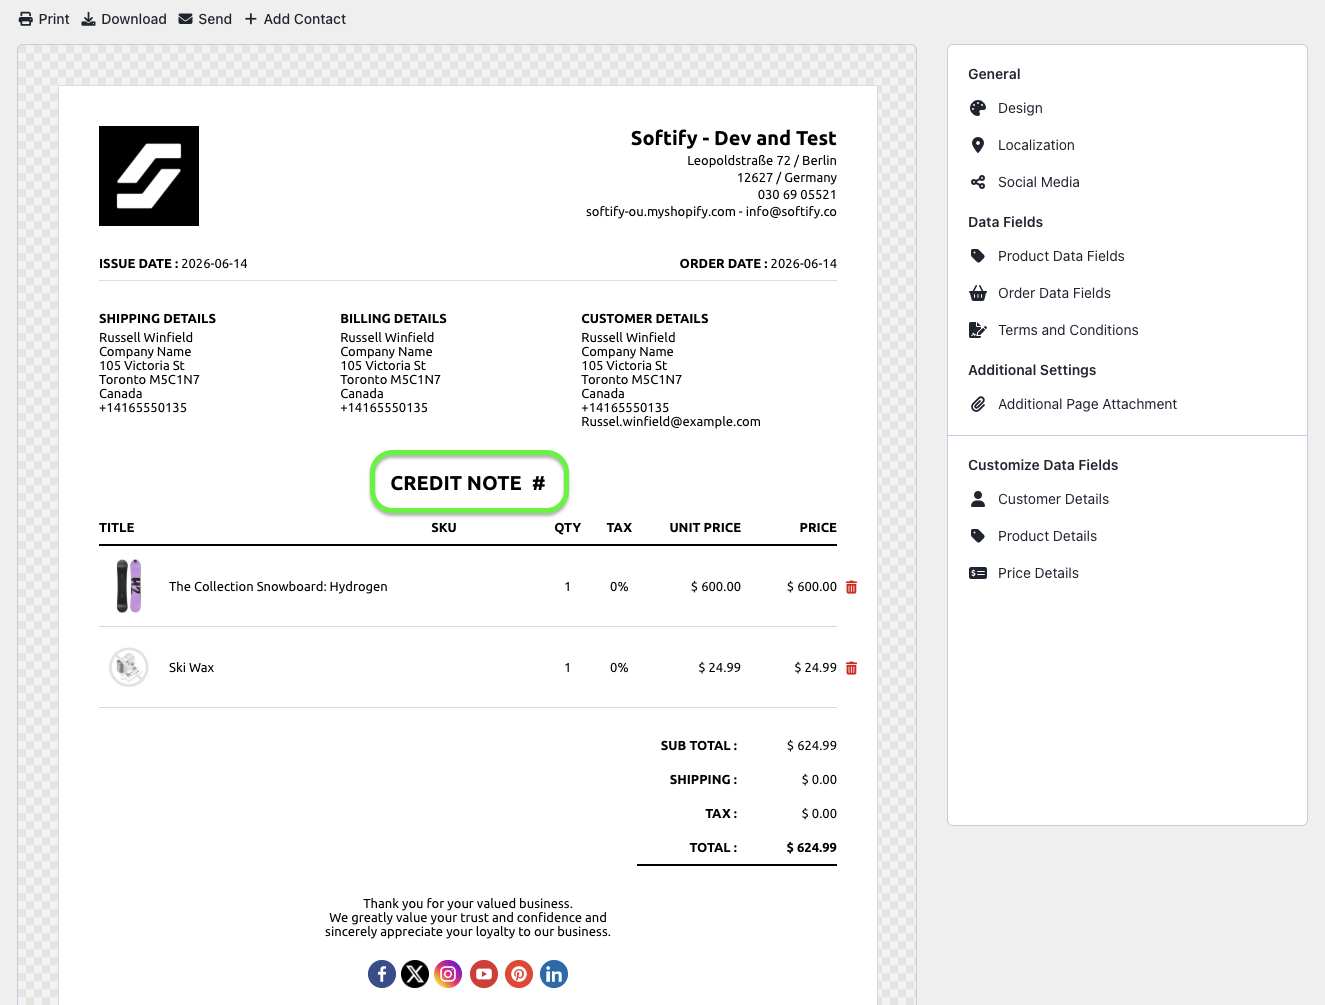
Step 8: After adding all the necessary information, click on the Terms and Conditions section to show or hide the following fields:
- Issue Date
- Payment Gateway

Step 9: To manually assign a document number, click on the Credit Note number line and enter your desired credit note number.
Step 10: Once you’ve made your selection, click the Save button at the top center of the screen to apply your changes.
![]()
How to Create a Credit Note Automatically
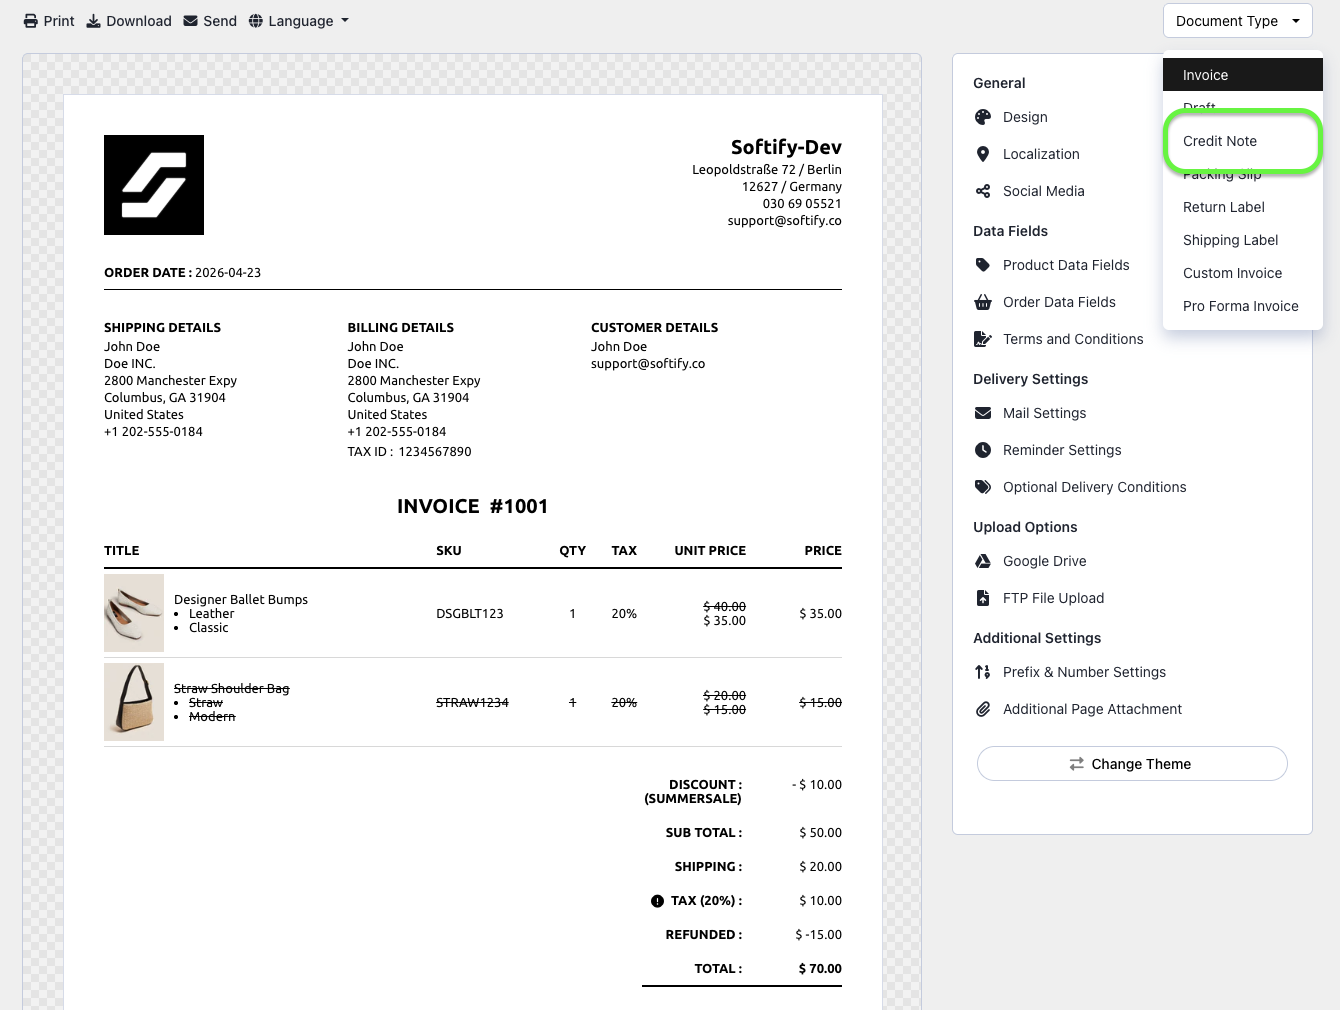
Step 1: On the Easy Order Manager+ dashboard, go to Template Design and select Credit Note from the Document Type dropdown.
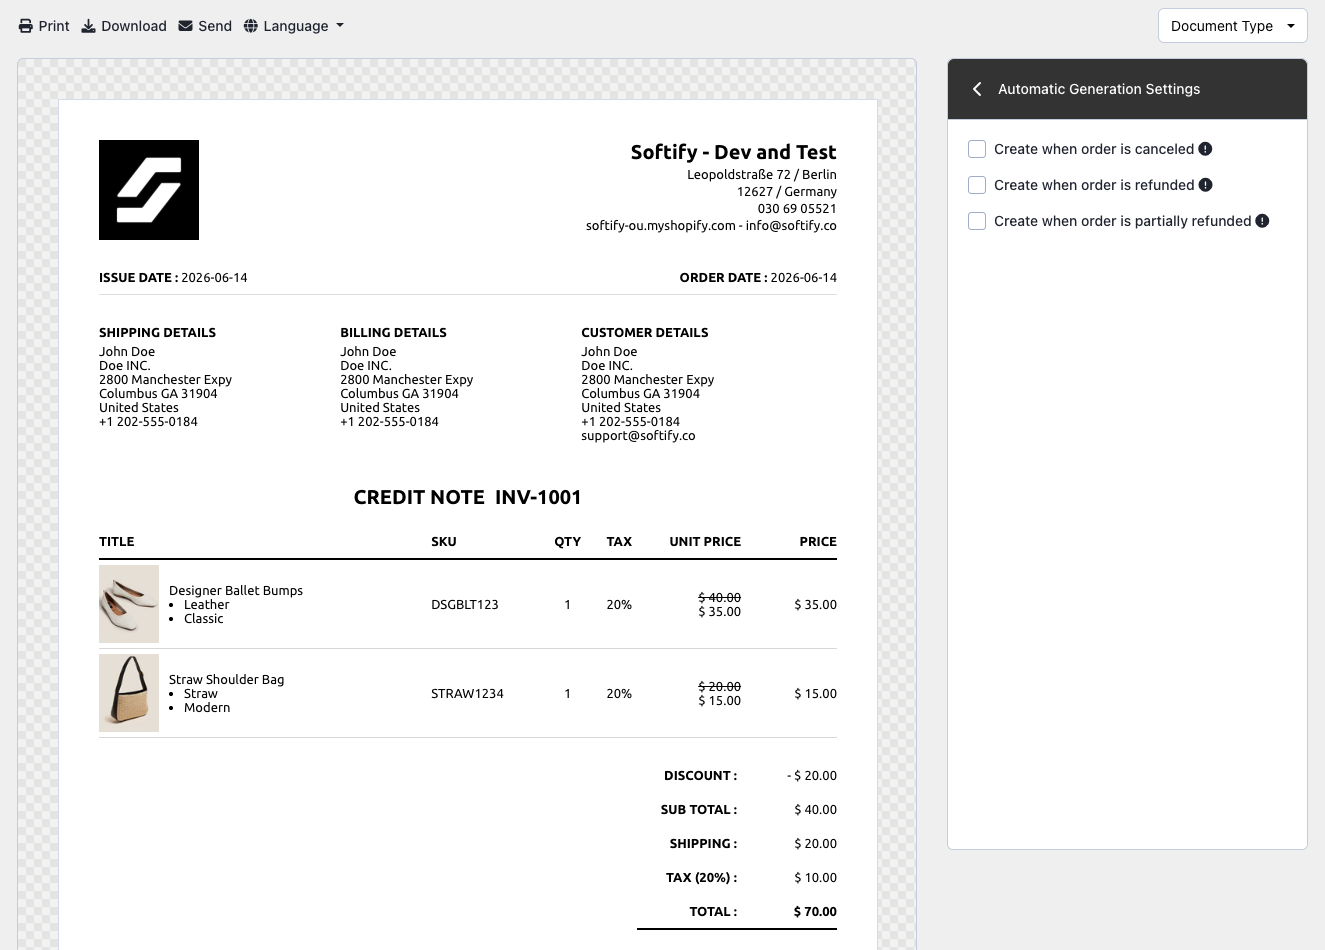
Step 2: Click on Automatic Generation Settings.
Step 3: Choose the automation rules that best fit your workflow. You can enable:
- Create when order is canceled
- Create when order is refunded
- Create when order is partially refunded
Step 4: Once you’ve made your selection, click the Save button at the top center of the screen to apply your changes.
![]()
How to Convert an Order to a Credit Note
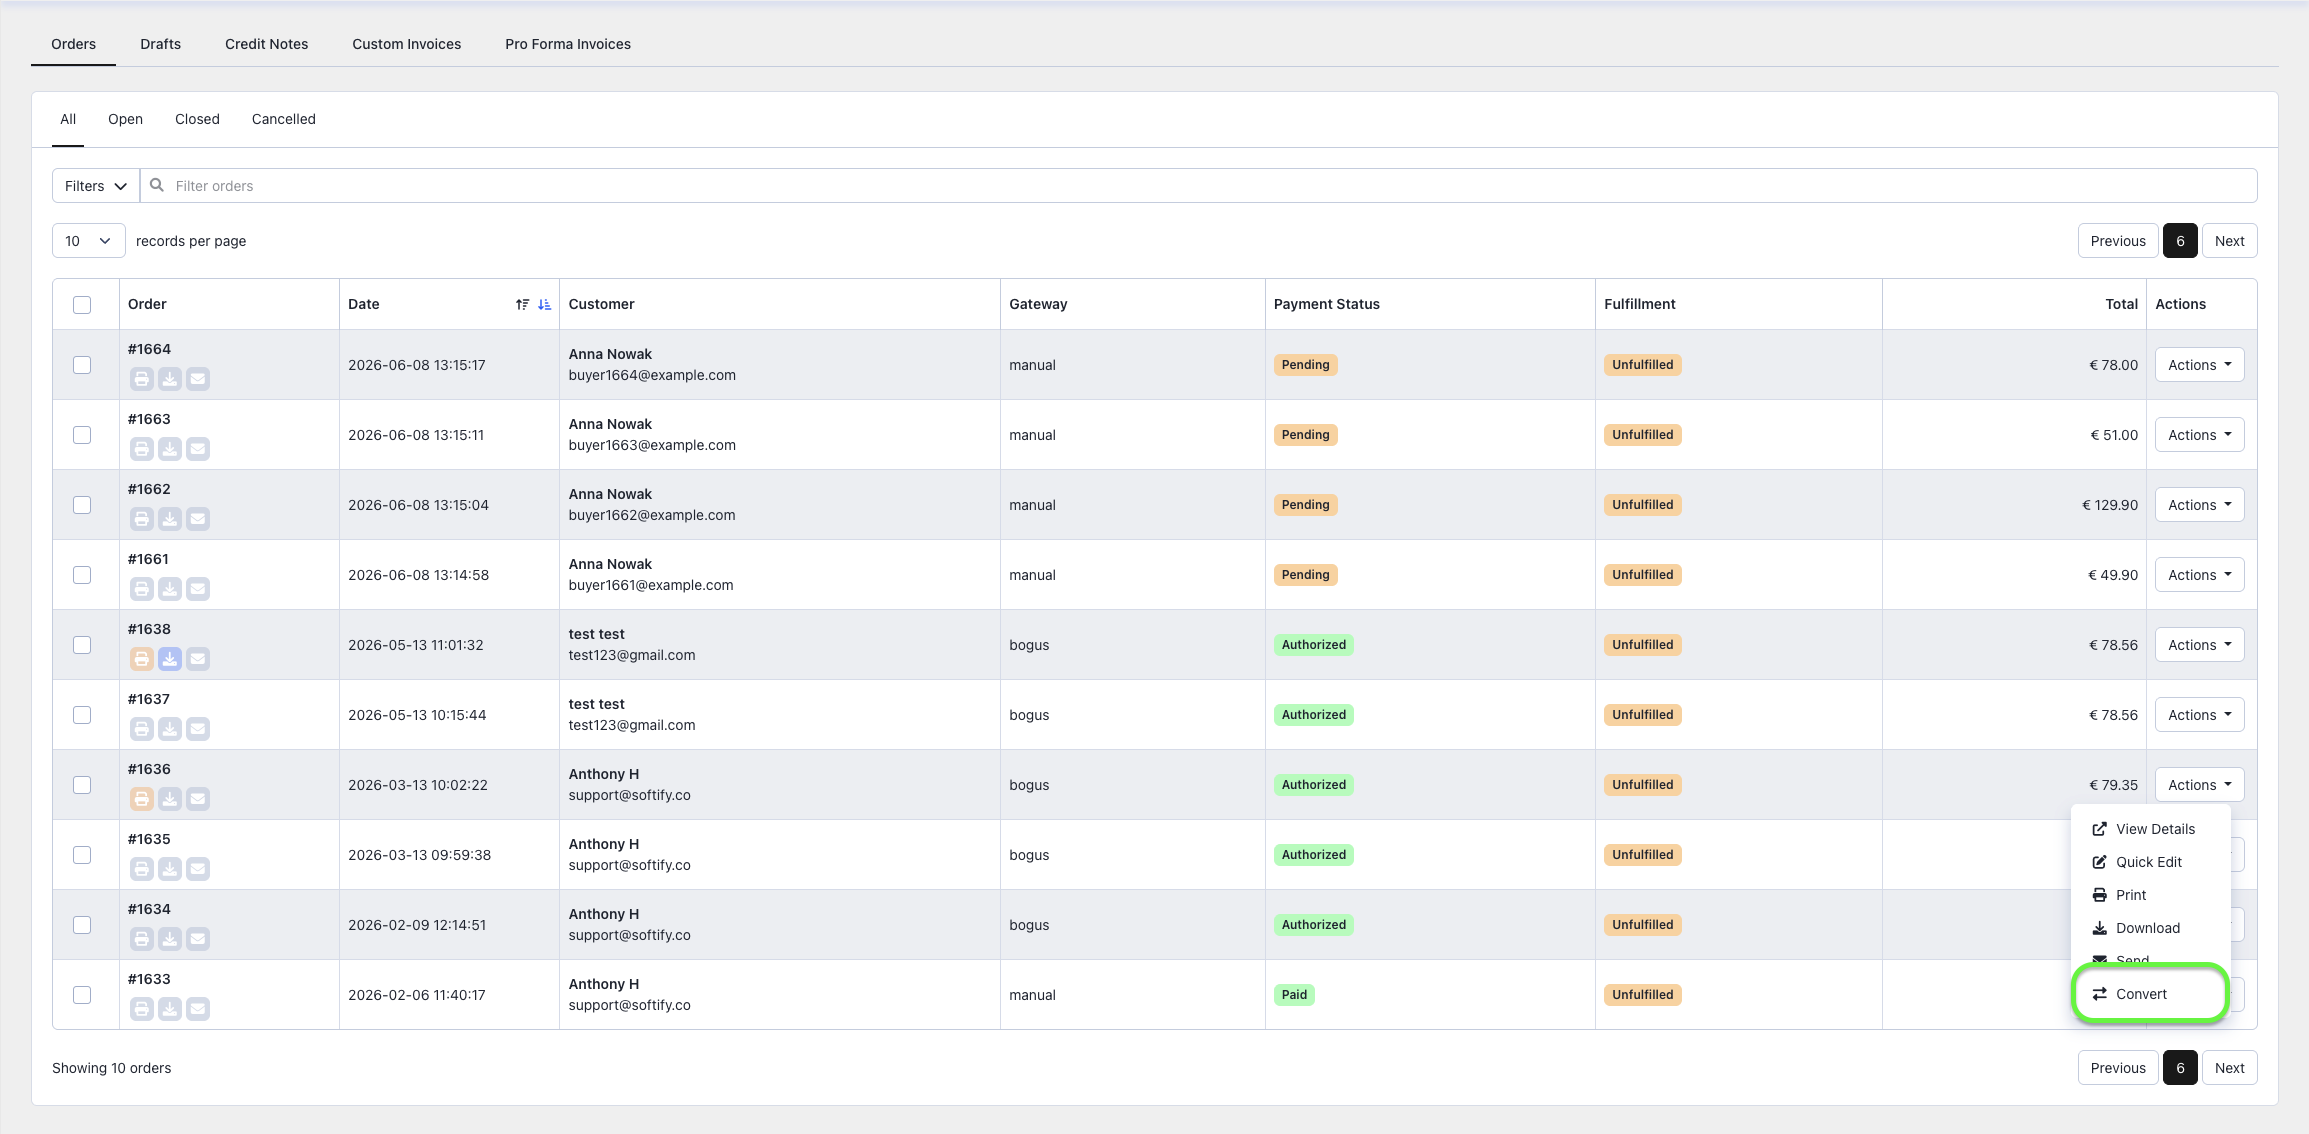
Step 1: Click on the Orders tab.
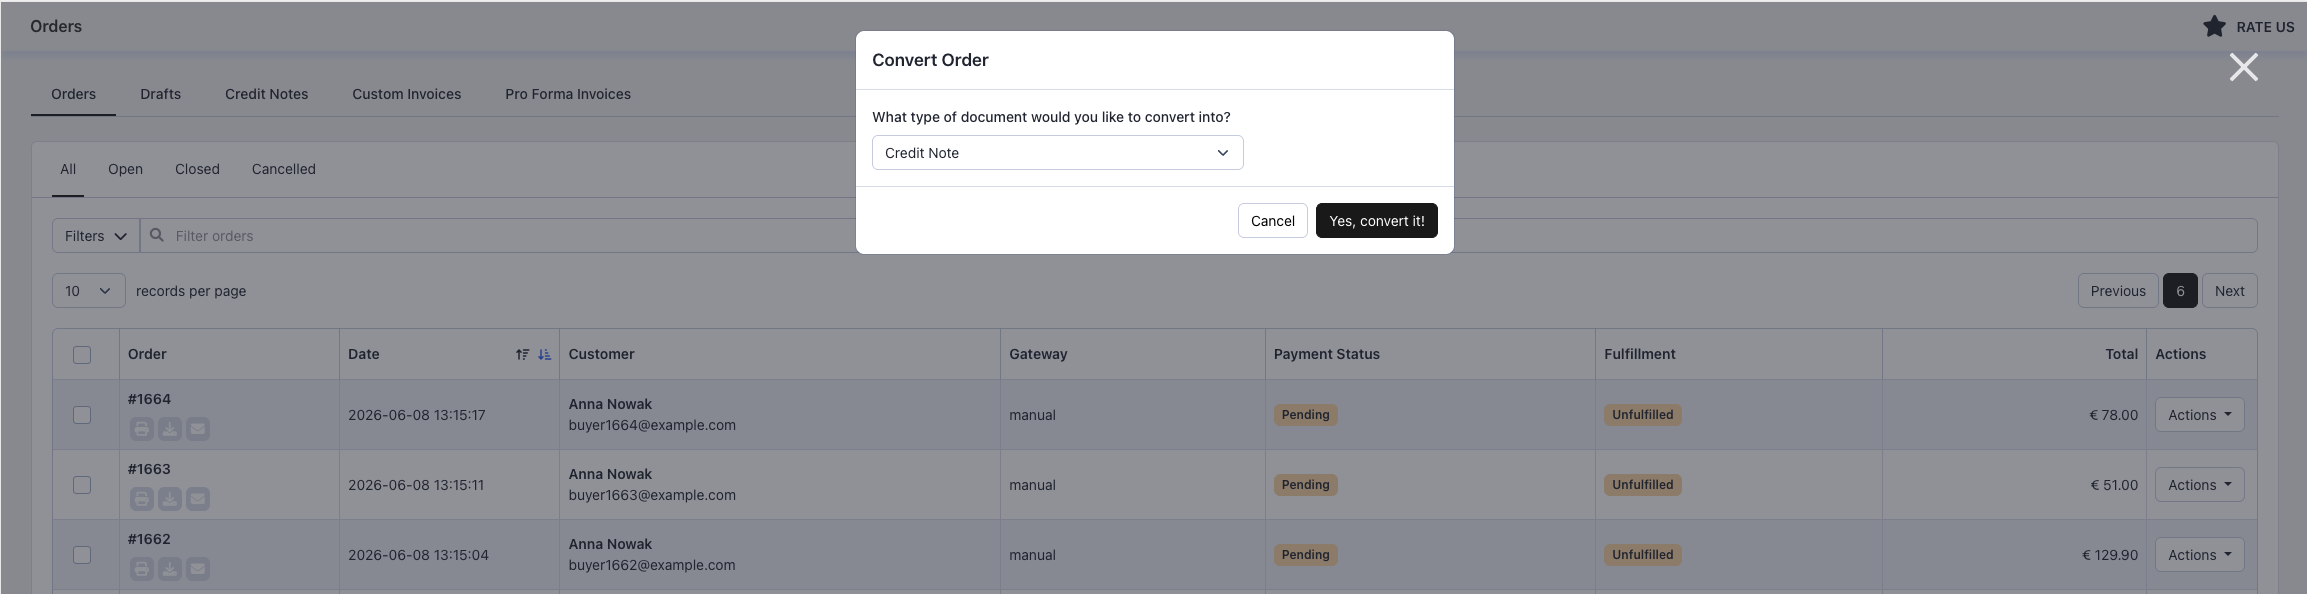
Step 2: Locate the order you want to convert, click the Actions button next to it, and select Convert.
Step 3: Confirm the conversion by clicking Yes, convert it!
Alternatively, you can open the order details page in Easy Order Manager+ and click the Convert button from there.
Need Additional Help?
If you’re still experiencing issues, feel free to reach out to our support team:
- Visit the Help Center section within your Easy Order Manager+ dashboard to create a ticket.
- Or click here to email us directly.
We’re always happy to help!