This guide provides all the essential information for creating shipping labels using Easy Order Manager+.
Note: If you have not yet customized your shipping label template, navigate to the Template Design section and select Shipping Label from the Document Type dropdown menu to configure your preferred design settings.
Step 1: Log in to your Shopify account.
Step 2: Navigate to the Apps section of your Shopify store and select Easy Order Manager+. You will be automatically redirected to the app dashboard.

Step 3: Click on the Orders tab.
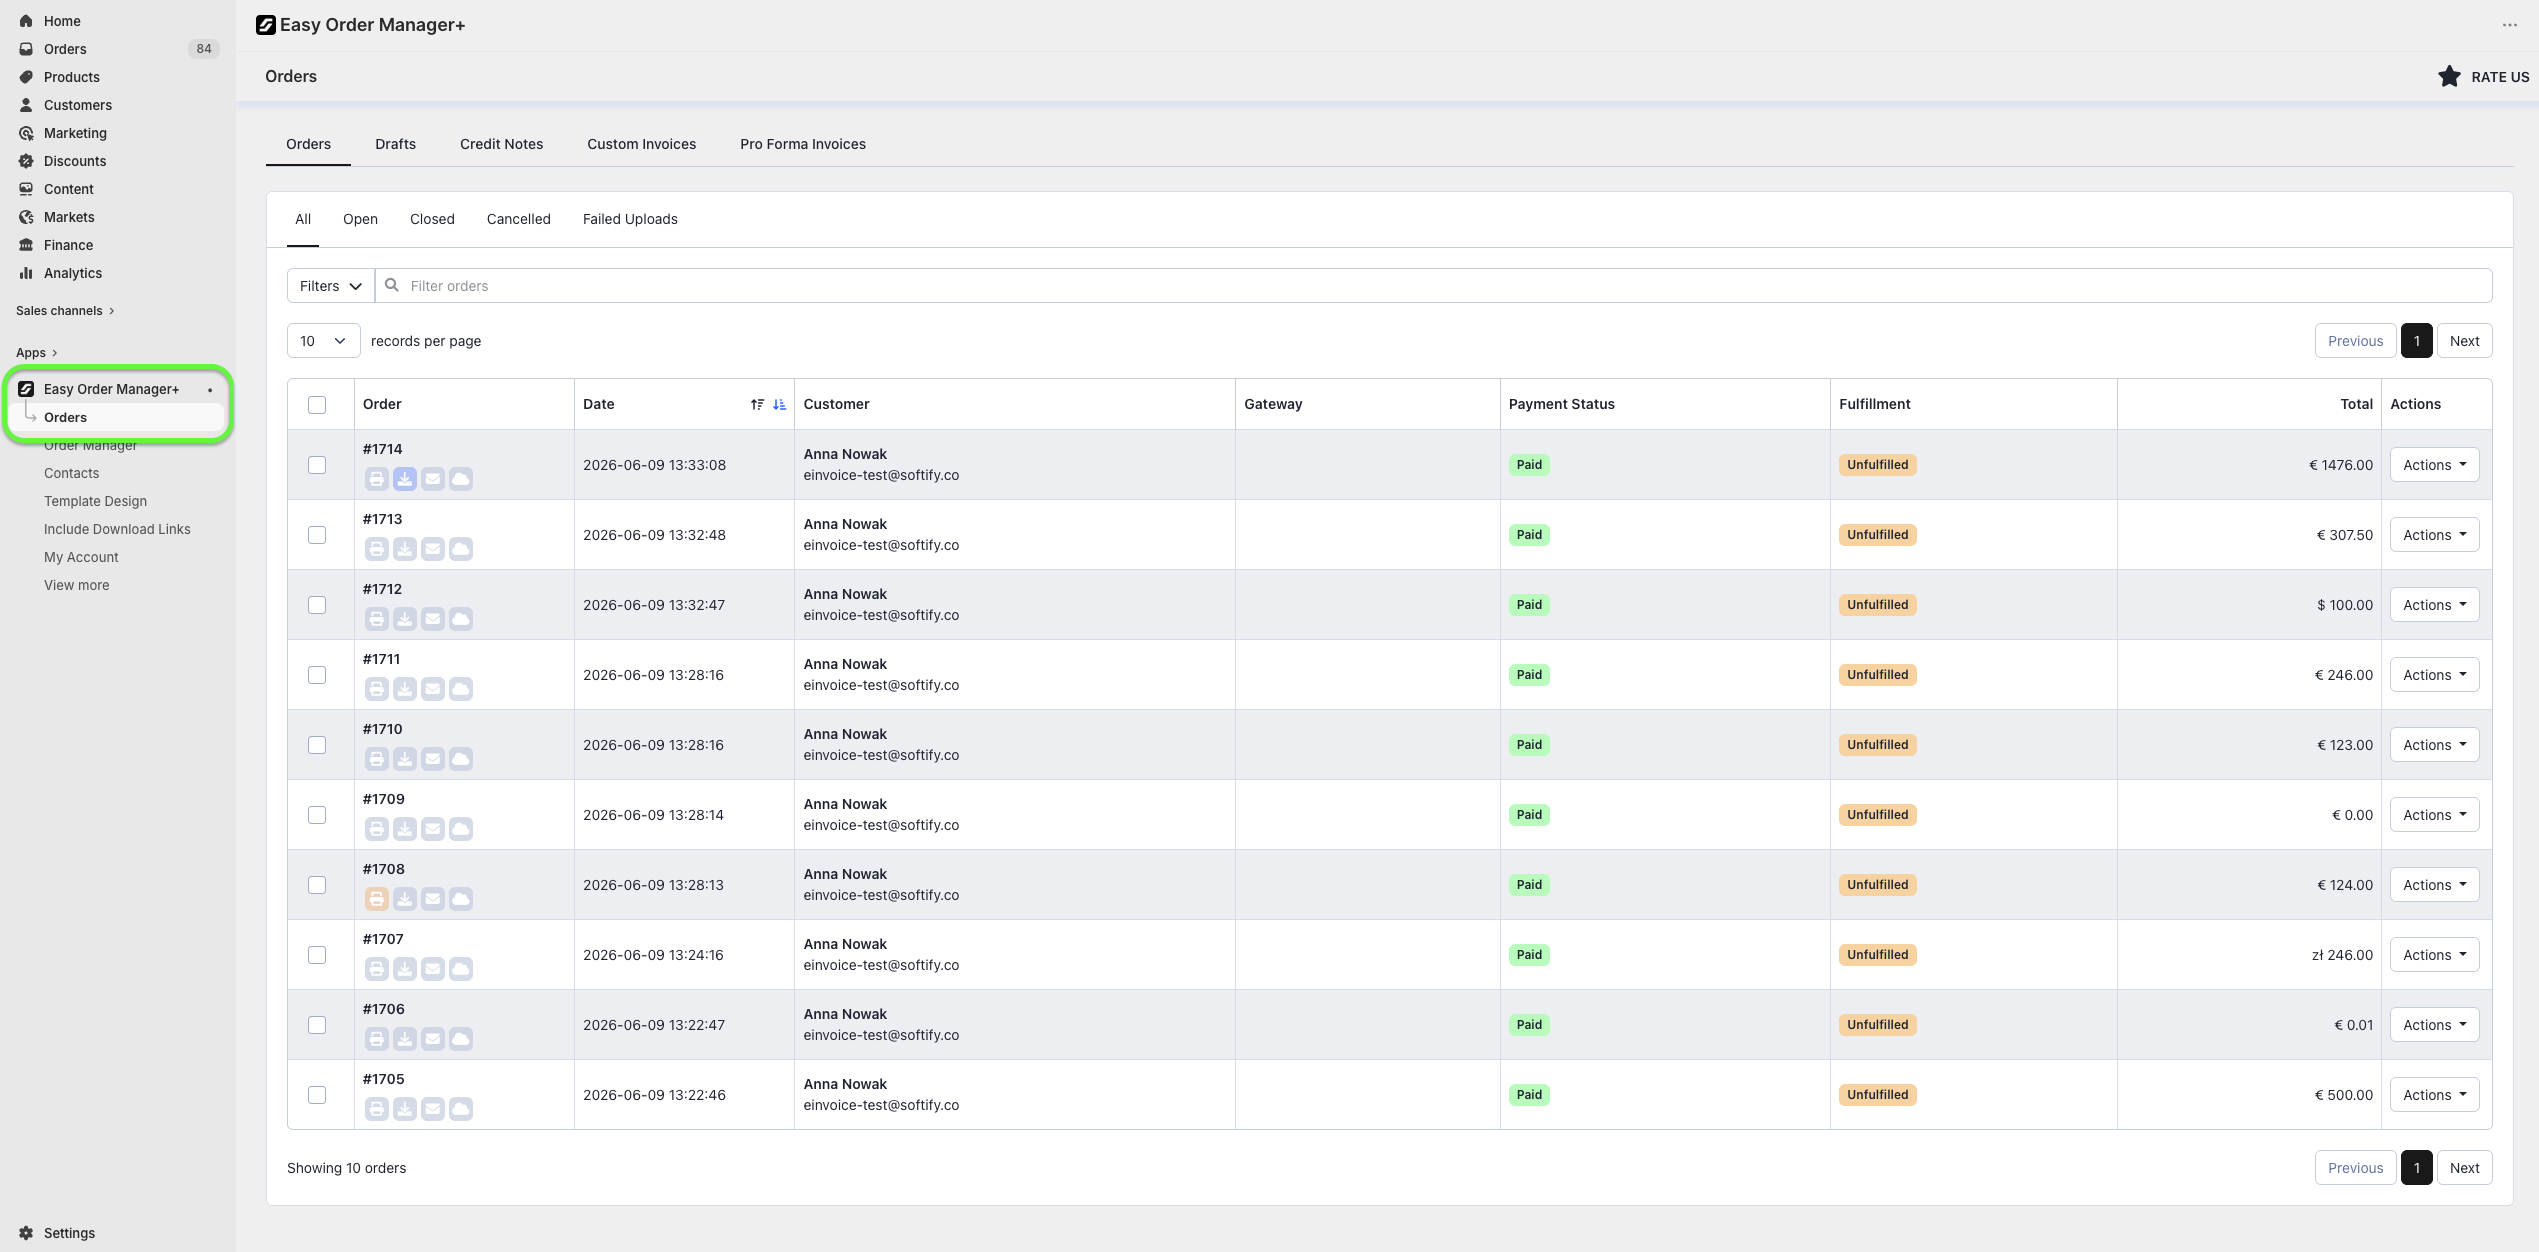
Step 4: Locate the order for which you would like to create a shipping label. Click the Actions button on the right-hand side, then select either Print or Download.

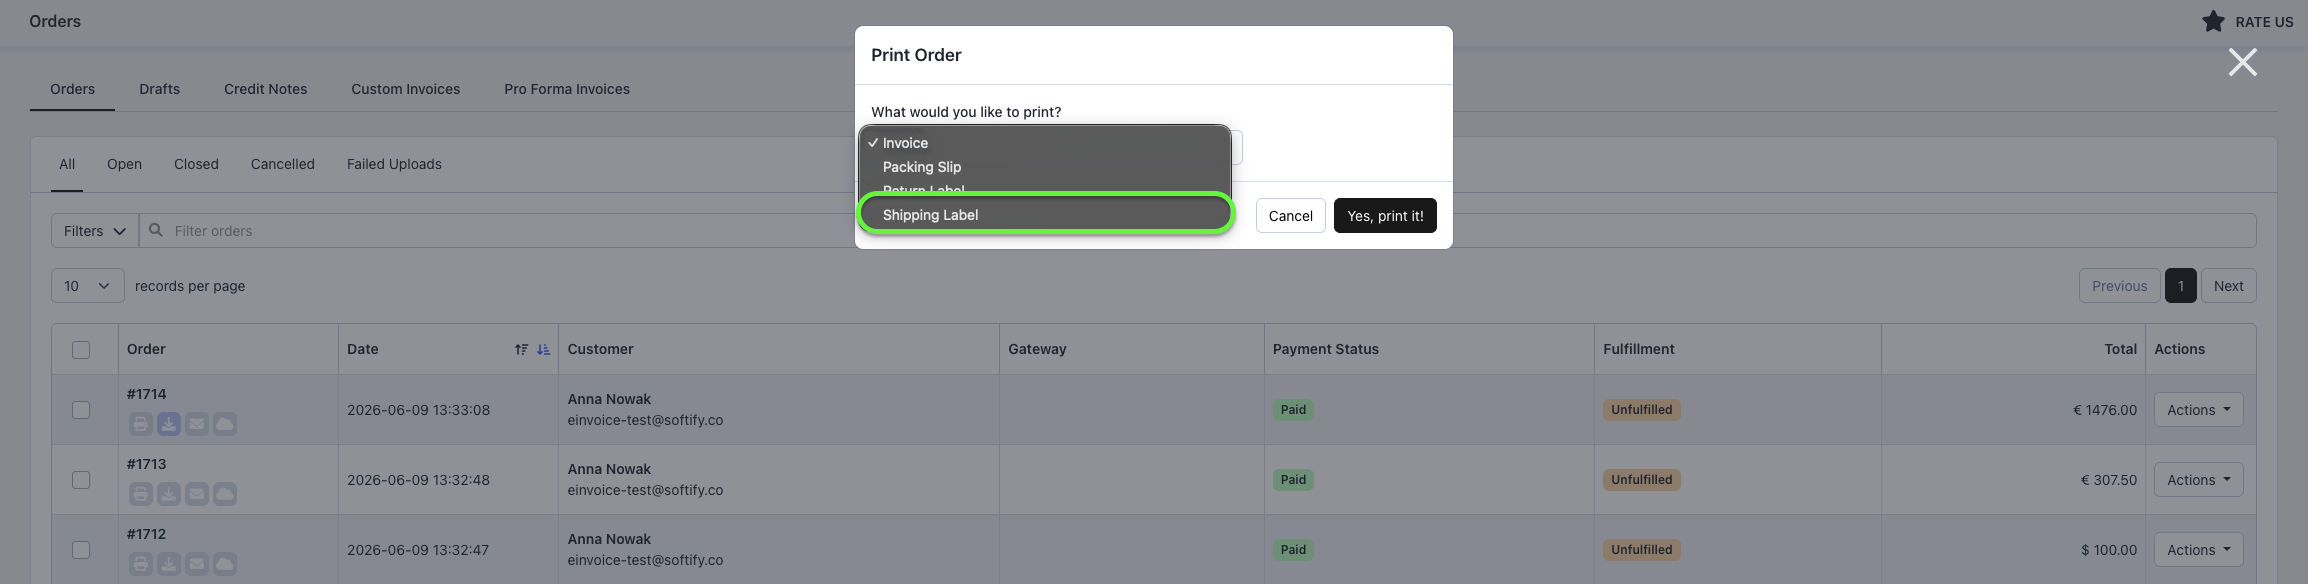
Step 5: From the dropdown menu, select Shipping Label.
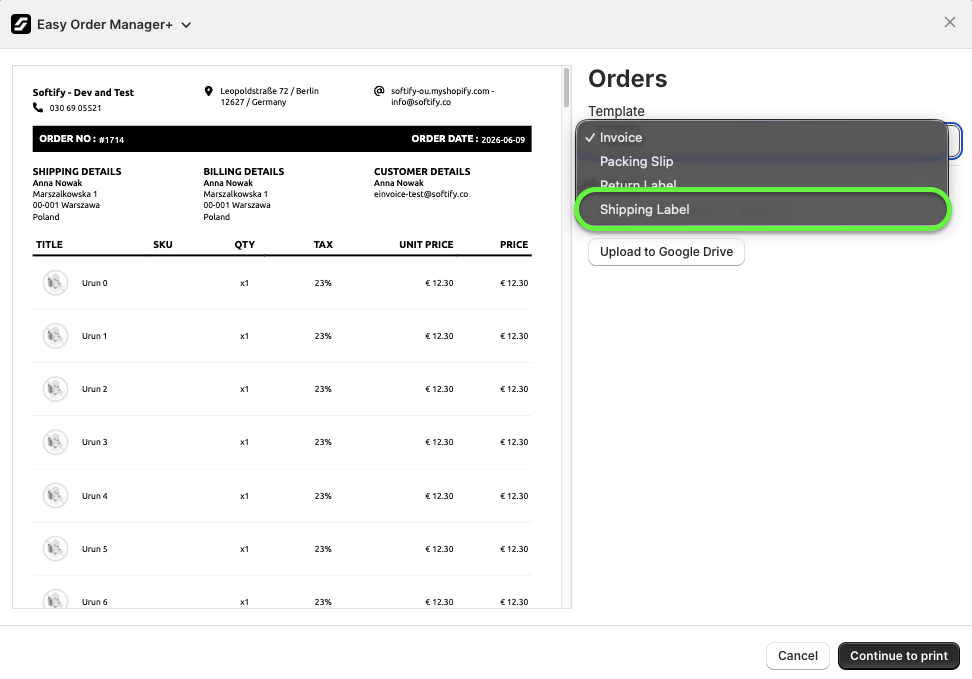
You can also create a shipping label directly from the Order Details page within Easy Order Manager+. Simply open the desired order, click Print or Download, and then select Shipping Label from the dropdown menu.

Additionally, you can create a shipping label directly from Shopify’s Orders page or an order’s Order Details page using Shopify’s native print functionality.
Need Additional Help?
If you need further assistance, please feel free to contact our support team:
- Visit the Help Center section within your Easy Order Manager+ dashboard to create a support ticket.
- Or click here to email us directly.
We’re always happy to help!