This guide provides all the essential information for setting up sequential invoice numbers.
Step 1: Log in to your Shopify account.
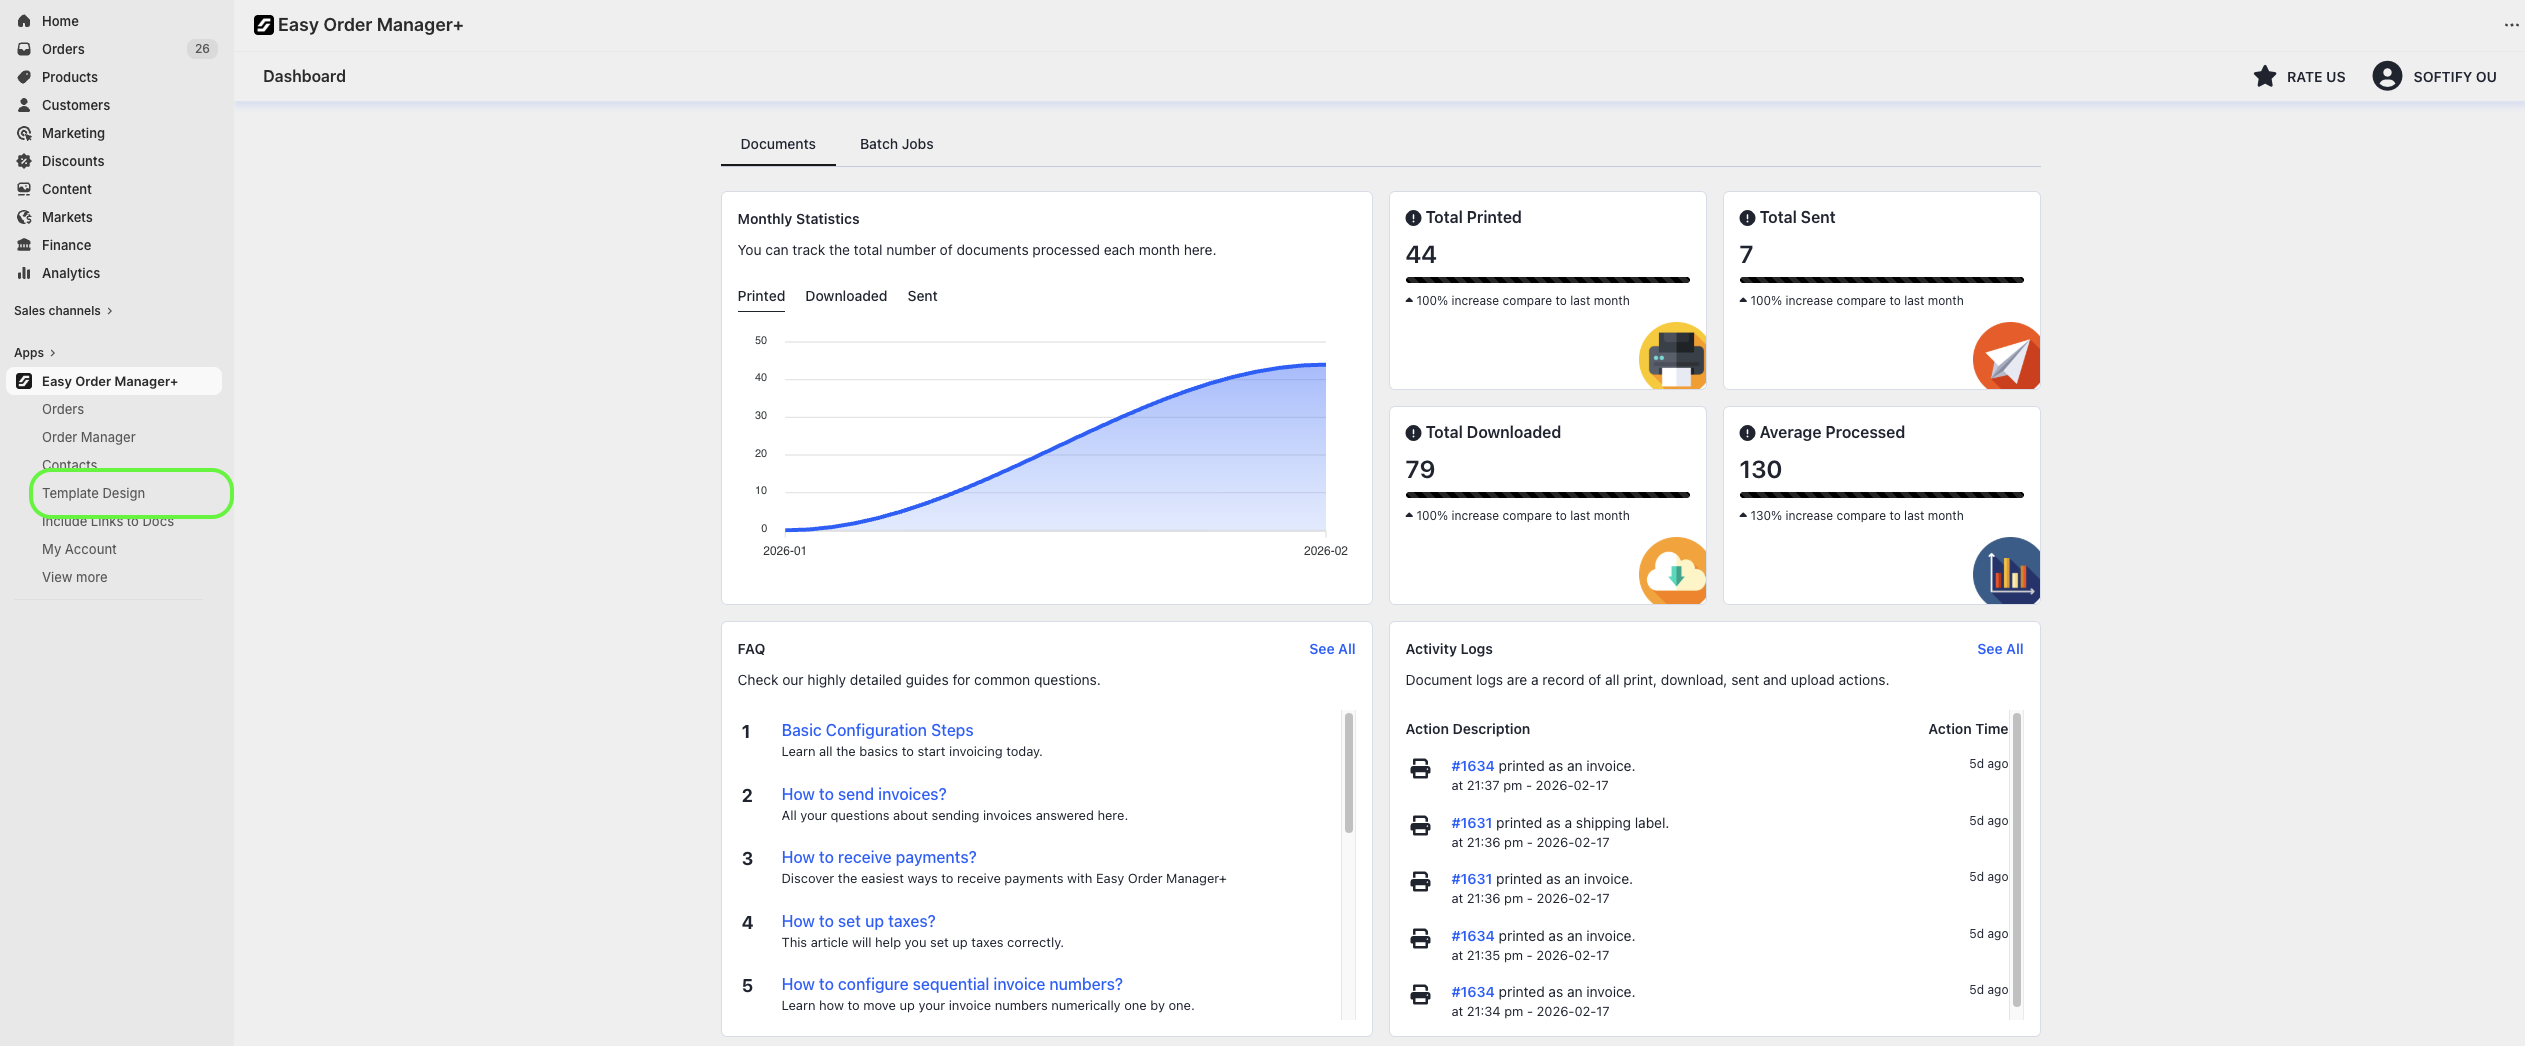
Step 2: Navigate to the Apps section of your Shopify store and select Easy Order Manager+. You will be automatically redirected to the app dashboard.

Step 3: From the dashboard, click on Template Design.
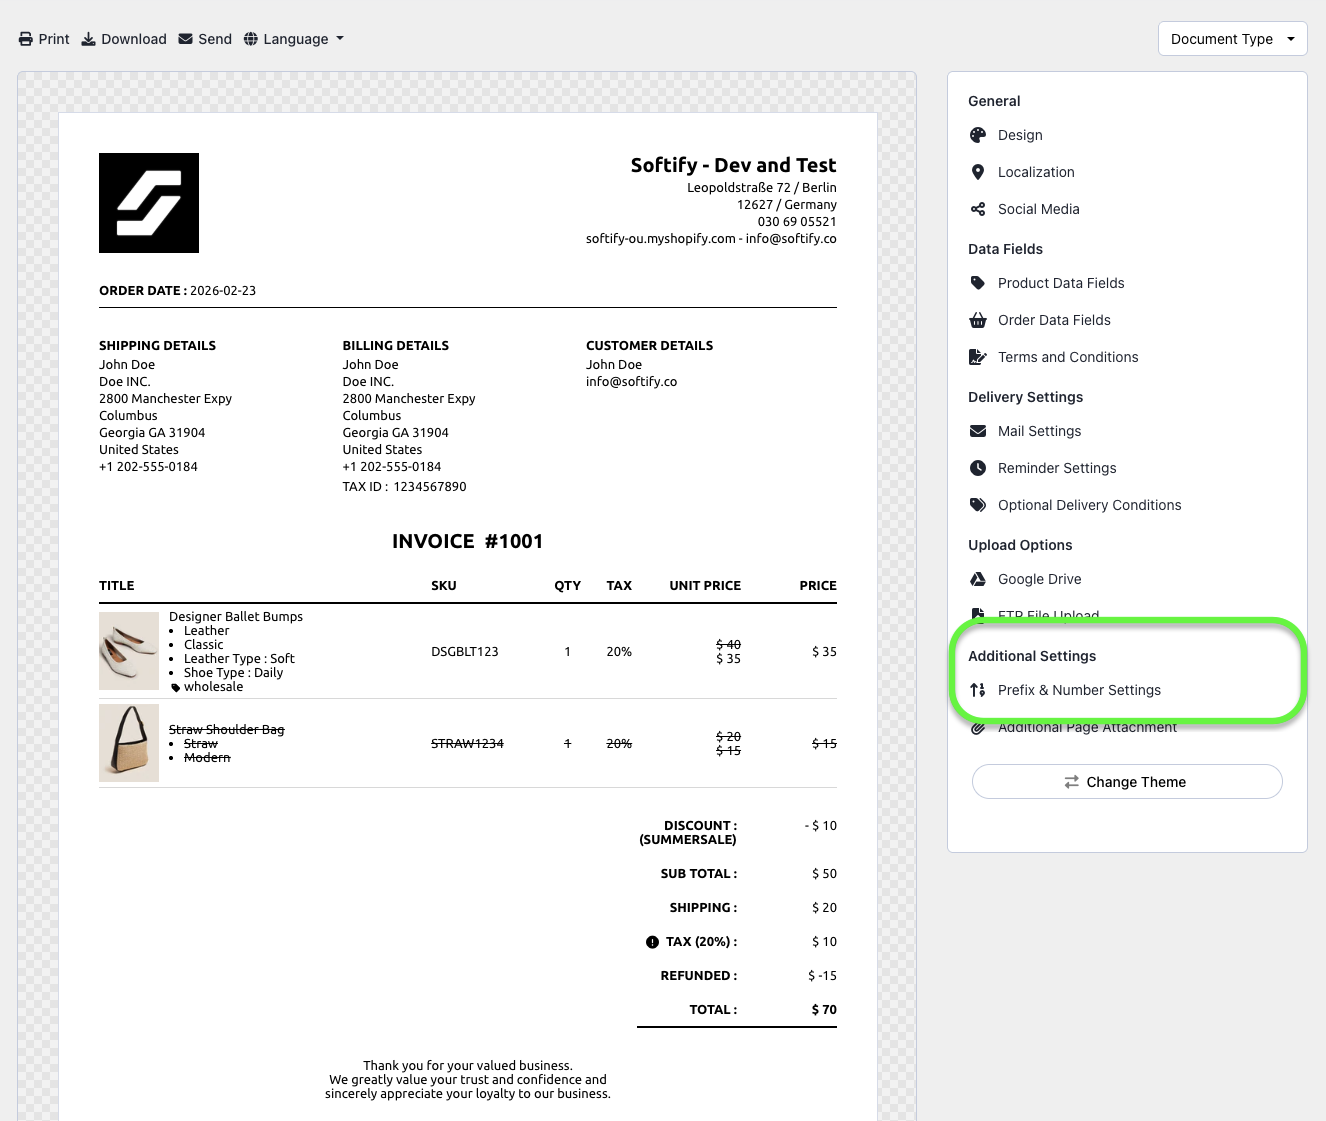
Step 4: Click on the Prefix & Number Settings.
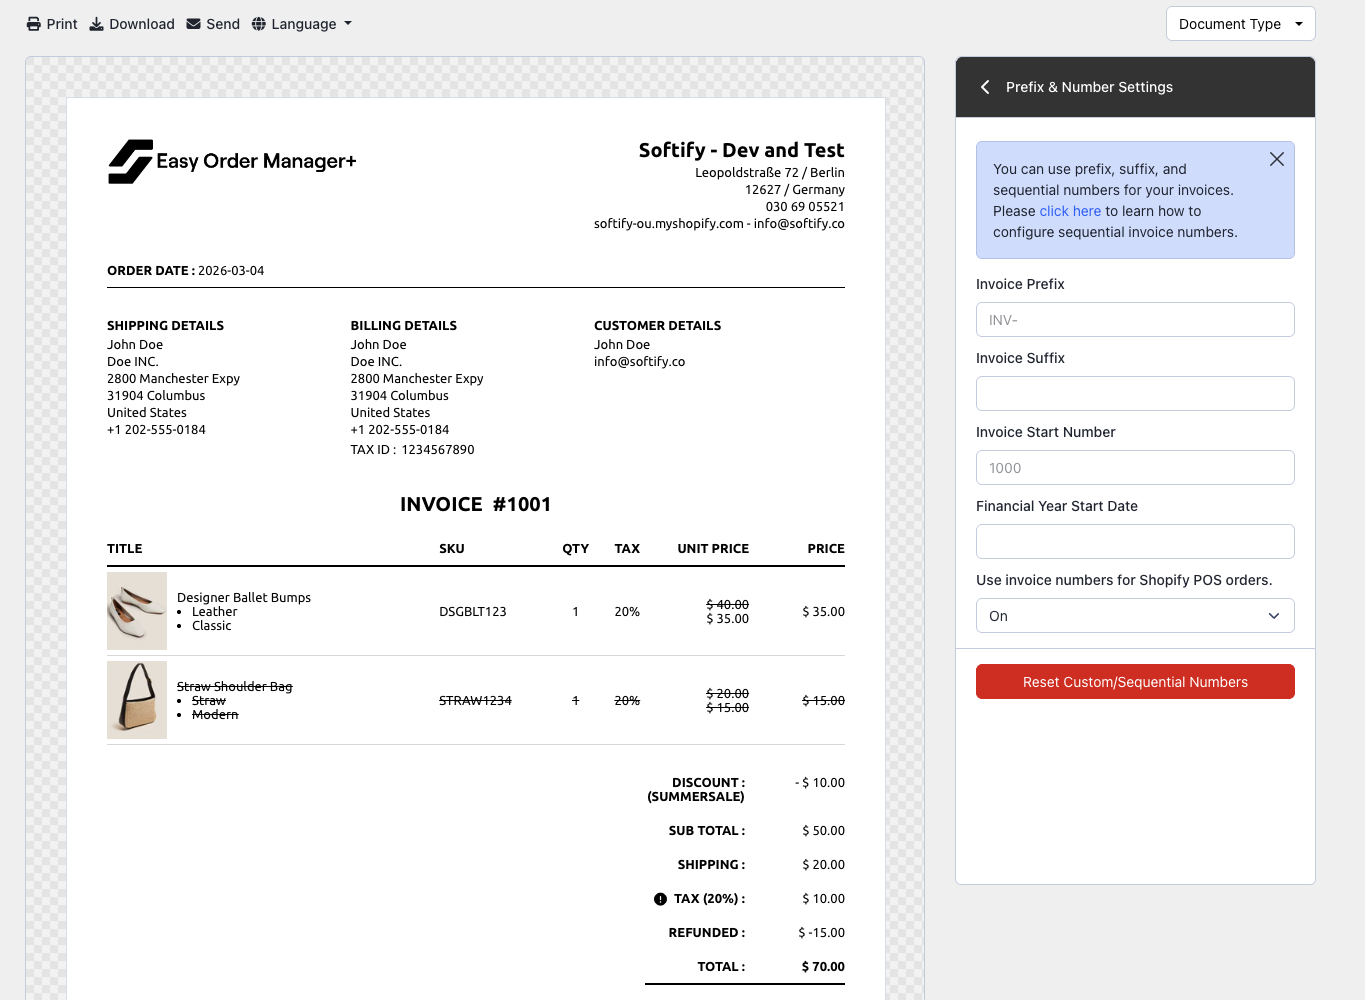
Step 5: You can customize the following options:
- Invoice Prefix: Add any text or numbers you want to appear before the invoice number.
- Invoice Suffix: Add any text or numbers you want to appear after the invoice number.
- Invoice Start Number (required): Set the starting number for your invoices.
Note: If you’d like your numbering to begin with a zero (e.g., 001, 002), add the necessary zeroes to the Invoice Prefix (e.g., use
00as the prefix and start number as1).
Optional Settings:
- Financial Year Start Date: Set a specific start date to begin custom numbering.
Example: If the start date is01.01.2026, any invoice created before that date will not use a custom number. - Shopify POS Invoices: To include POS orders in your invoice numbering, toggle Use invoice numbers for Shopify POS orders to On.
- Multi-country Support: If you sell to multiple countries, Easy Order Manager+ supports country-specific sequential numbering.
- Reset Numbering: If needed, you can reset your numbering by clicking Reset Custom/Sequential Numbers.
Important: If you operate multiple Shopify stores and wish to use a shared custom numbering system, please create a support ticket or click here to email us for activation support.
Step 6: Once you’ve made your selection, click the Save button at the top center of the screen to apply your changes.
![]()
Verify Your Setup
After saving your settings:
- Process (Print, download, or send) an order to assign the custom invoice number.
- The custom number appears in the Order Number field on your invoice template, which can be renamed (e.g., change “Order #” to “Invoice #”).
- All text fields in the template are inline-editable — click directly on any text to update it.
For a detailed walkthrough, check out our step-by-step video tutorial on configuring sequential invoice numbers.
Need Additional Help?
If you’re still experiencing issues, feel free to reach out to our support team:
- Visit the Help Center section within your Easy Order Manager+ dashboard to create a ticket
- Or click here to email us directly.
We’re always happy to help!