This guide provides all the essential information on sending invoices and receiving payments using Shopify Draft Orders.
If you haven’t yet customized your Draft Template, navigate to the Template Design section in Easy Order Manager+. Learn more about customizing templates.
Once sent, your customer will receive a draft invoice that includes a secure payment link redirecting them to your store’s checkout page.
You can send draft invoices from both your Shopify Admin and Easy Order Manager+. Follow the steps below for each method:
Sending Drafts from Shopify Admin
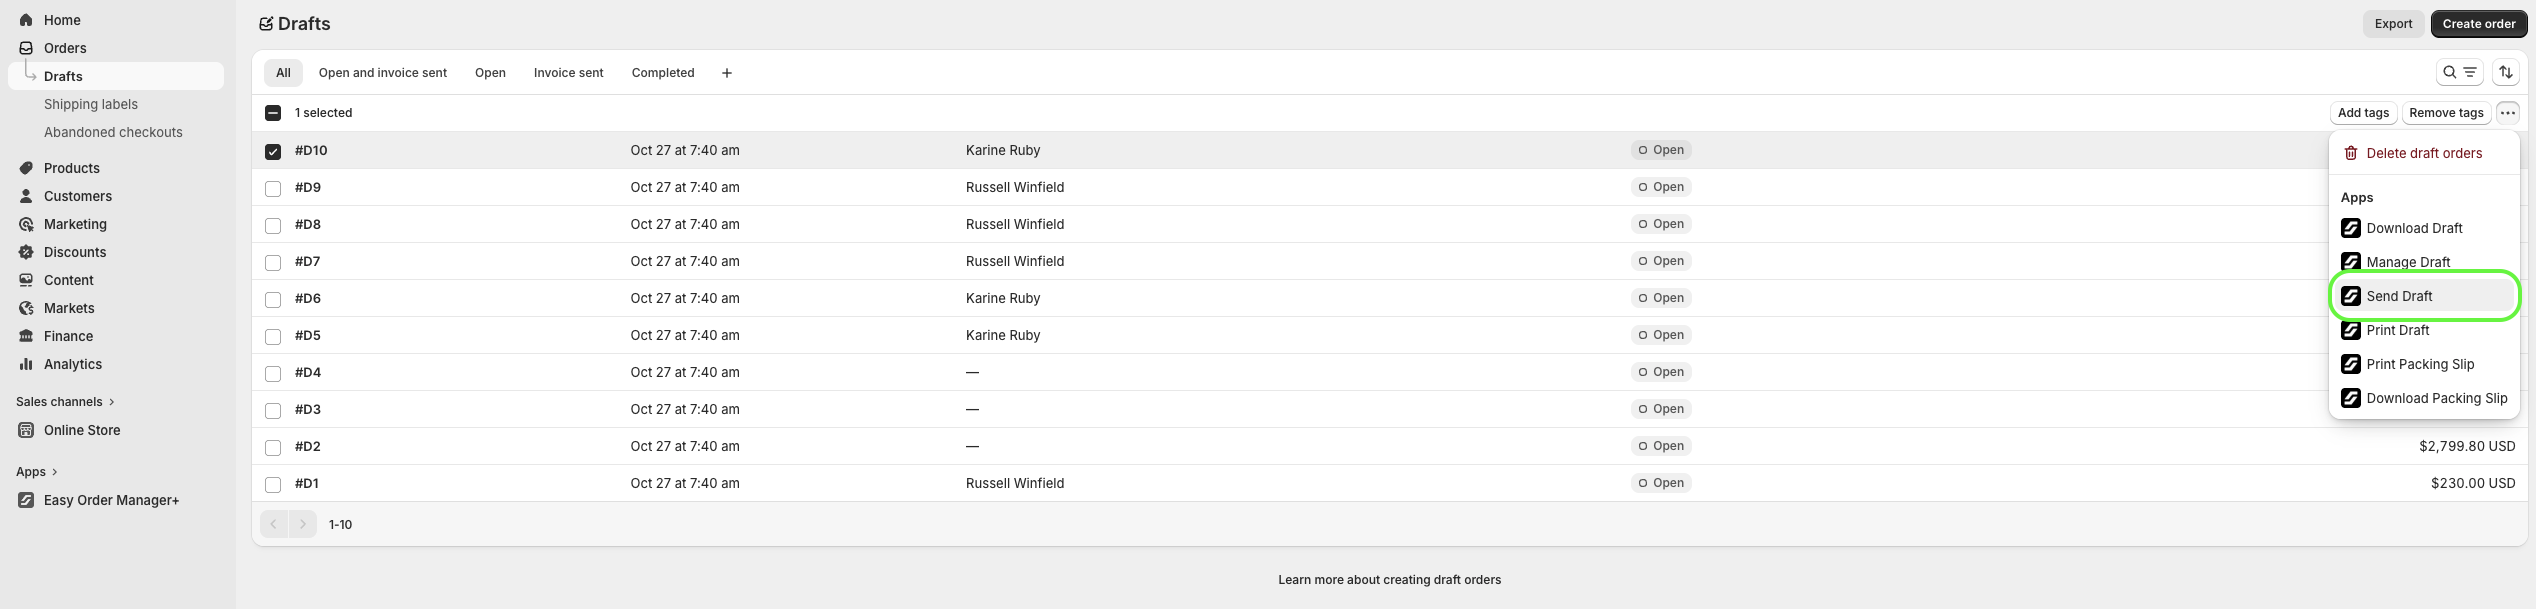
Step A: From your Shopify Admin, go to the Draft Orders section.

Step B: Select the draft order you want to send. Click the More Actions (⋯) dropdown, then select Send Draft.
Important: Ensure Shopify Payments is fully set up before sending draft invoices.
For setup help, visit: Shopify Payments Help
Alternatively, you can send the invoice from the draft order’s detail page. Click on the draft order, then click More Actions, and select Send Draft.

Sending Drafts from Easy Order Manager+
Step 1: Log in to your Shopify account.
Step 2: Navigate to the Apps section of your Shopify store and select Easy Order Manager+. You will be automatically redirected to the app dashboard.

Step 3: Click on the Orders and then click on the Drafts tab.

Step 4: Find the draft order you want to send, click the Actions button on the right, and select Send.

Alternatively, you can send the draft invoice from the draft order’s detail page. Click on the order, then click the Send button.

Need Additional Help?
If you’re still experiencing issues, feel free to reach out to our support team:
- Visit the Help Center section within your Easy Order Manager+ dashboard to create a ticket
- Or click here to email us directly.
We’re always happy to help!