Easy Order Manager+ allows you to define when invoices are automatically sent by configuring two separate settings:
- Automatic Delivery Options
- Optional Delivery Conditions
How to Set the Automatic Delivery Options
Step 1: Log in to your Shopify account.
Step 2: Navigate to the Apps section of your Shopify store and select Easy Order Manager+. You will be automatically redirected to the app dashboard.

Step 3: From the dashboard, click on Template Design.
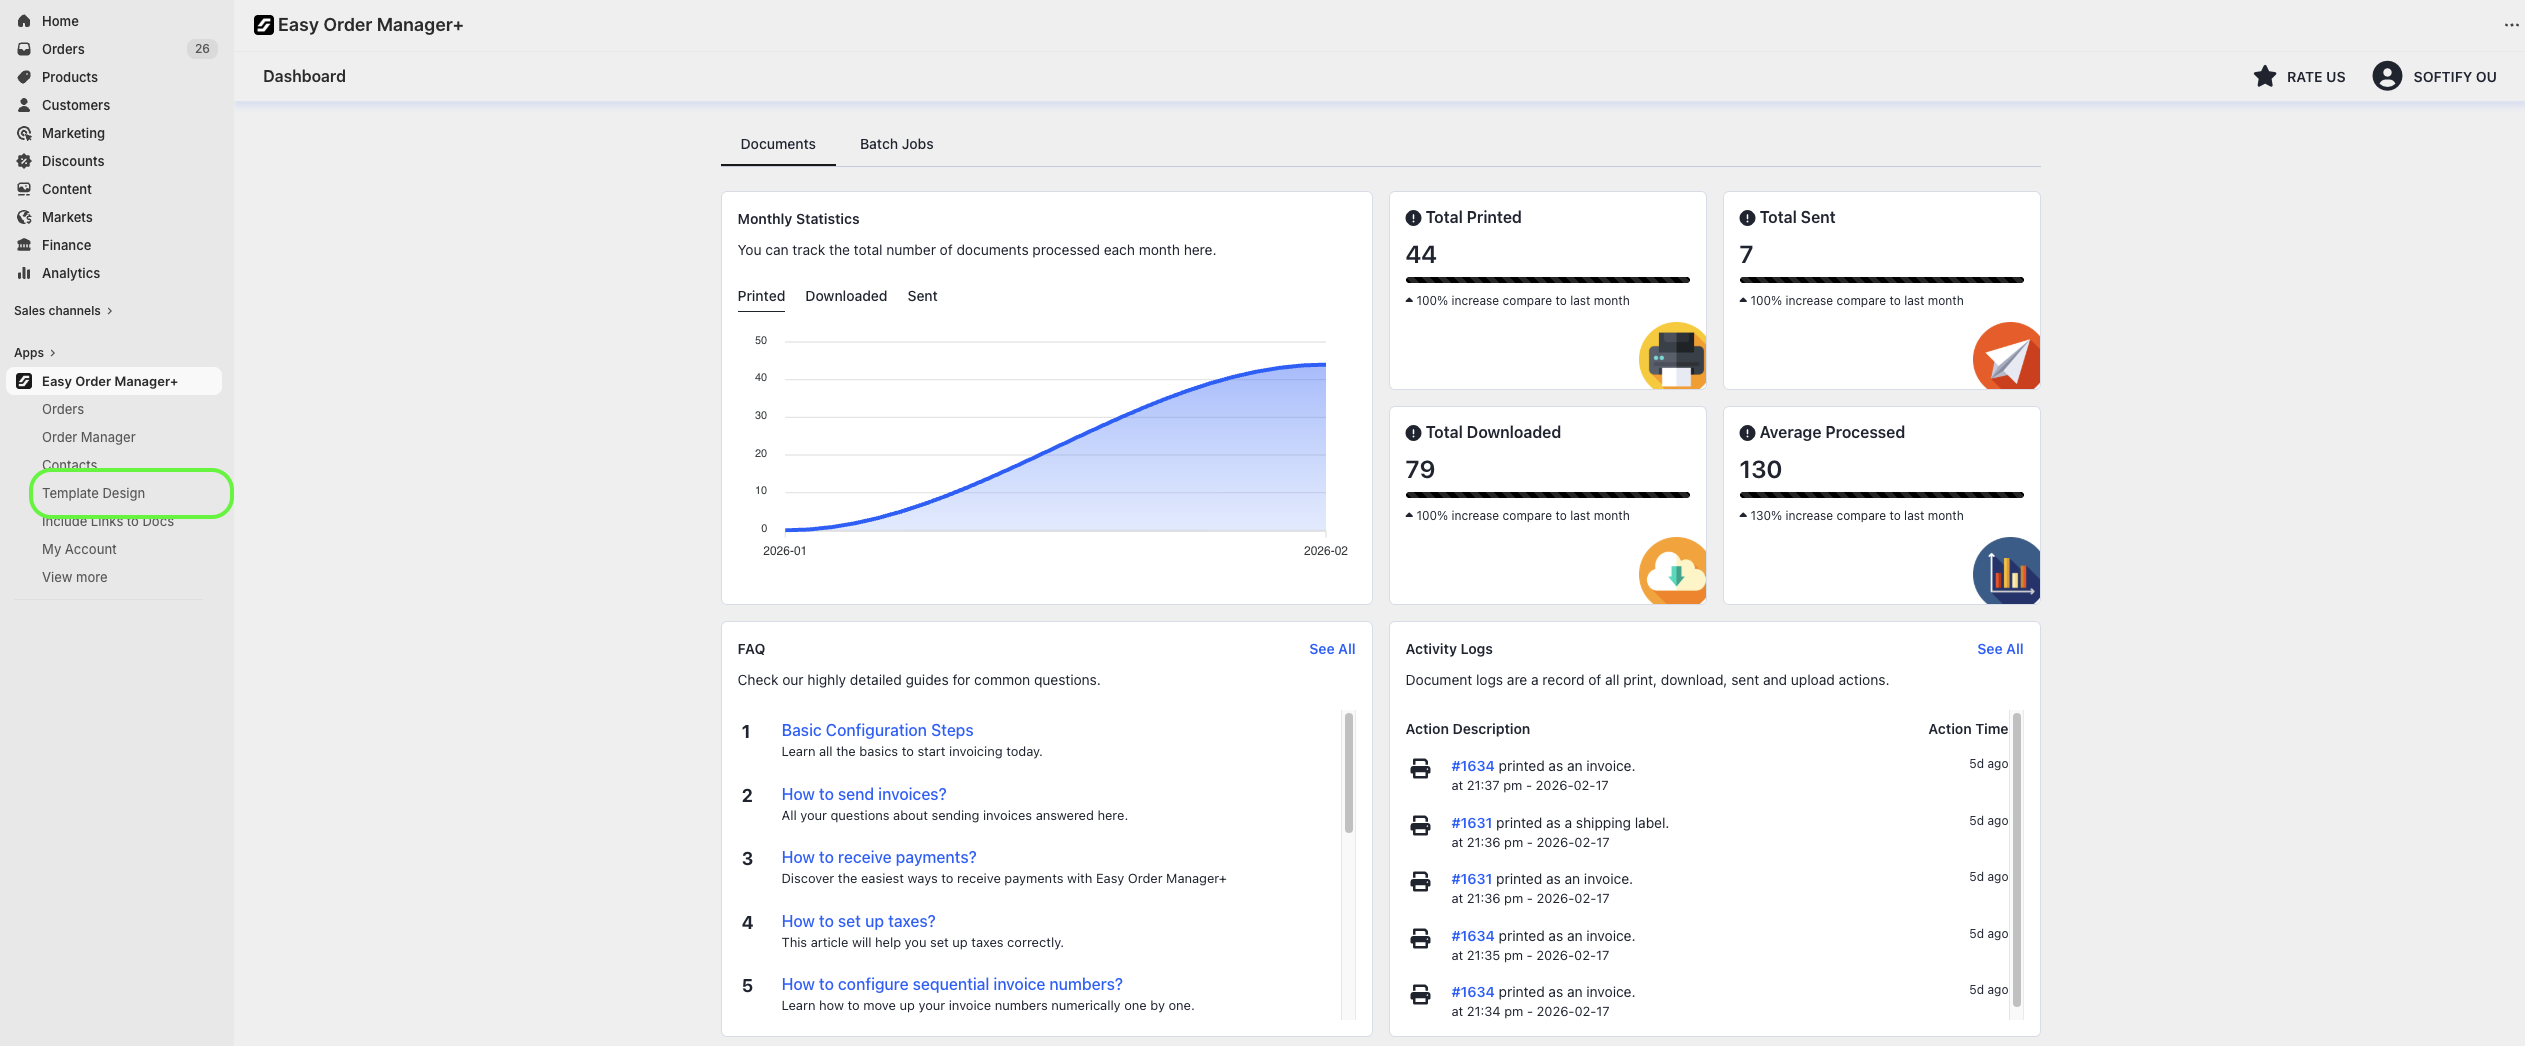
Step 4: Navigate to the Mail Settings section.
Step 5: Under the Delivery & Sender section, open the Automatic Delivery Options dropdown and choose your preferred method for sending invoices. The available options are:
- Manual: Invoices are sent manually. This is the default setting.
- Auto On Order: Invoices are sent automatically when a customer places an order.
- Auto On Payment: Invoices are sent automatically when a payment is completed.
- Auto On Fulfillment: Invoices are sent automatically once the order is fulfilled.
- Auto Only For Copy Address: Invoices are sent only to the BCC email address when an order is placed.

Step 6: Once you’ve made your selection, click the Save button at the top center of the screen to apply your changes.
![]()
How to Set the Optional Delivery Conditions
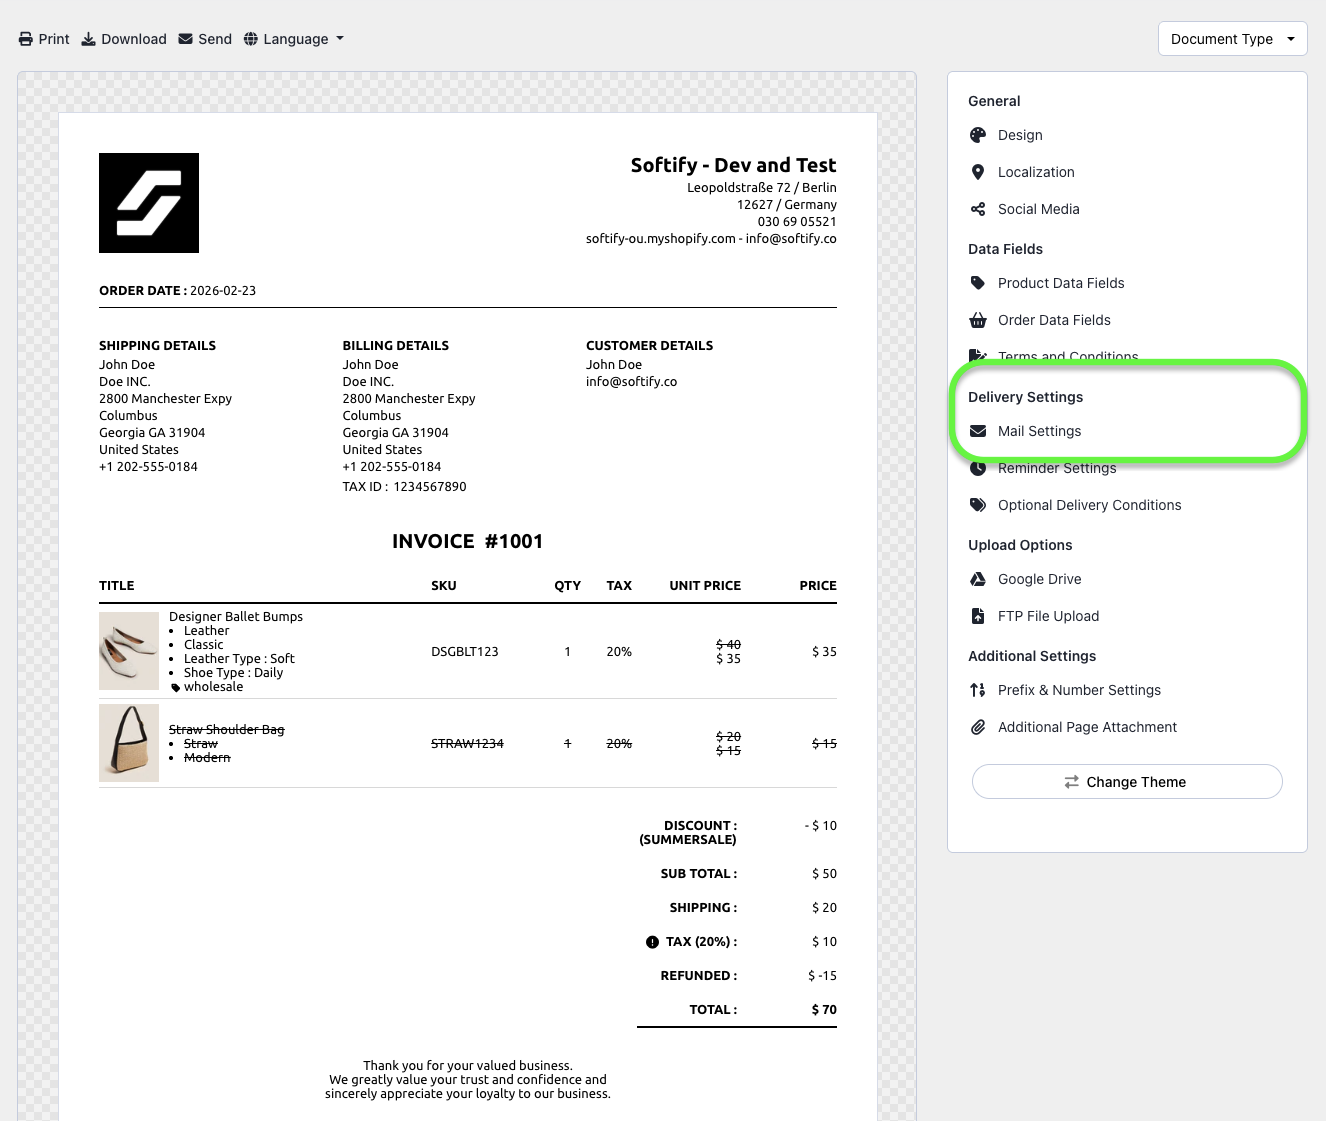
Step 1: From the dashboard, click on Template Design.
Step 2: Under Delivery Settings, click on Optional Delivery Conditions.

Step 3: You can define any of the following four optional conditions to control when invoices are automatically sent:
- Send invoices automatically to orders with these tags: Invoices will be sent only if the order includes any of the tags specified in this field.
- Do not send invoices automatically to orders with these tags: Invoices will not be sent if the order includes any of the tags specified in this field.
- Send invoices automatically to orders with these payment gateways: Invoices will be sent only for orders paid through the specified gateways.
- Do not send invoices automatically to orders with these payment gateways: Invoices will not be sent for orders paid through the specified gateways.

Step 4: Once you’ve made your selection, click the Save button at the top center of the screen to apply your changes.
![]()
Important: Ensure that the exact order tag or payment gateway name is used in each field to enable these conditions correctly.
How to Find the Exact Payment Gateway Name
Step 1: Go to the Orders section in your Shopify admin.

Step 2: Select the order you’d like to inspect.
Step 3: In the browser’s address bar, add .json to the end of the URL and press Enter.

Step 4: Use Ctrl+F (Windows) or Cmd+F (Mac) and search for “gateway” to locate the exact name.
Step 5: Copy and paste the gateway name (without quotes) into the appropriate field in Easy Order Manager+.

Need Additional Help?
If you’re still experiencing issues, feel free to reach out to our support team:
- Visit the Help Center section within your Easy Order Manager+ dashboard to create a ticket.
- Or click here to email us directly.
We’re always happy to help!