This guide provides all the essential information on setting an issue date for invoices in Easy Order Manager+.
The issue date must be configured during order creation in your Shopify admin.
Set the Issue Date in Your Shopify Store Admin
Step A: Log in to your Shopify account.
Step B: Click on the Orders section, then click Create Order.
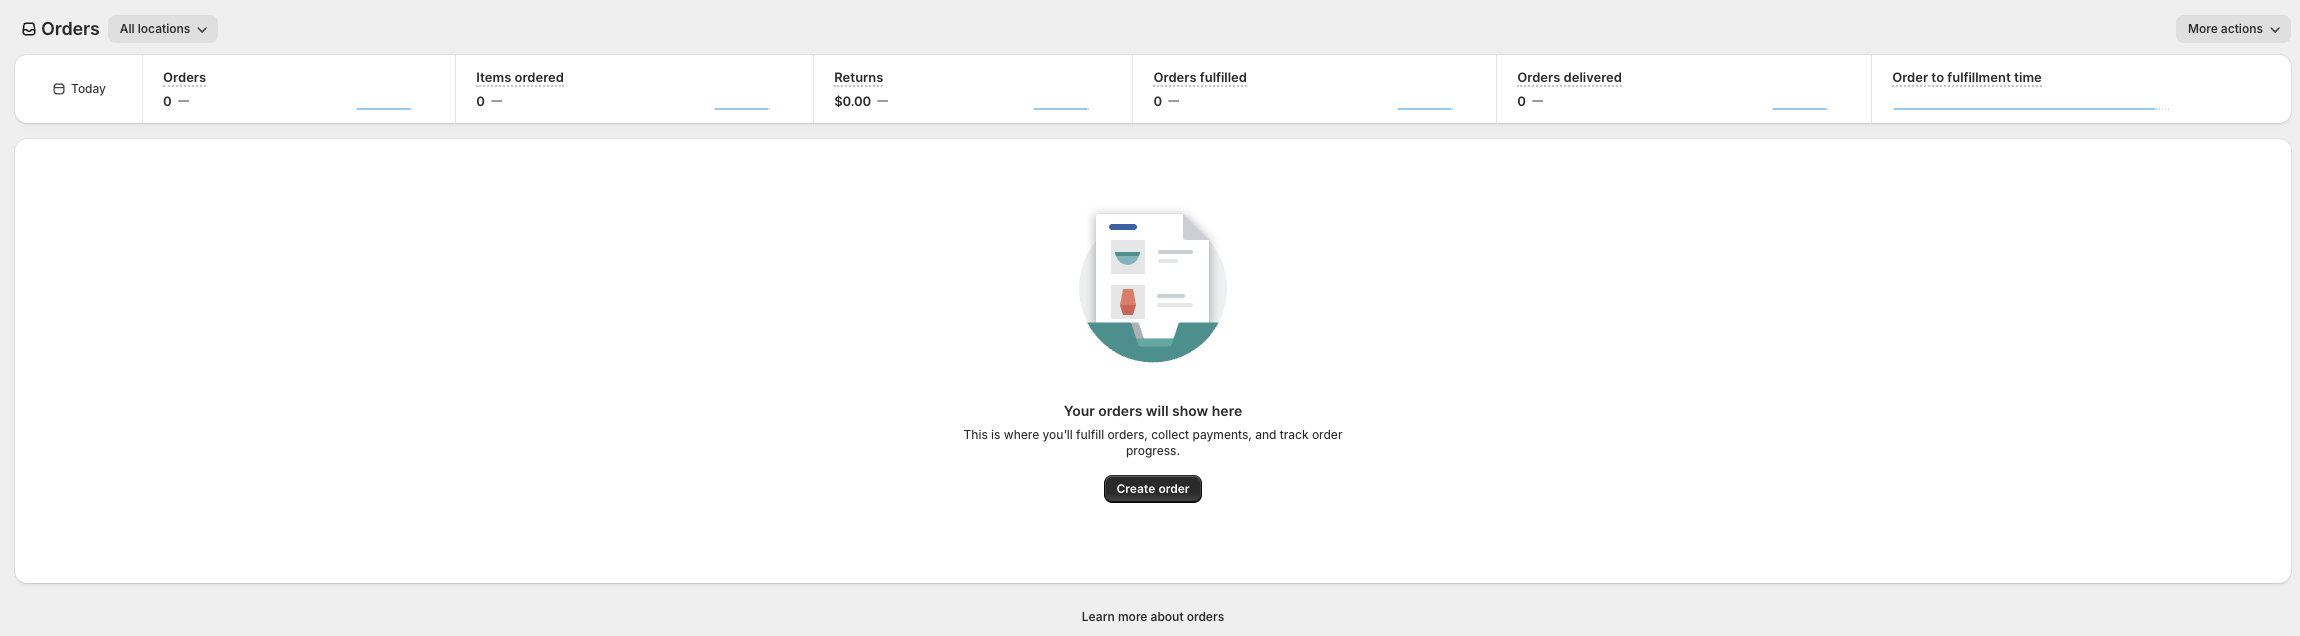
Step C: After entering the necessary order details, click Payment due later, then select one of the available Payment terms options.
You can set or edit the issue date at this stage.

Display Issue Date on Your Invoice in Easy Order Manager+
Once the issue date has been set, follow the steps below to ensure it is shown on the invoice:
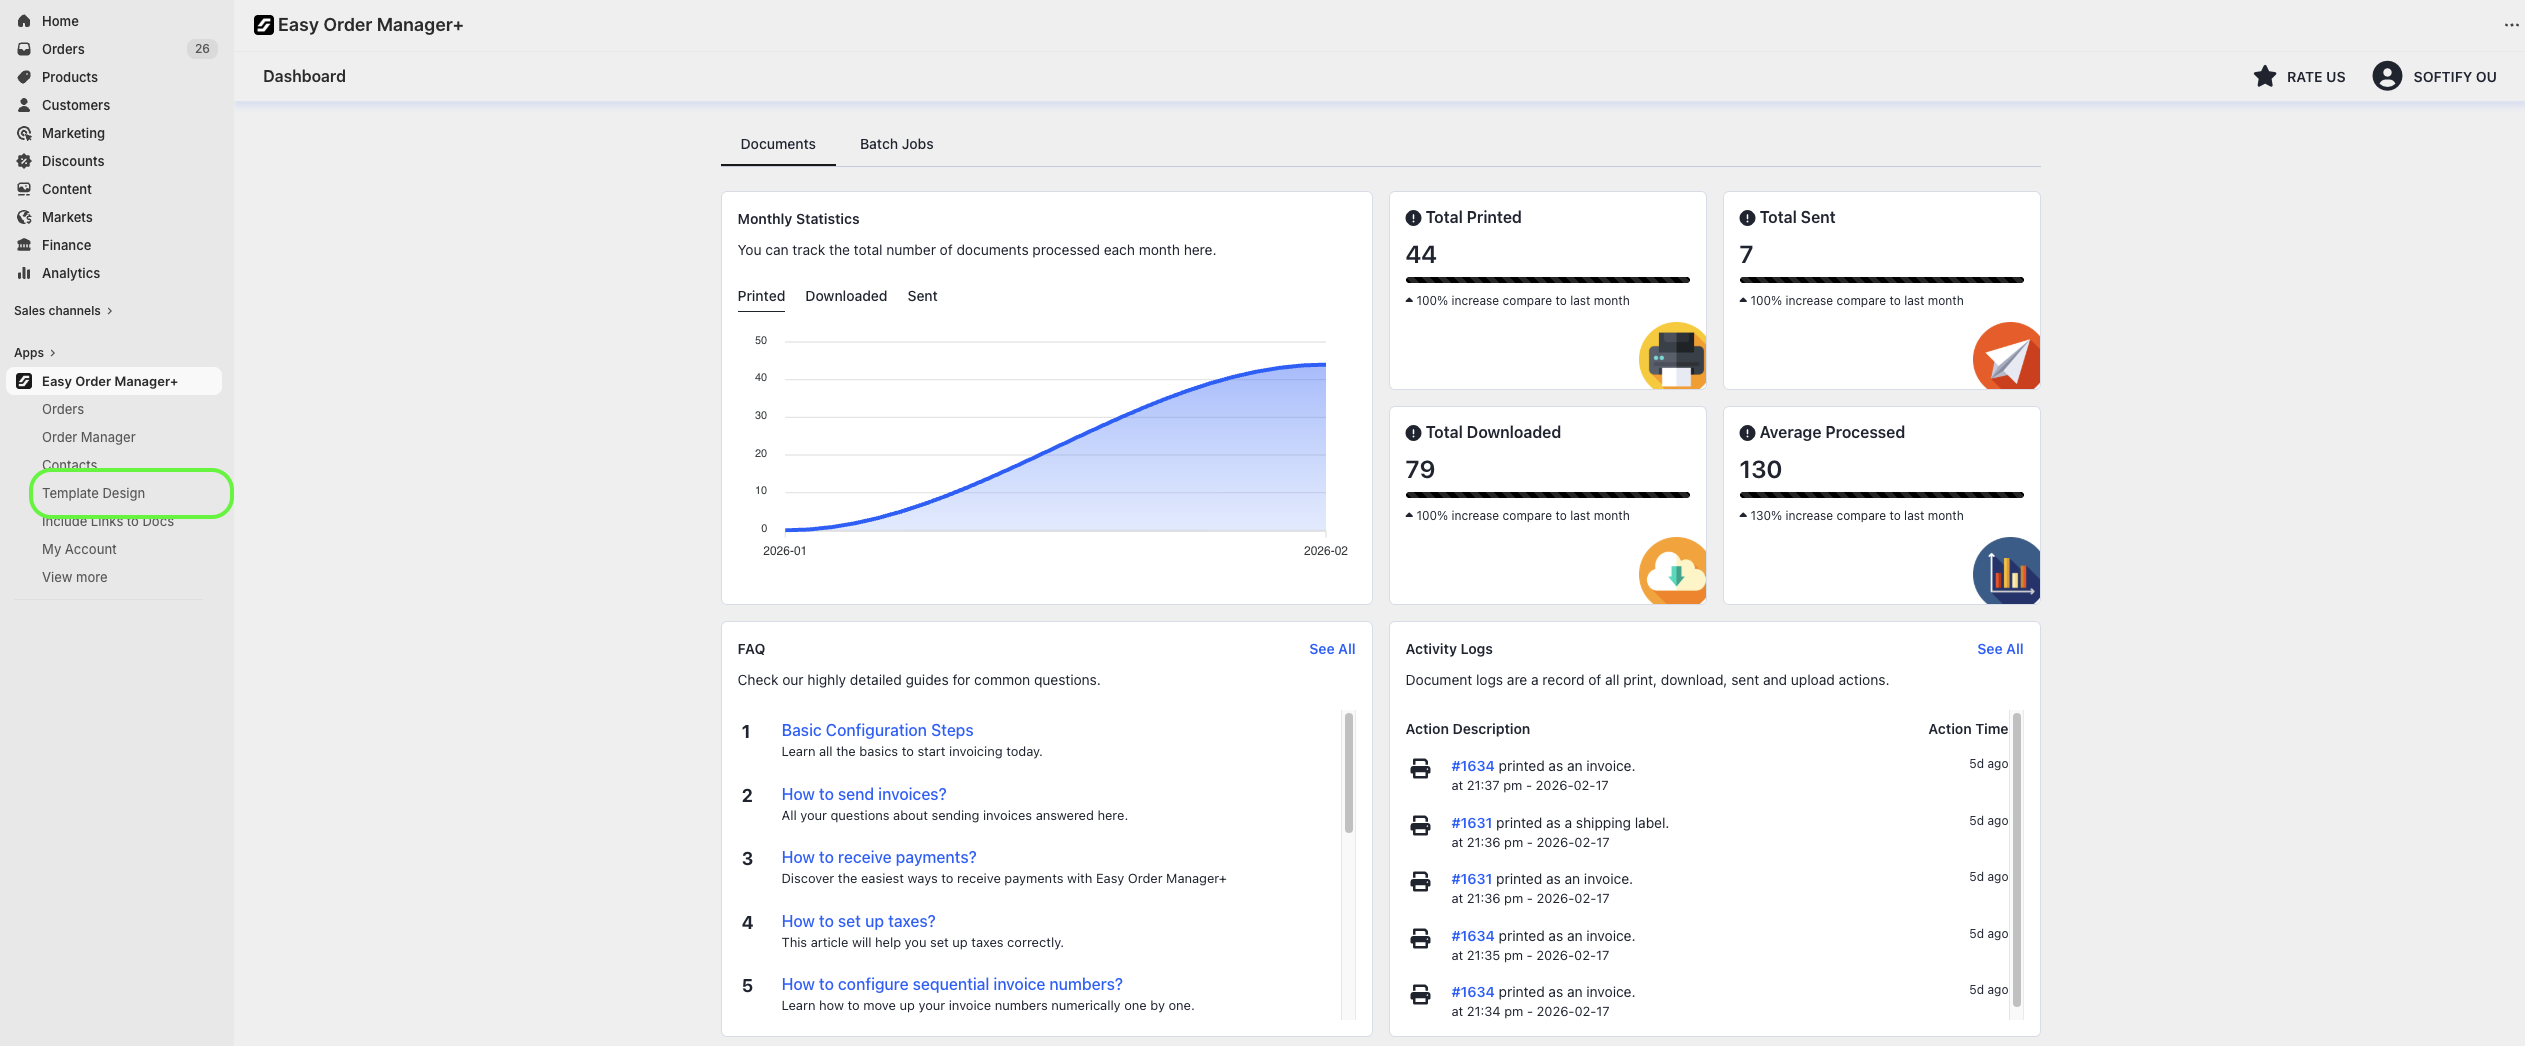
Step 1: Navigate to the Apps section of your Shopify store and select Easy Order Manager+. You will be automatically redirected to the app dashboard.

Step 2: From the dashboard, click on Template Design.
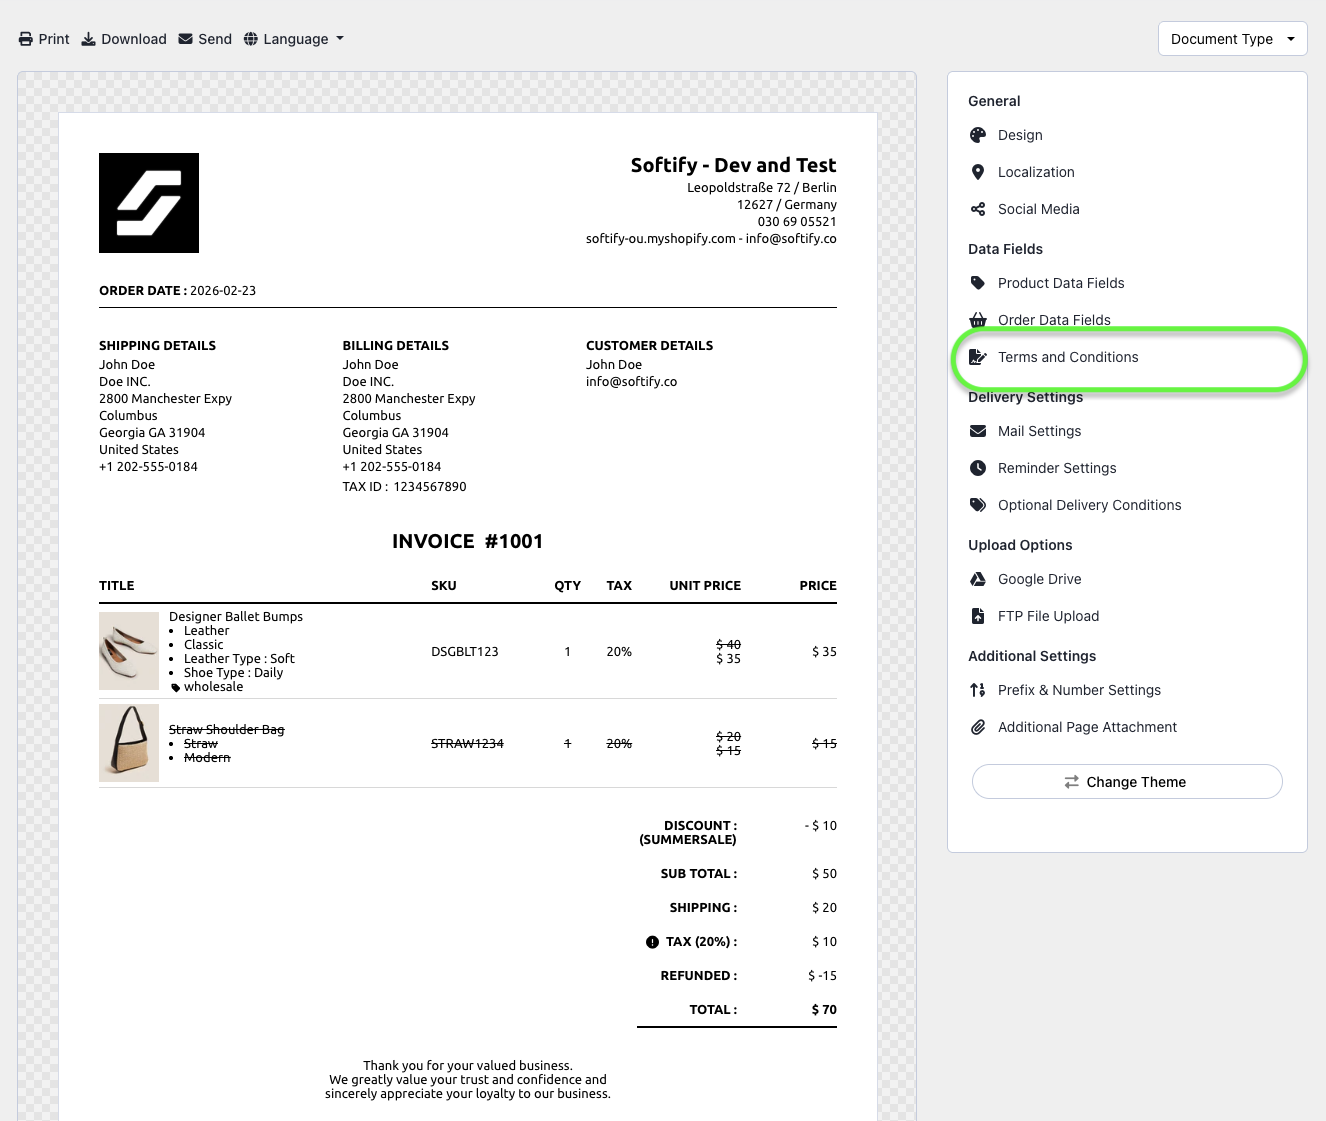
Step 3: Click on Terms and Conditions.
Step 4: Enable the Show Issue Date option.
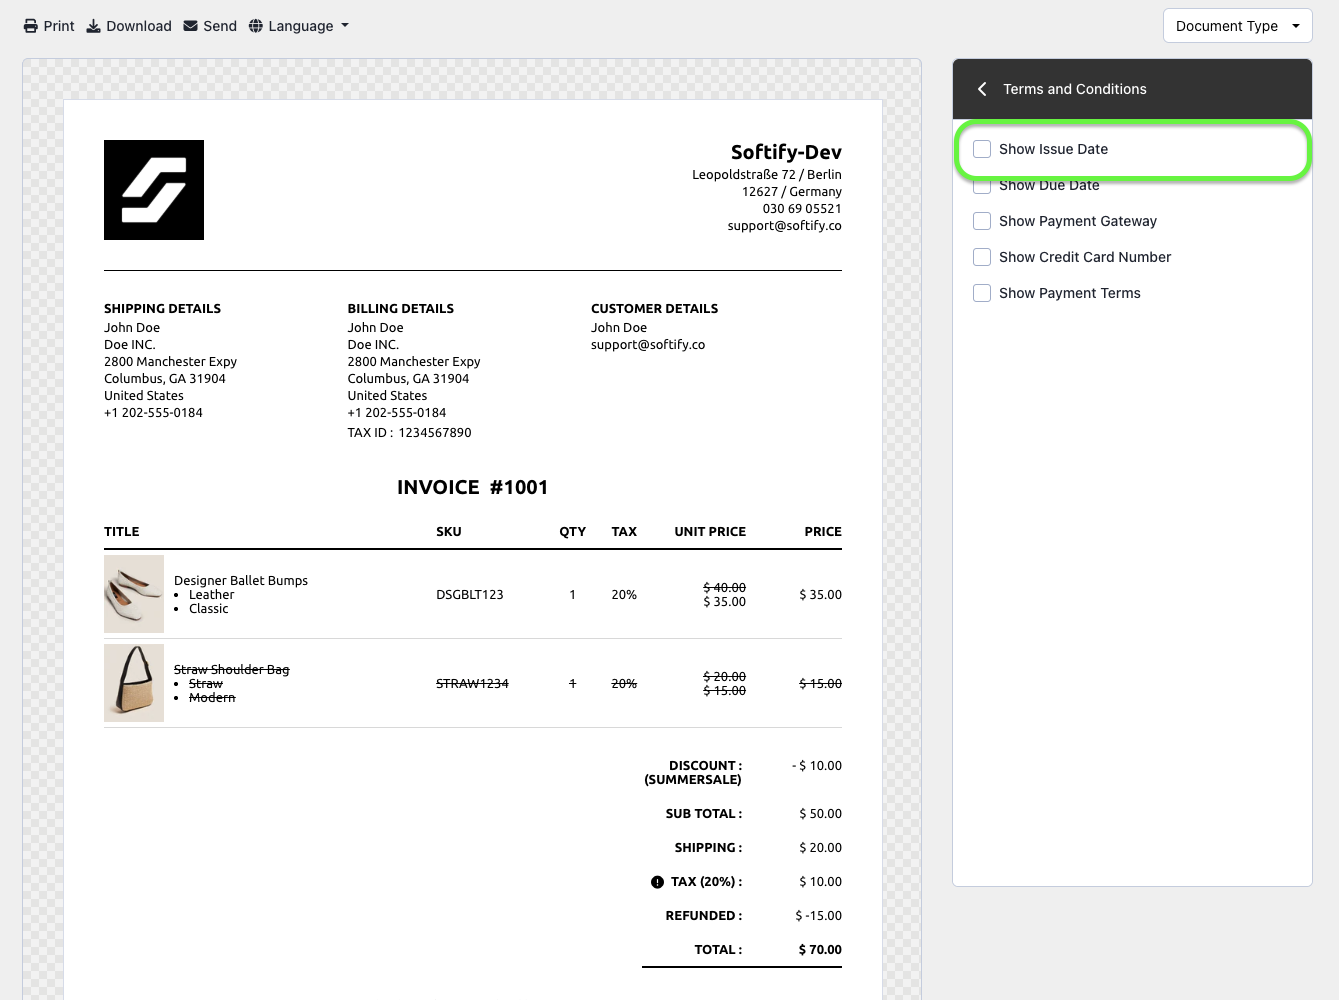
Step 5: Once you’ve made your selection, click the Save button at the top center of the screen to apply your changes.
![]()
Shopify does not currently provide a dedicated field for the invoice issue date for store orders. If displaying the issue date is essential for your workflow or required by your country’s regulations, we offer two alternative solutions:
- Use the Order Process Date:
We can configure your invoice template to print the date the invoice is generated (i.e., when it’s printed or downloaded).- Use an Existing Order Date Field:
Alternatively, we can replace the issue date with another available date from your order data, such as the fulfillment date.To request this customization, please create a support ticket or click here to email us directly.
Need Additional Help?
If you’re still experiencing issues, feel free to reach out to our support team:
- Visit the Help Center section within your Easy Order Manager+ dashboard to create a ticket
- Or click here to email us directly.
We’re always happy to help!