This guide provides all the key details for setting up Easy Invoice+ and customizing your invoice documents.
Step 1: Log in to your Shopify account.
Step 2: Navigate to the Apps section of your Shopify store and select Easy Invoice+. You will be automatically redirected to the app dashboard.

Step 3: From the dashboard, click on Template Design.

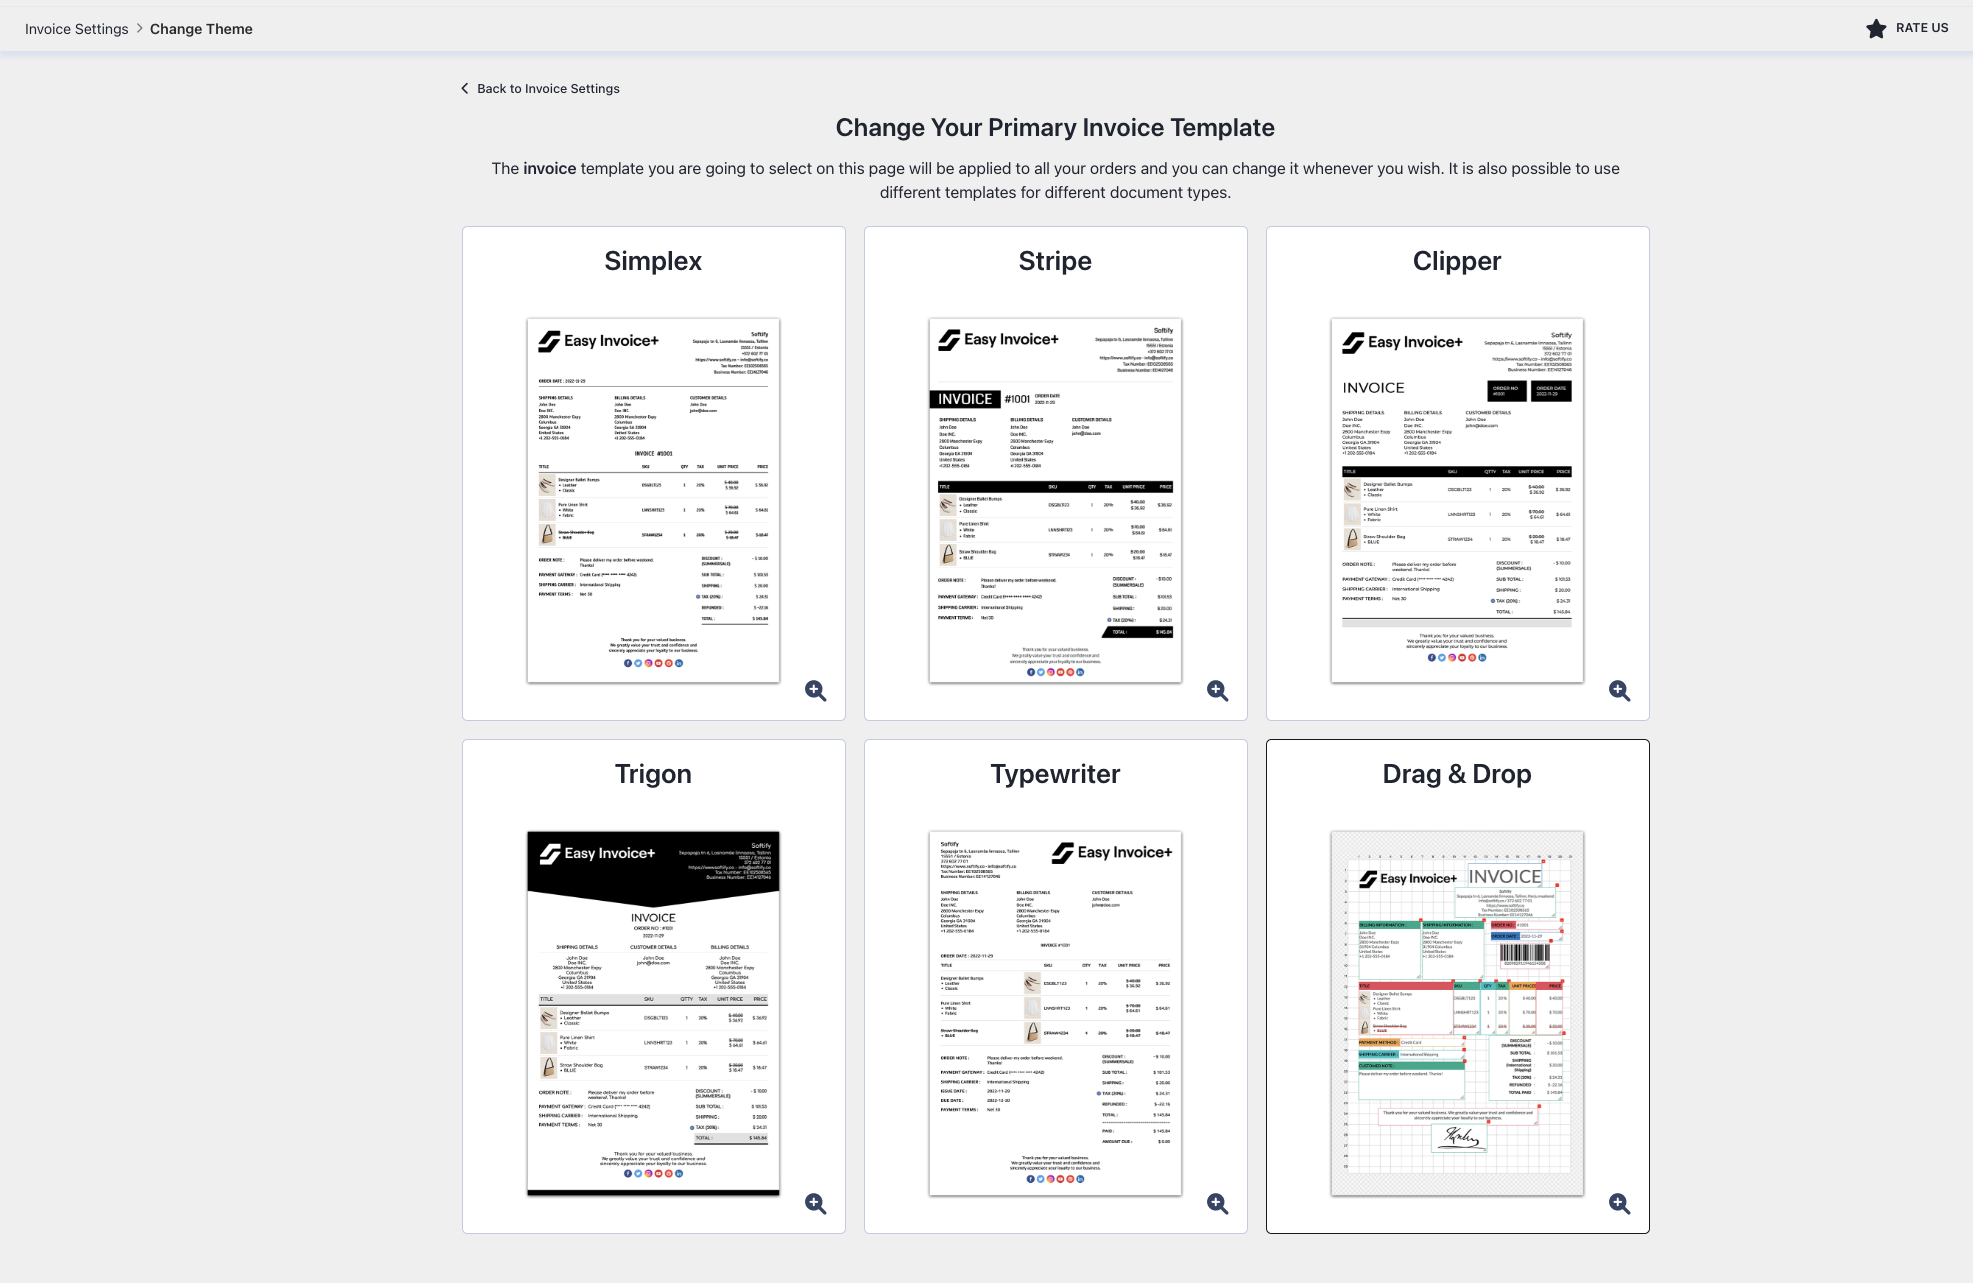
Step 4: In the Template Design section, you can choose to use the default Simplex template or select an alternative by clicking the Change Theme button.

Available Templates:
- Simplex
- Stripe
- Clipper
- Trigon
- Typewriter
- Drag & Drop
Step 5: Customize your chosen template. The customization options are organized into five main sections:
1. General
- Design:
Add and resize your company logo, select fonts, colors, and sizes, customize template colors, control variant and product image display, and sort products. - Localization:
Set date, time, address, and weight formats; choose file extension (PDF/HTML); rename your document files; customize currency format and conversion methods. - Social Media:
Show/hide social media icons and add URLs for Facebook, X (formerly Twitter), Instagram, YouTube, Pinterest, and LinkedIn.
2. Data Fields
- Product Data Fields:
Show/hide product info like SKU, barcode, HS code, country of origin, weight, and fulfillment status. - Order Data Fields:
Control display of shipping details, order date, order number, discounts, taxes, and more. - Terms and Conditions:
Manage visibility of issue and due dates, payment gateway info, credit card numbers, and payment terms.
3. Delivery Settings
- Mail Settings:
Configure automated invoice sending rules and customize email content. - Reminder Settings:
Define conditions and timing for invoice reminders and customize reminder emails. - Optional Delivery Conditions:
Set extra conditions for sending invoices, such as order tags or payment gateways.
4. Upload Options
- Google Drive:
Link your Easy Invoice+ account with Google Drive for document storage. - FTP File Upload:
Connect Easy Invoice+ with your FTP server to upload files automatically.
5. Additional Settings
- Prefix & Number Settings:
Set invoice numbering sequences like prefix and starting number. - Additional Page Attachment:
Add static HTML content (e.g., banking info, terms & conditions) as extra pages in your documents.
You can click and edit any text directly on the template preview—every text field supports inline editing.
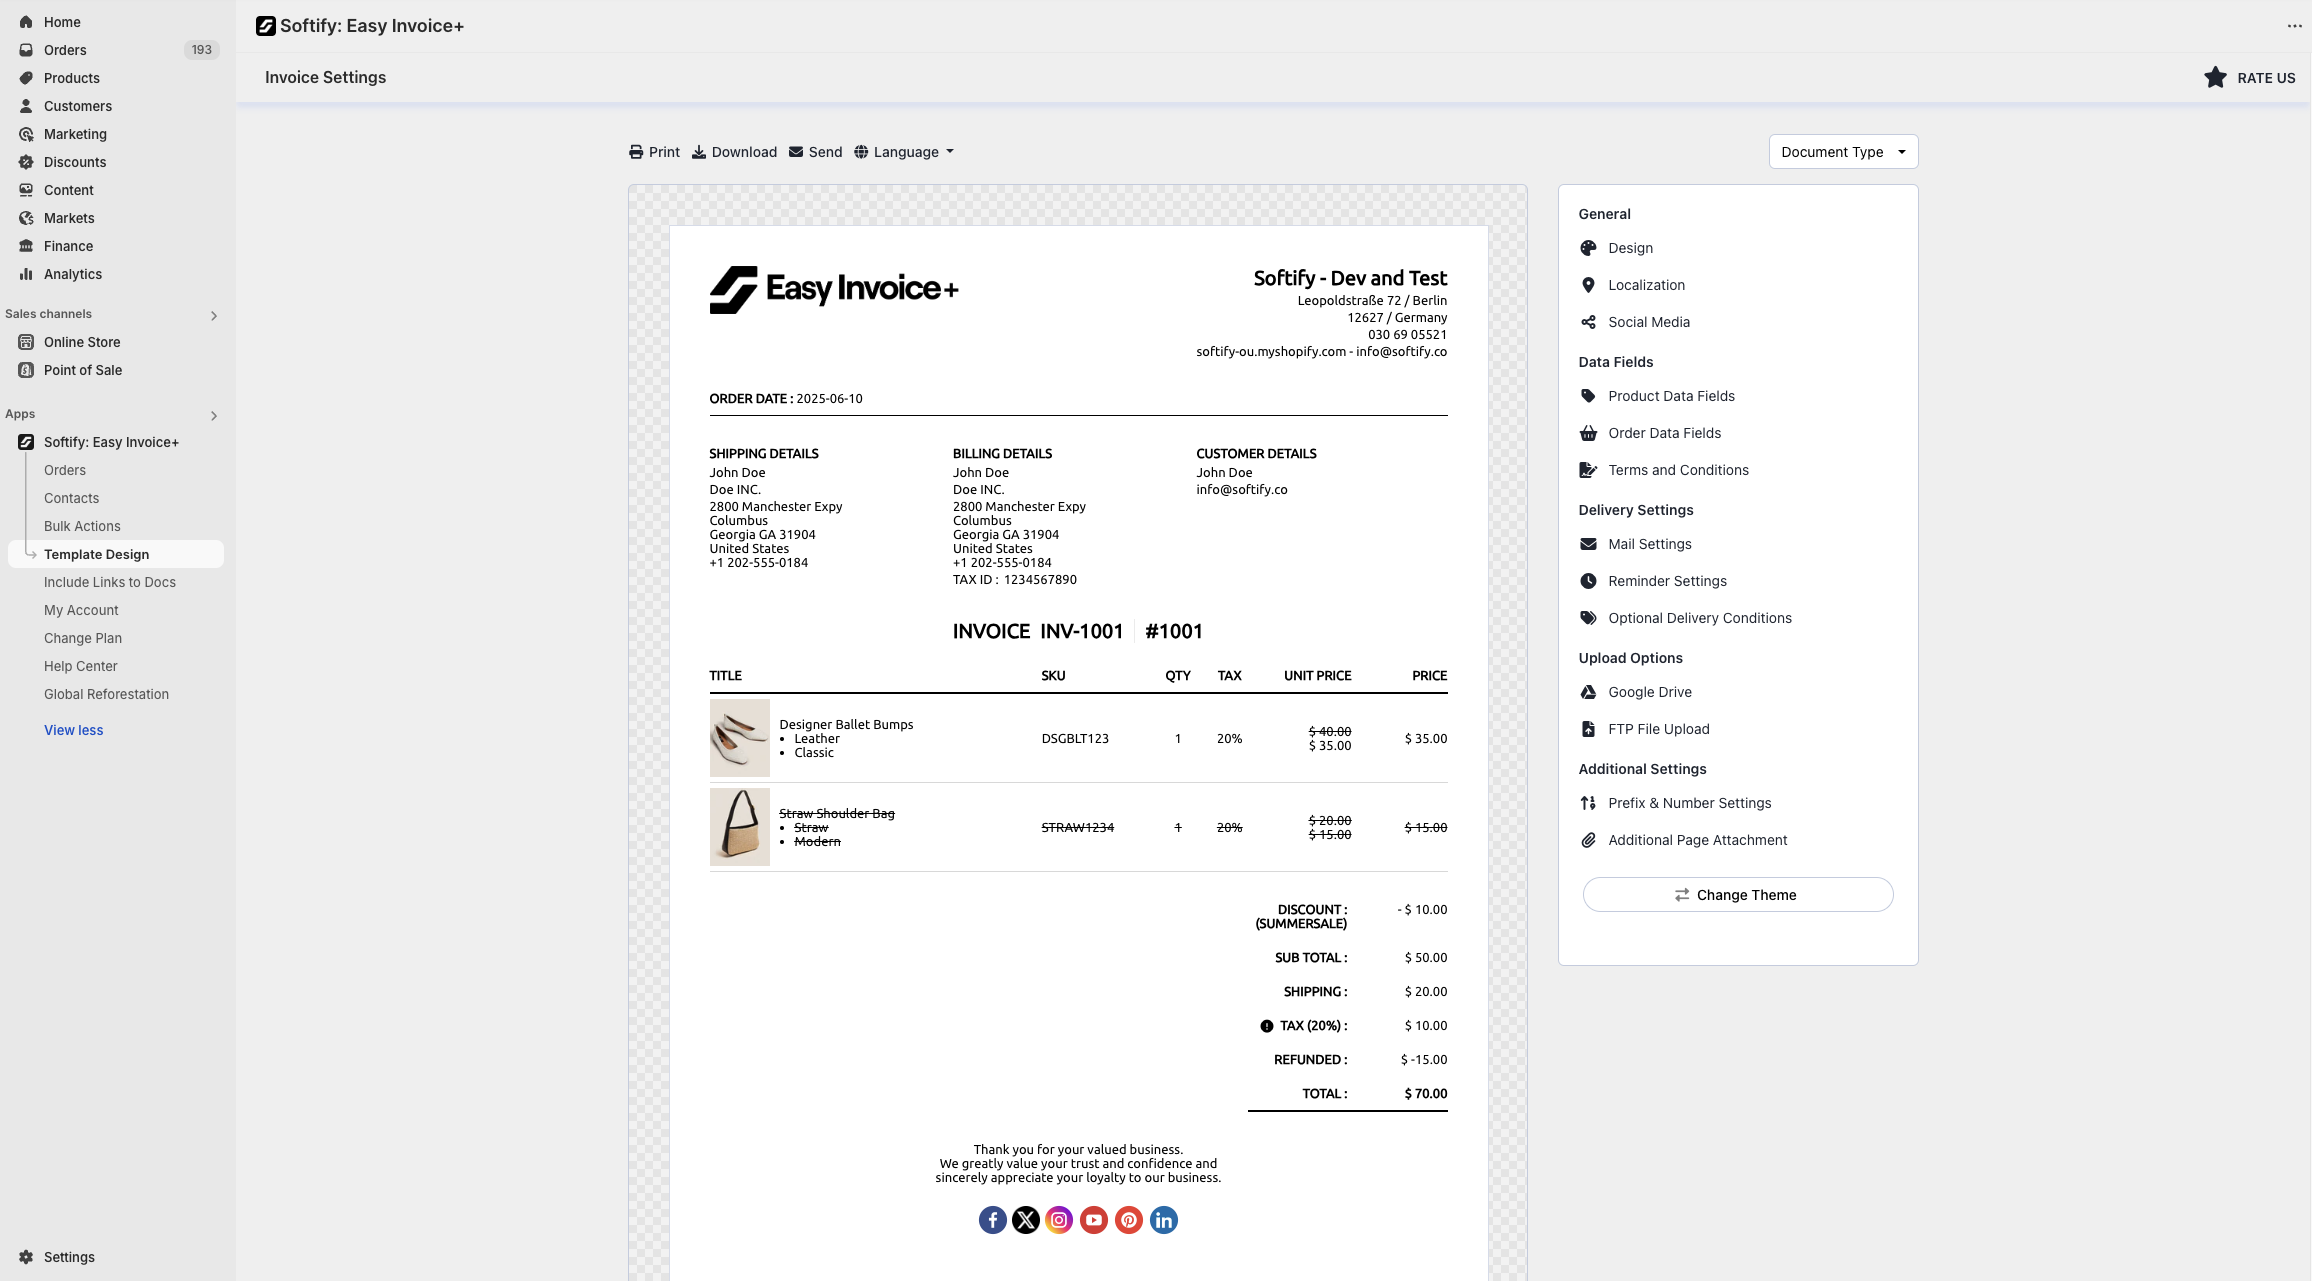
Step 6: Once you’ve made your selection, click the Save button at the top center of the screen to apply your changes.
![]()
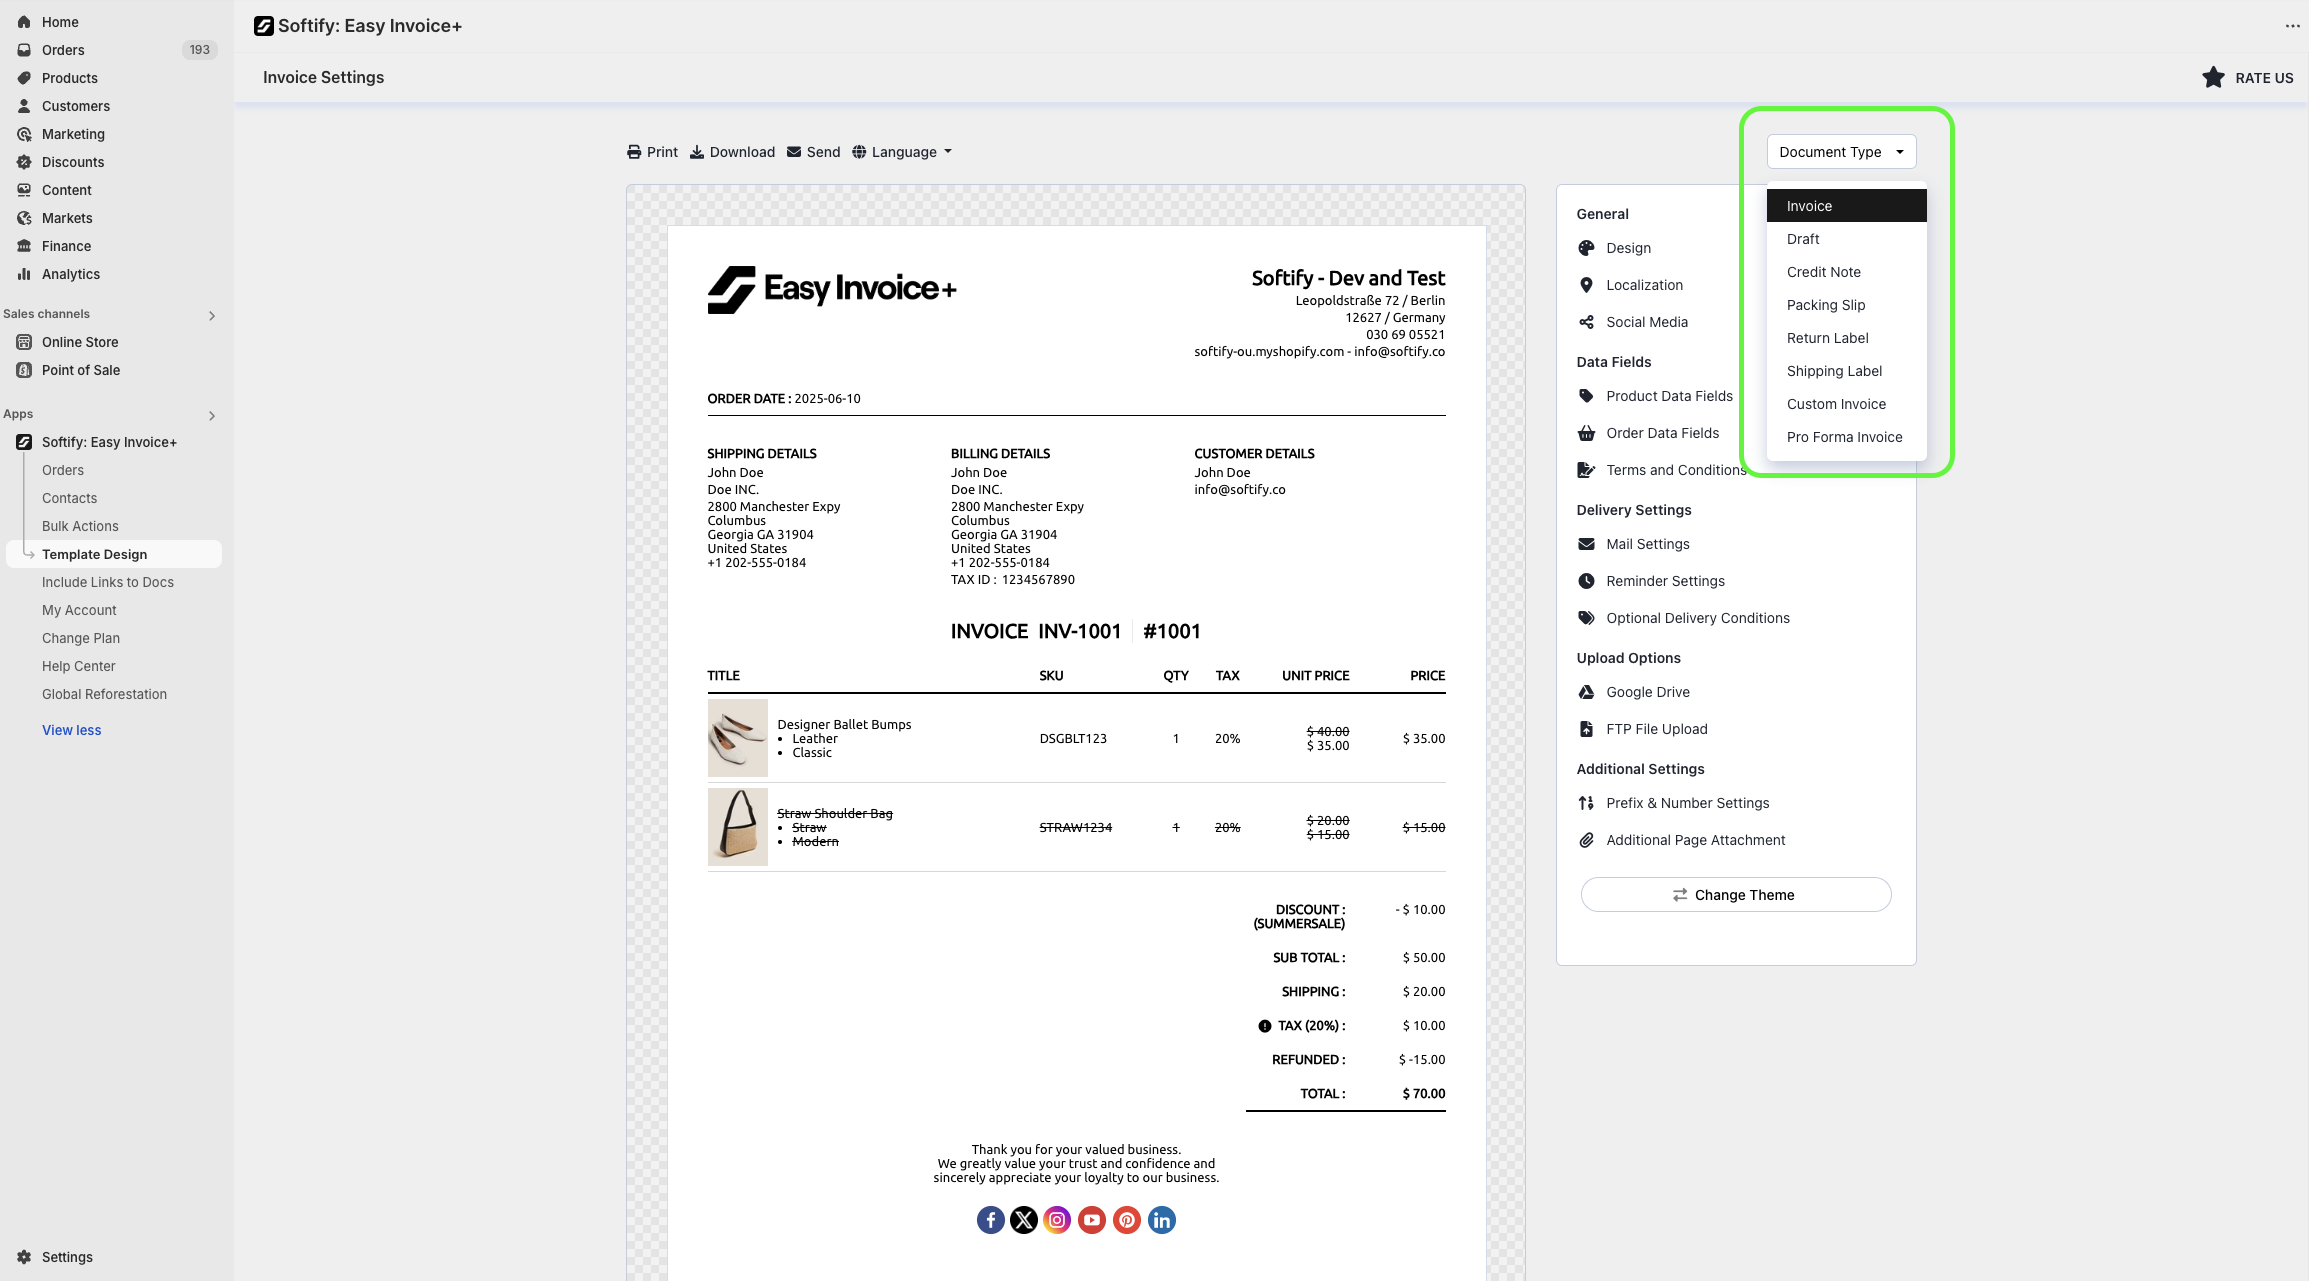
Note: To customize other document types, click the Document Type button in the upper right and select the desired template. Available customization options may vary by document type.
For an in-depth tutorial on sending invoices, please click here: How to send invoices?
Processing Invoices
From Shopify Store Admin:
Step A: Click on the Orders section.

Step B: Select the checkbox next to the order you want to process.

Step C: Click on the Print dropdown menu and choose Softify: Easy Invoice+.

Step D: On the Softify: Easy Invoice+ preview page, click the Process option under the Actions section.

You can also process your order from the Print menu located on the individual Order Details page within the Shopify Store Admin.

From Easy Invoice+:
Step 1: Click on the Orders tab.

Step 3: Find the order you wish to process, click the Actions button next to it, and select the Process option.

Alternatively, you can process your orders directly from Easy Invoice+’s Order Details page. Simply select the desired order and click the Process option button.

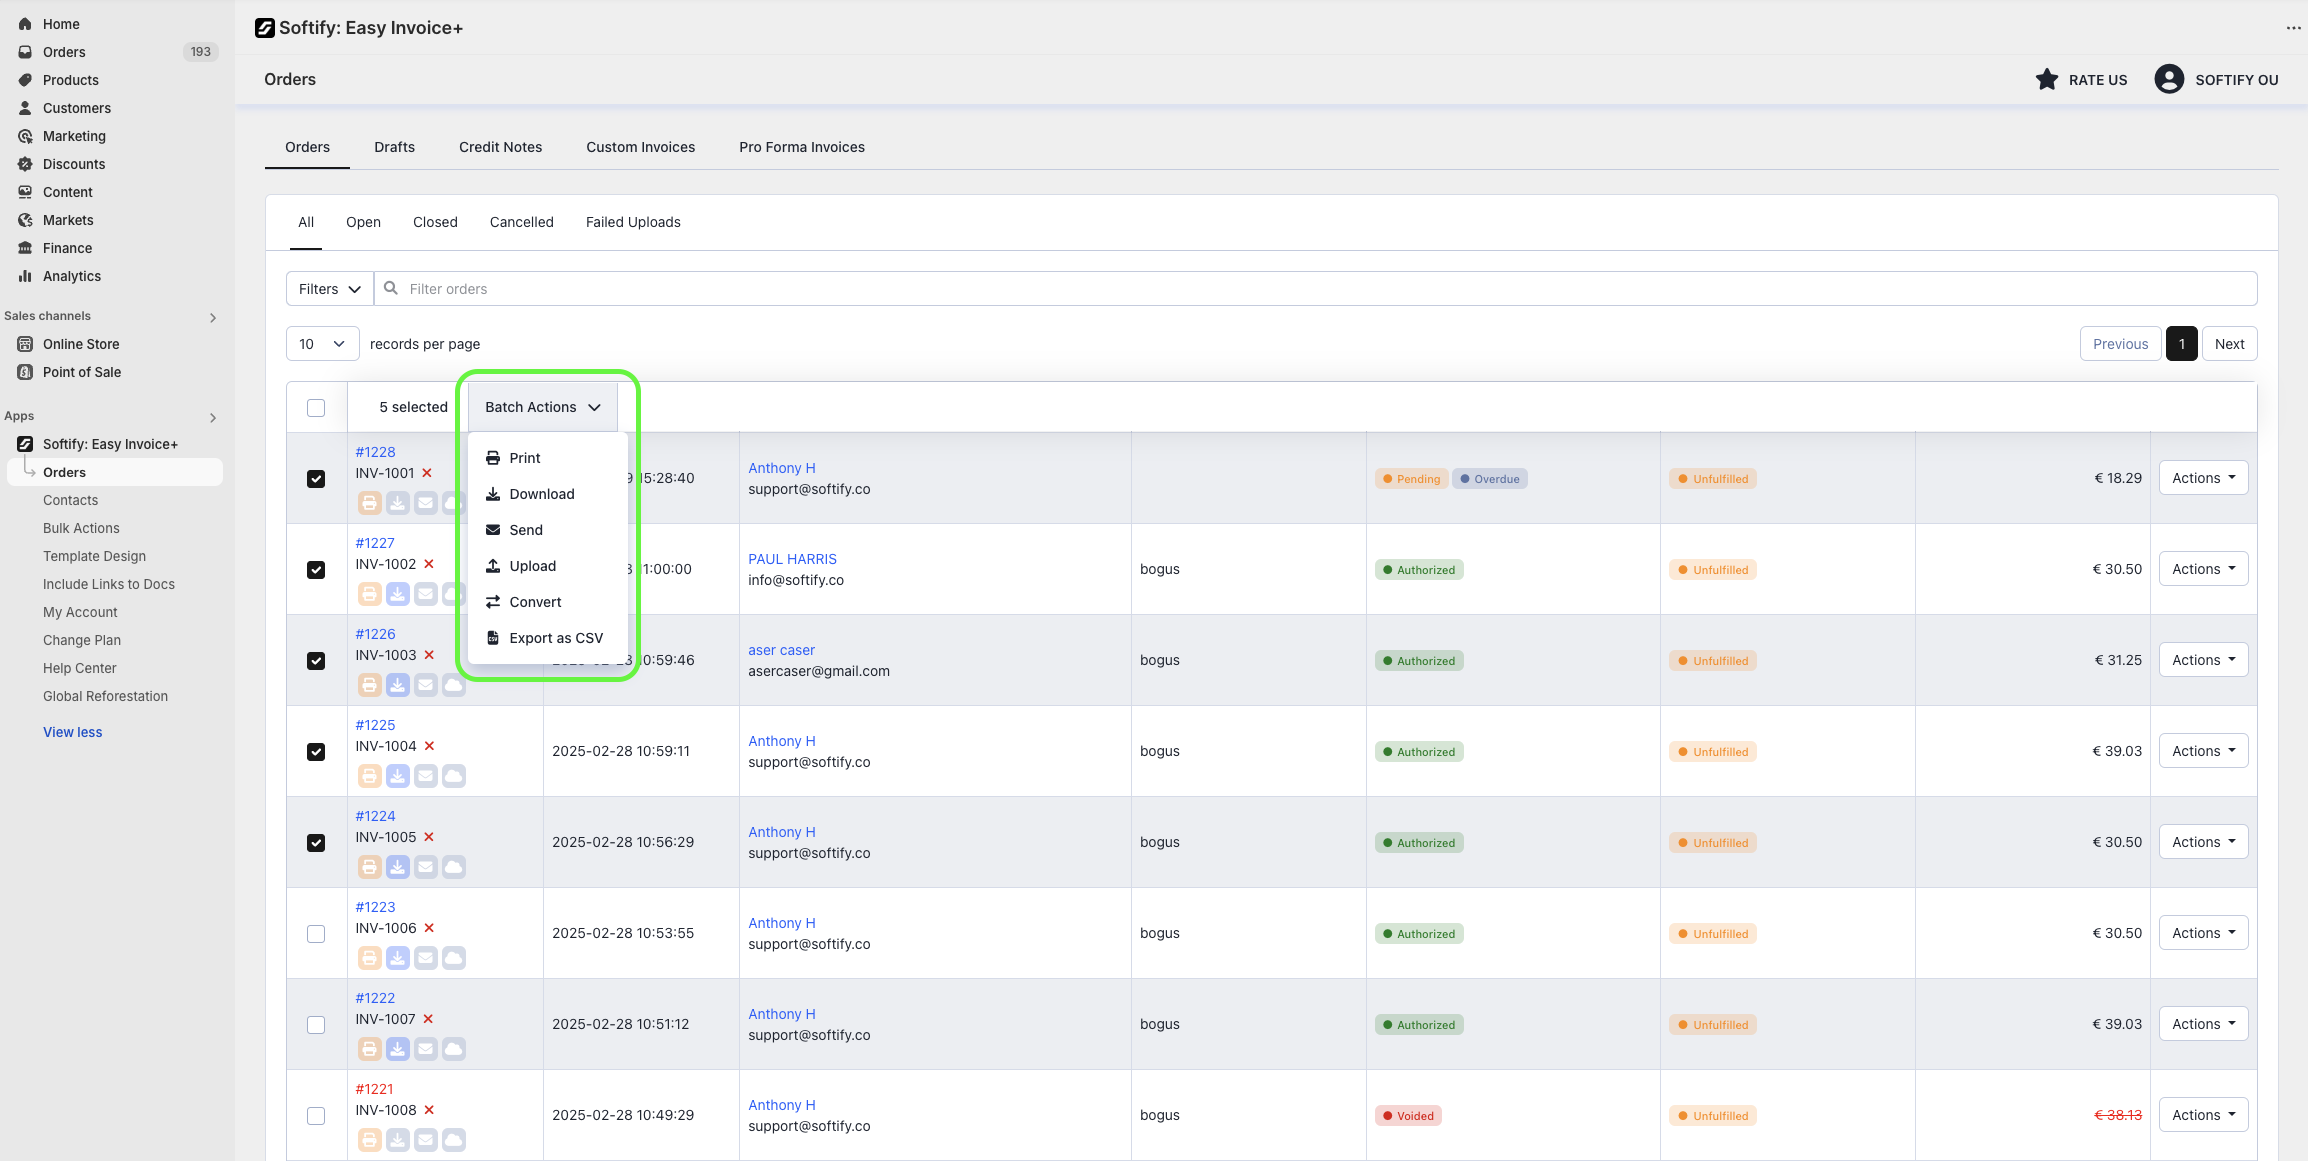
Bulk Processing
- Select multiple orders by checking boxes.
- Click Batch Actions and choose the desired process option.
Bulk processing is available only on Advanced or Enterprise plans.
Important:
You can normally process up to 50 invoices at once (Easy Invoice+ supports up to 100). Adding extra data like metafields or tags may slow or disrupt processing. To improve speed and reliability, consider hiding product images or turning off product variants and additional product details in the Template Design settings.
Need Additional Help?
If you’re still experiencing issues, feel free to reach out to our support team:
- Visit the Help Center section within your Easy Invoice+ dashboard to create a ticket
- Or click here to email us directly.
We’re always happy to help!