Product rules allow you to set up “if this, then that” automations that trigger automatically when products are created or updated in your Shopify store. These rules operate in the background 24/7, ensuring your catalog stays organized without manual work.
How Product Rules Work
Every rule is composed of three distinct parts:
- Trigger: Determines when the rule checks your products. This can be when a Product is Created (newly added) or when a Product is Updated (any change to an existing item).
- Filters: Define specific conditions a product must meet to trigger the action. Examples include filtering by vendor, price, product type, or specific tags. If no filters are set, the rule applies to every product matching the trigger.
- Action: The specific change the app makes automatically. You can automate most bulk editing tasks, such as adding tags, adjusting prices, updating SEO titles, or changing product status.
Important Restrictions: To prevent endless loops and safety issues, product rules cannot change inventory quantities, delete products, upload images, or run exports/imports.
Step-by-Step: Creating a Product Rule
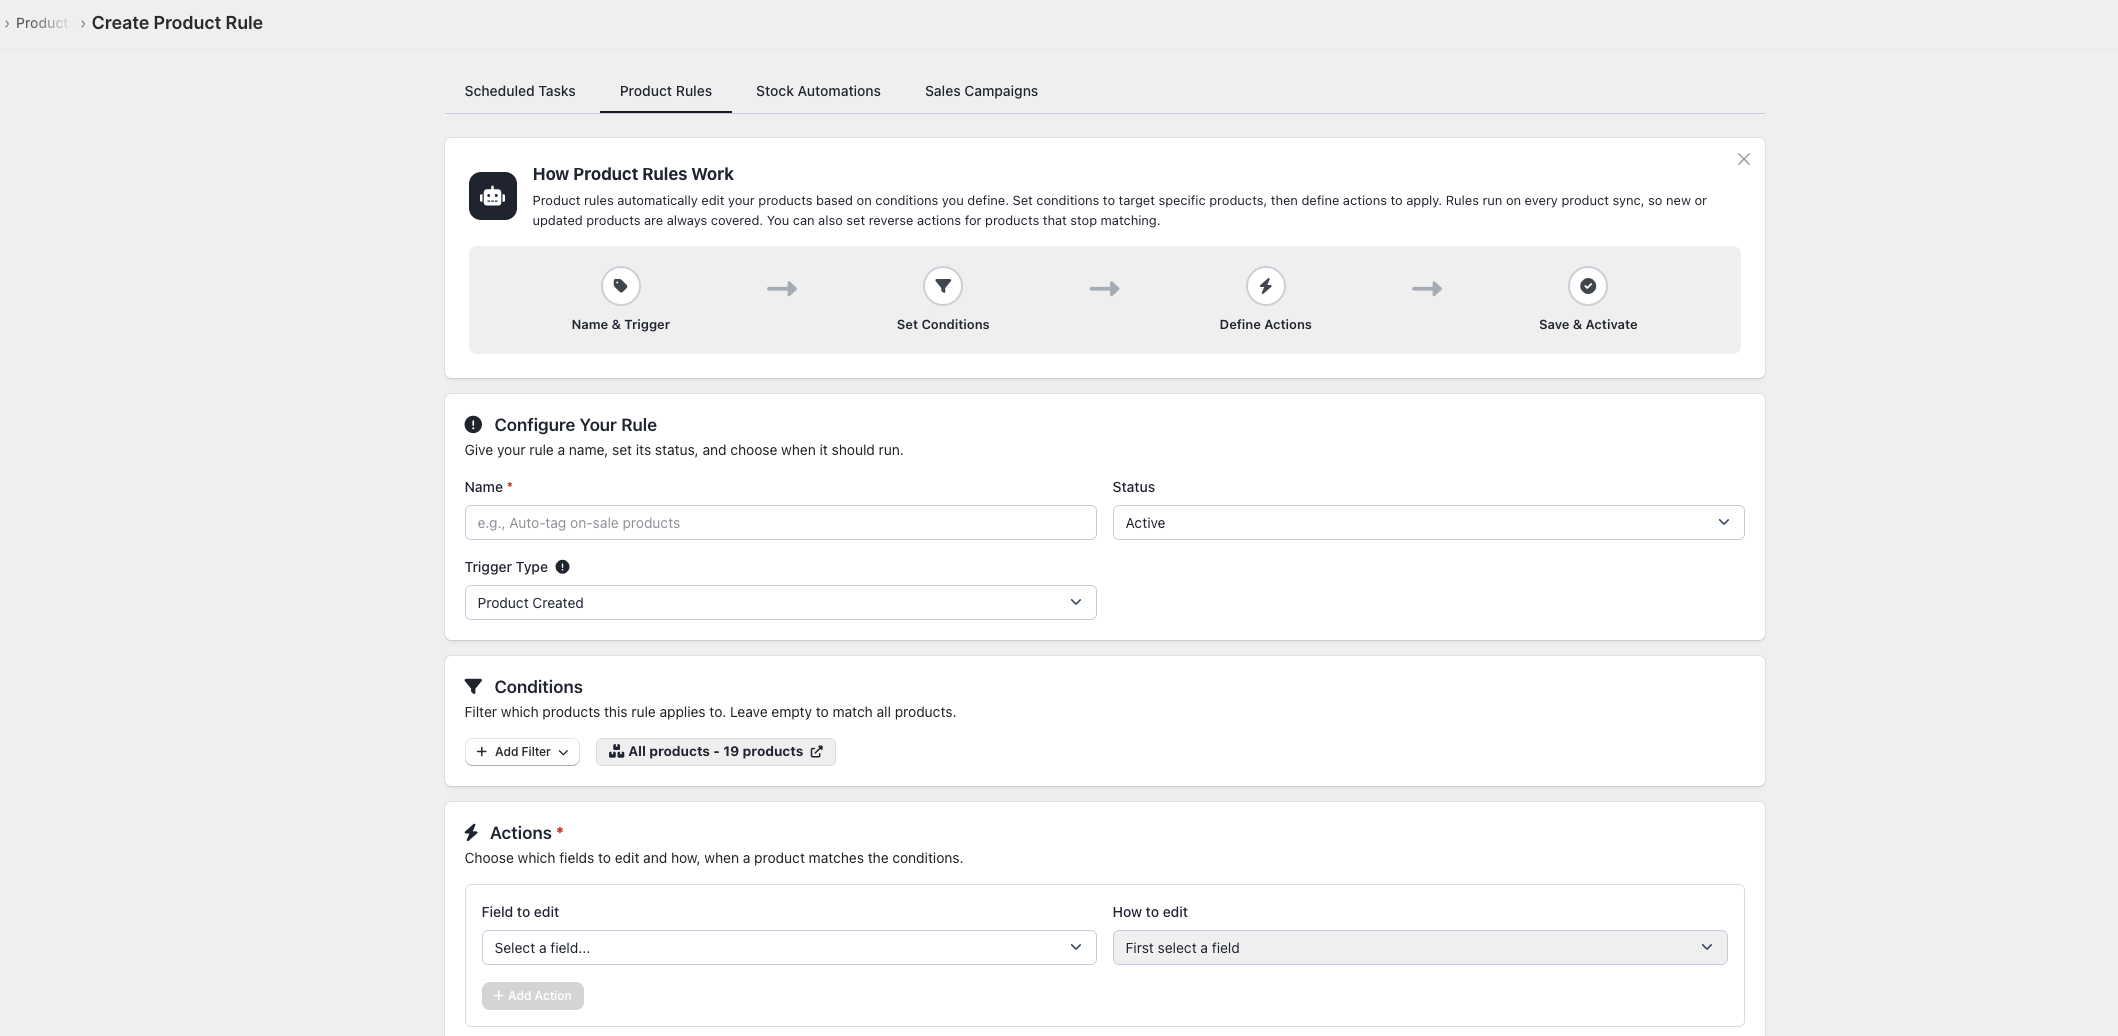
- Navigate to Automations > Product Rules and click Create Rule.
- Name your rule: Use a descriptive name like “Auto-tag Nike Products” for easy identification later.
- Choose the trigger: Select “Product Created” for new items or “Product Updated” for existing items.
- Set the filters: Define the conditions the product must meet (e.g., Vendor equals “Nike”). Products must match ALL active filters for the rule to run.
- Choose the action: Select the field you want to change, the type of change, and the new value.
- Save and Enable: Click Save, then use the toggle switch to turn the rule on.
Managing and Monitoring Rules
You can manage your active automations from the Automations > Product Rules list page.
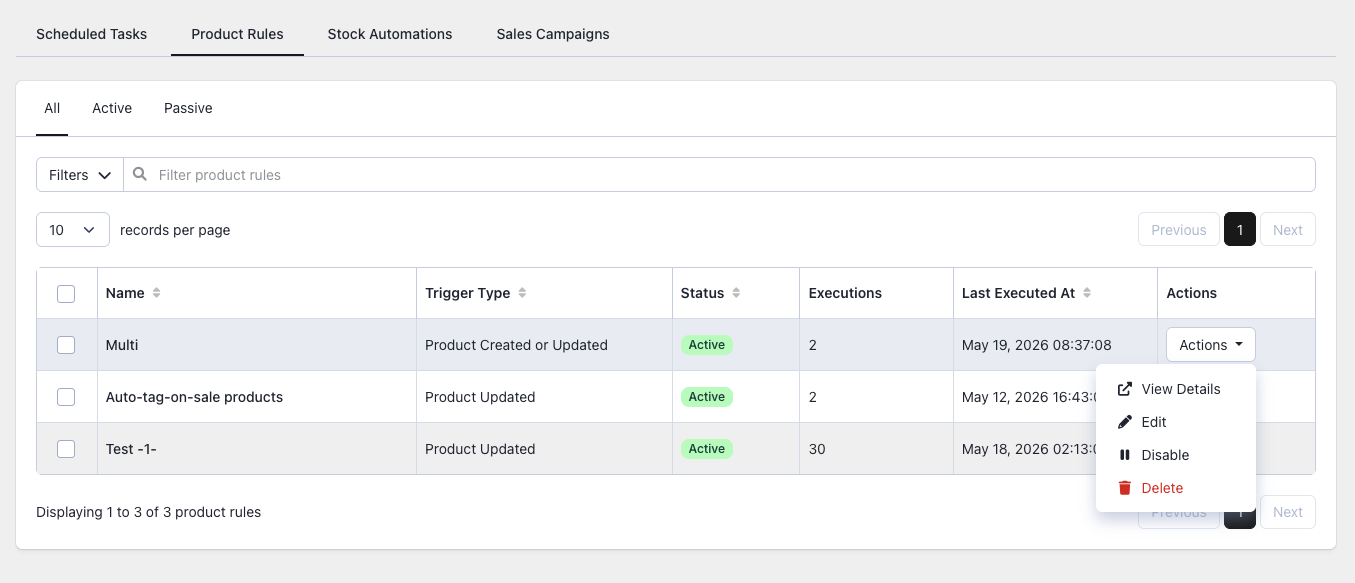
- Toggle On/Off: Use the switch to pause a rule without deleting its configuration.
- Execution Count: View how many times a rule has fired since its creation.
- View Logs: Review the history to see exactly which products were affected by a specific rule execution.
- Edit/Delete: Modify your triggers and filters or permanently remove the rule.
Real-World Automation Examples
- Auto-tagging: Automatically add the tag “nike-products” whenever a product with Vendor “Nike” is created.
- SEO Automation: Generate a standardized SEO title like
{title} | Your Store Namefor every new product. - Safety Net: Automatically set a product’s status to “Draft” if its price is updated to a value below $5.00.
- Standardization: Automatically capitalize all new “Product Type” entries to maintain consistent formatting.
- Collection Management: Automatically add all new “Shoes” products to a “New Arrivals” collection.
Best Practices and Tips
- Use Specific Filters: Broad filters can lead to unexpected changes; it is safer to be highly specific with your conditions.
- Test First: Create your rule, keep it disabled, and then manually update a test product to verify the logic before enabling it for your full catalog.
- One Action per Rule: Create separate rules for different actions (e.g., one for tags and one for status) to make troubleshooting easier.
- Disable During Bulk Edits: If you are performing a massive manual bulk edit, temporarily disable “Product Updated” rules to prevent them from firing on every change.
Plan Details
Note: Product rules require a Basic plan or higher.
| Feature | Free | Basic | Advanced | Enterprise |
|---|---|---|---|---|
| Product Rules | No | Yes | Yes | Yes |
| Active Rules | – | 5 | 25 | Unlimited |