This guide explains how to upload, delete, resize, or add watermarks to your product images in bulk.
What Can You Do with Product Images?
The app provides several powerful tools for managing your product photography at scale:
- Upload images from Google Drive or Dropbox: Automatically match and upload images to the correct products.
- Edit image alt text: Set, generate, or clear descriptions to improve Google search visibility.
- Delete images: Remove images from multiple products simultaneously.
- Reorder images: Change which photo appears first across many items.
- Add images from a web address: Use an image URL to add a photo to multiple products.
- Assign variant images: Link specific images to specific options, like colors.
- Add watermarks (Advanced+): Protect your photos with a customized logo or text overlay.
- Resize images (Advanced+): Shrink large files to specific dimensions to speed up your store’s loading time.
Uploading Images from Cloud Storage
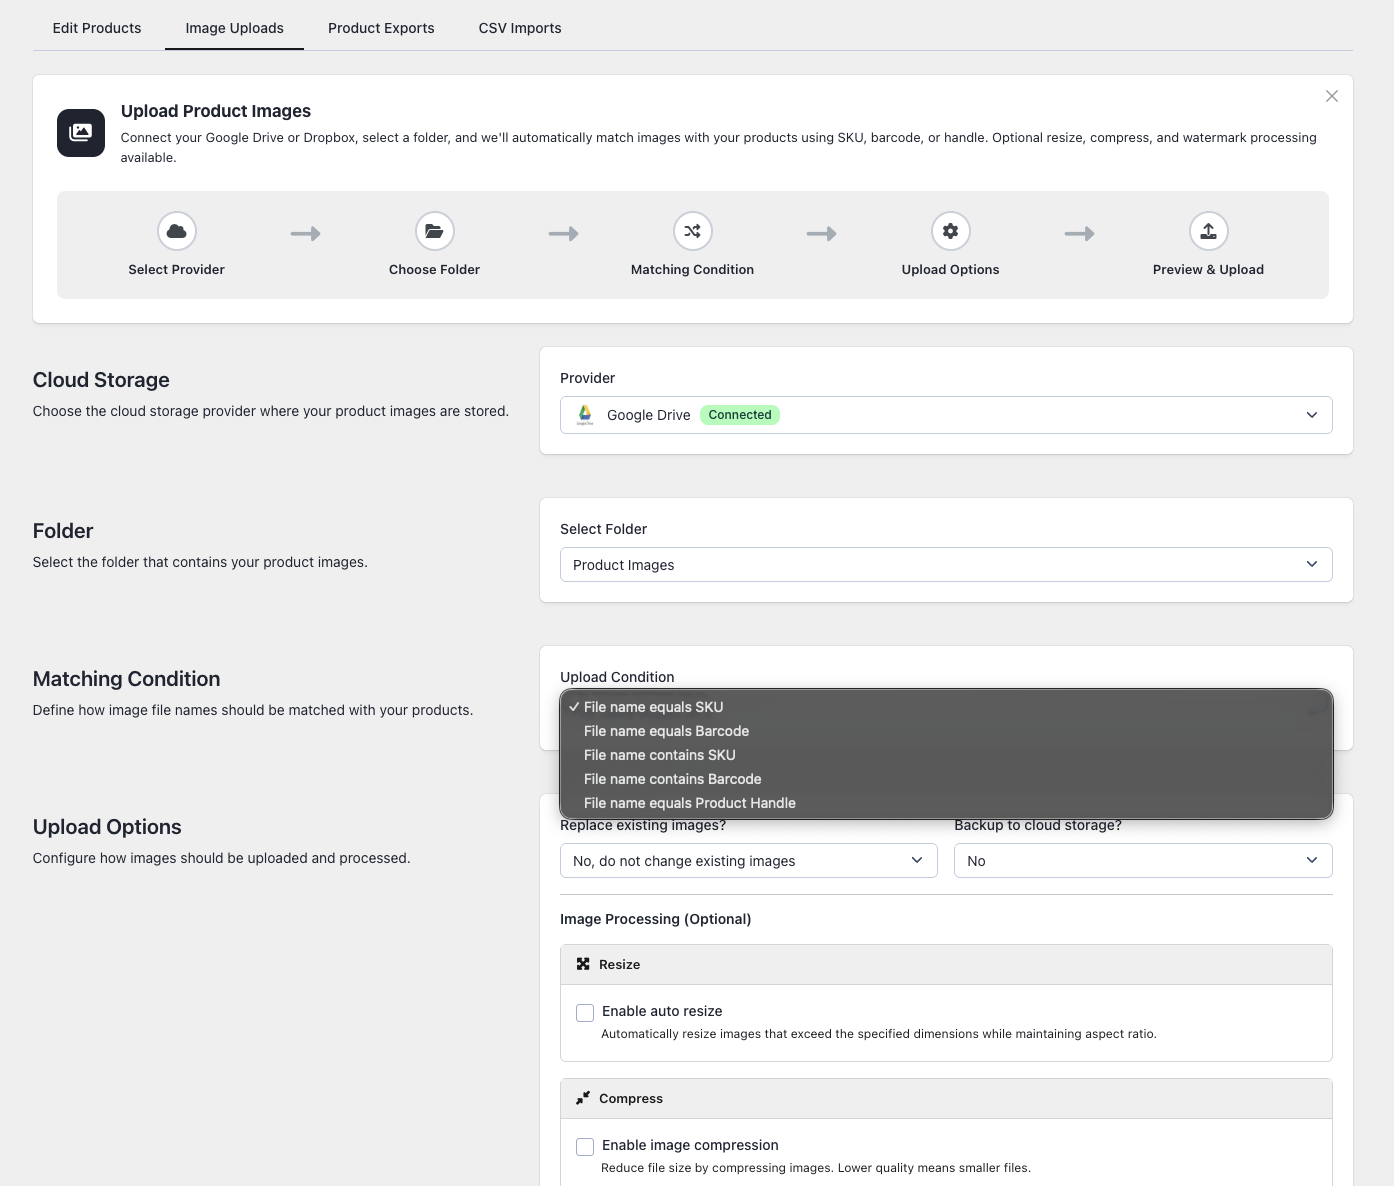
If you have product photos saved in Google Drive or Dropbox, you can upload them to Shopify in bulk. The app automatically matches each image to the correct product based on its filename.
How the Matching Works
The app analyzes each image’s filename to find its matching product in your store. You can choose how it makes this match:
- Match by SKU (exact): The filename exactly matches the product SKU (e.g.,
SHIRT-BLU-M.jpgmatches SKU “SHIRT-BLU-M”). - Match by SKU (contains): The filename includes the SKU anywhere within it (e.g.,
front-SHIRT-BLU-M.jpg). - Match by Barcode (exact or contains): Similar to SKU matching, but uses the product’s barcode number.
- Match by Product Handle: The filename matches the end of the product URL (e.g.,
blue-running-shoes.jpg).
Tip: If you have multiple images for one product, just use the same identifier for all of them, like
SHIRT-BLU-M-1.jpgandSHIRT-BLU-M-2.jpg.
Step-by-Step Upload Guide
- Connect your cloud storage: Go to Settings > Cloud Storage and connect your Google Drive or Dropbox (you only need to do this once).
- Prepare your images: Place all photos for the batch into a single cloud folder and name them according to your chosen matching method.
- Start the upload: Go to Edit Products > Image Upload, select your cloud provider, browse to your folder, and choose your matching method.
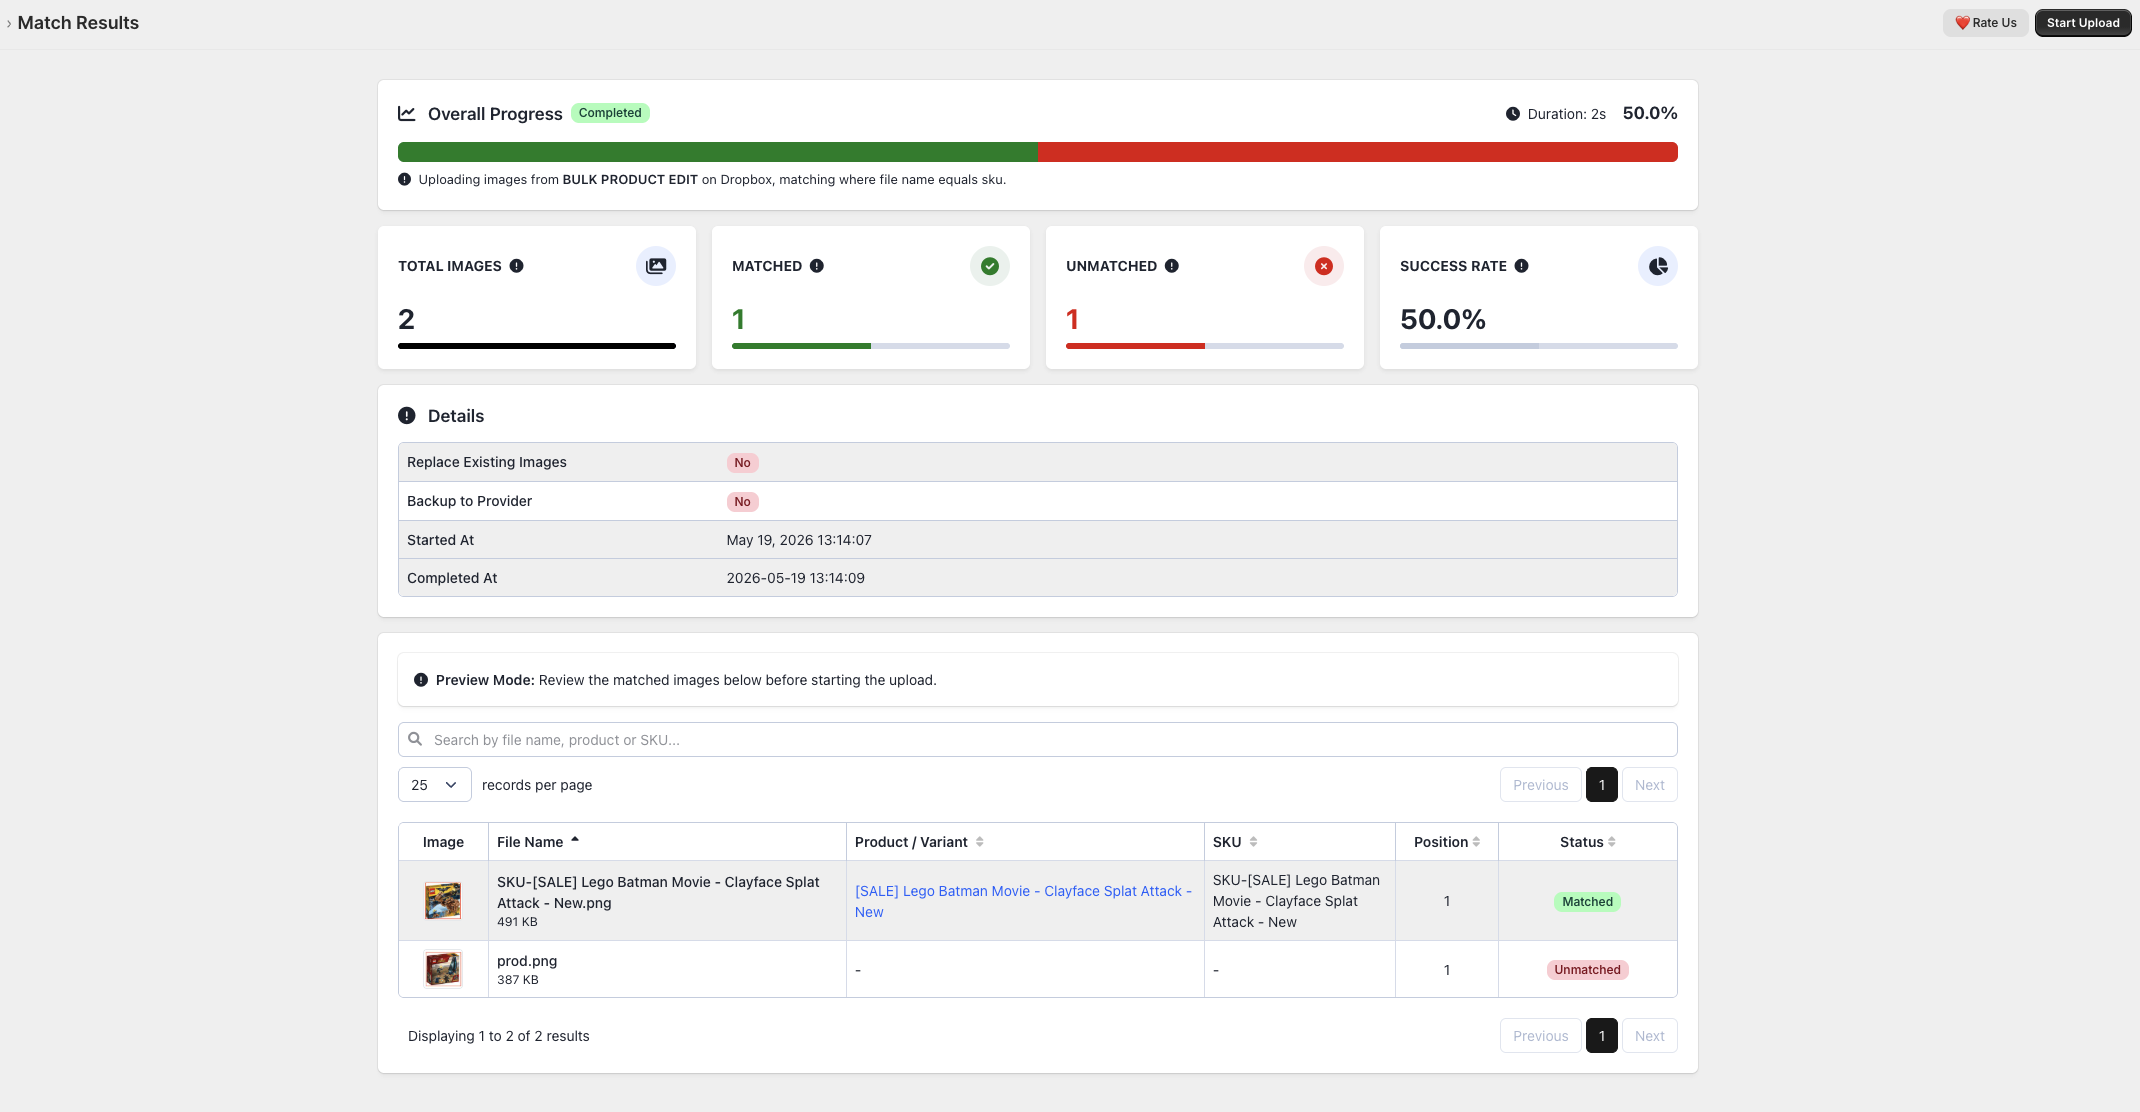
- Preview the matches: Review the preview screen to see exactly which images matched to which products, along with any unmatched files.
- Configure options: Choose if the image should be the main image or added to the end, and optionally set an alt text template.
- Upload: Click Start Upload and watch the progress bar.
Supported File Types
You can upload JPG, JPEG, PNG, and WEBP files.
Editing Image Alt Text
Alt text is a hidden description that helps search engines understand your images (boosting SEO) and allows screen readers to describe photos to visually impaired customers.
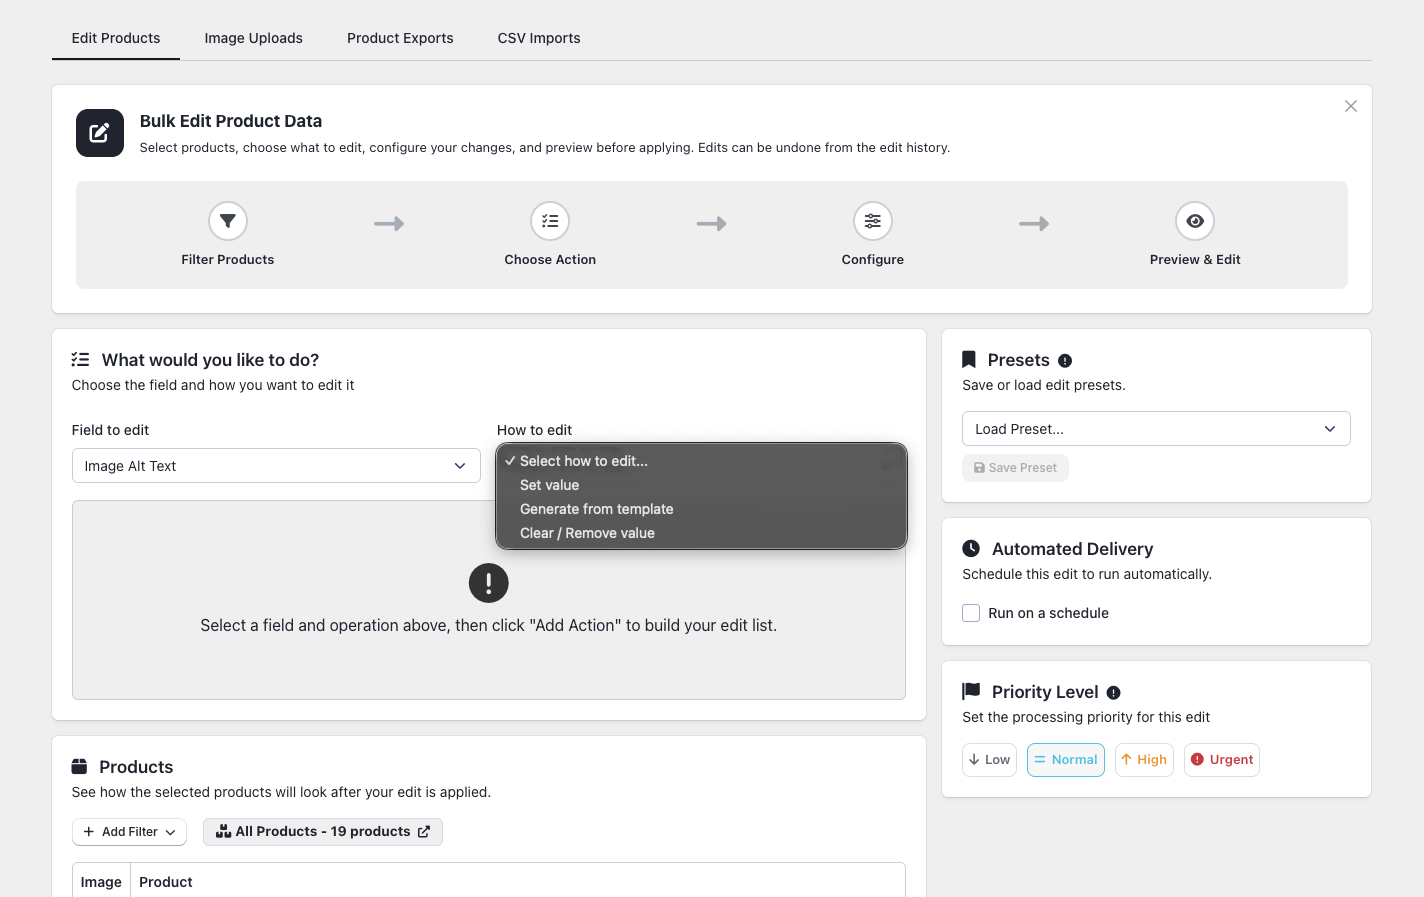
- Set Alt Text: Apply the exact same phrase to every selected image.
- Clear Alt Text: Remove all descriptions from the images.
- Generate Alt Text: Use “Smart Placeholders” to automatically create unique descriptions. For example, entering
{title} by {vendor}will dynamically generate “Blue Sneakers by Nike” for one product and “Leather Bag by Coach” for another.
Deleting Images
To quickly remove images from multiple products:
- Go to Edit Products.
- Set Field to edit to Images / Media.
- Set How to edit to Delete images.
- Choose to delete all images or target a specific position (like “only the 3rd image”).
- Click Start Edit.
Important: Deleting images cannot be undone in the app. Ensure you have backups in your cloud storage before proceeding.
Additional Image Actions
- Reordering Images: Change the sequence of your photos. For example, move image #3 to position #1 so it becomes the main thumbnail.
- Adding from a Web Address: Paste an image URL to automatically download and attach that image to your selected products.
- Variant Images: Assign specific photos to specific variants (e.g., linking a red shirt photo directly to the “Red” size option) or remove existing variant image links.
Watermarks & Resizing (Advanced Plans)
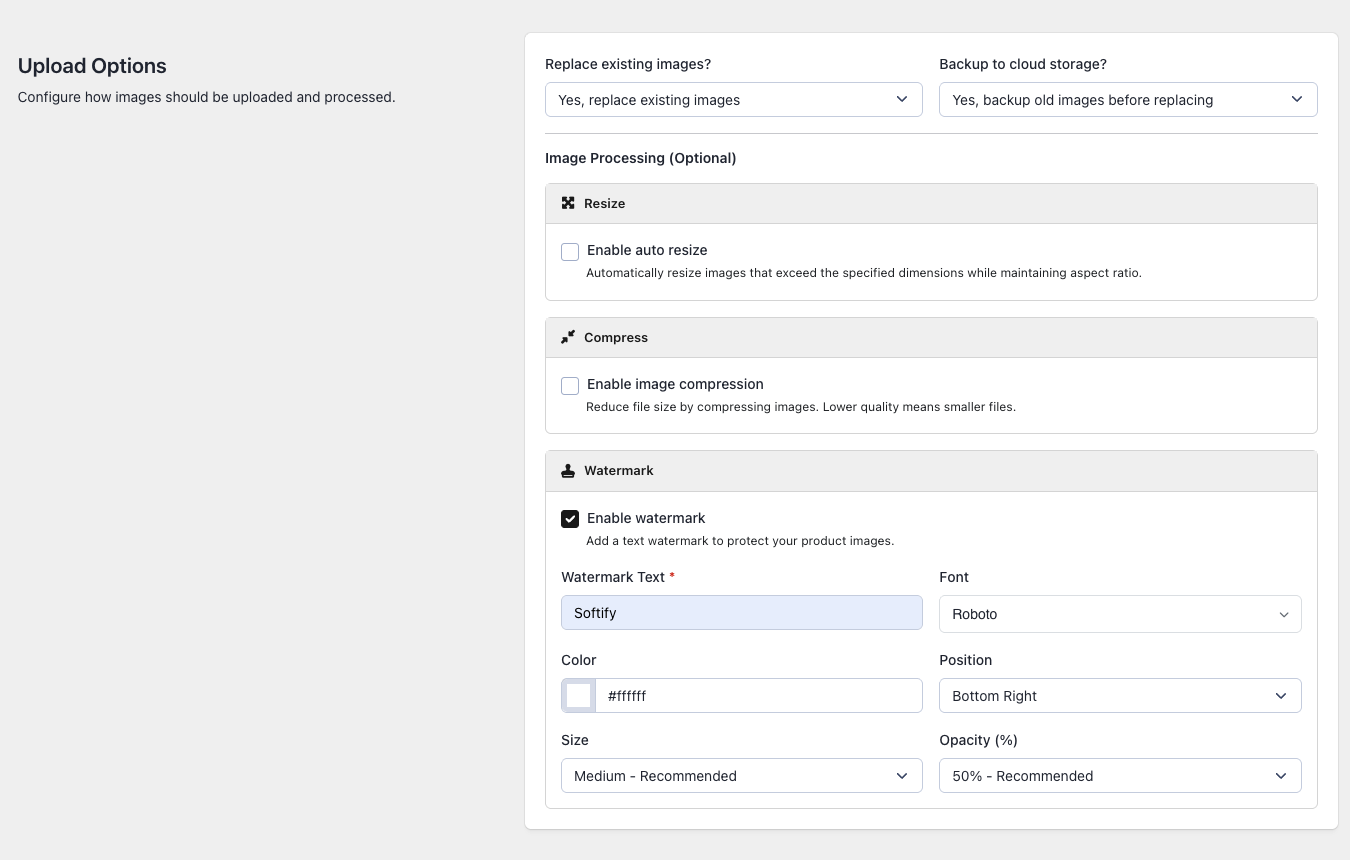
If you are on the Advanced or Enterprise plan, you can protect and optimize your photos during the upload process.
- Watermarks: Upload your logo, adjust its transparency (opacity), size it relative to the product photo, and pick a position (like the bottom corner) to prevent photo theft.
- Resize Images: Set a maximum width or height to automatically shrink massive files without distorting their proportions, helping your storefront load much faster.
Reverting an Image Upload
If you accidentally upload images to the wrong products, you can safely undo the batch:
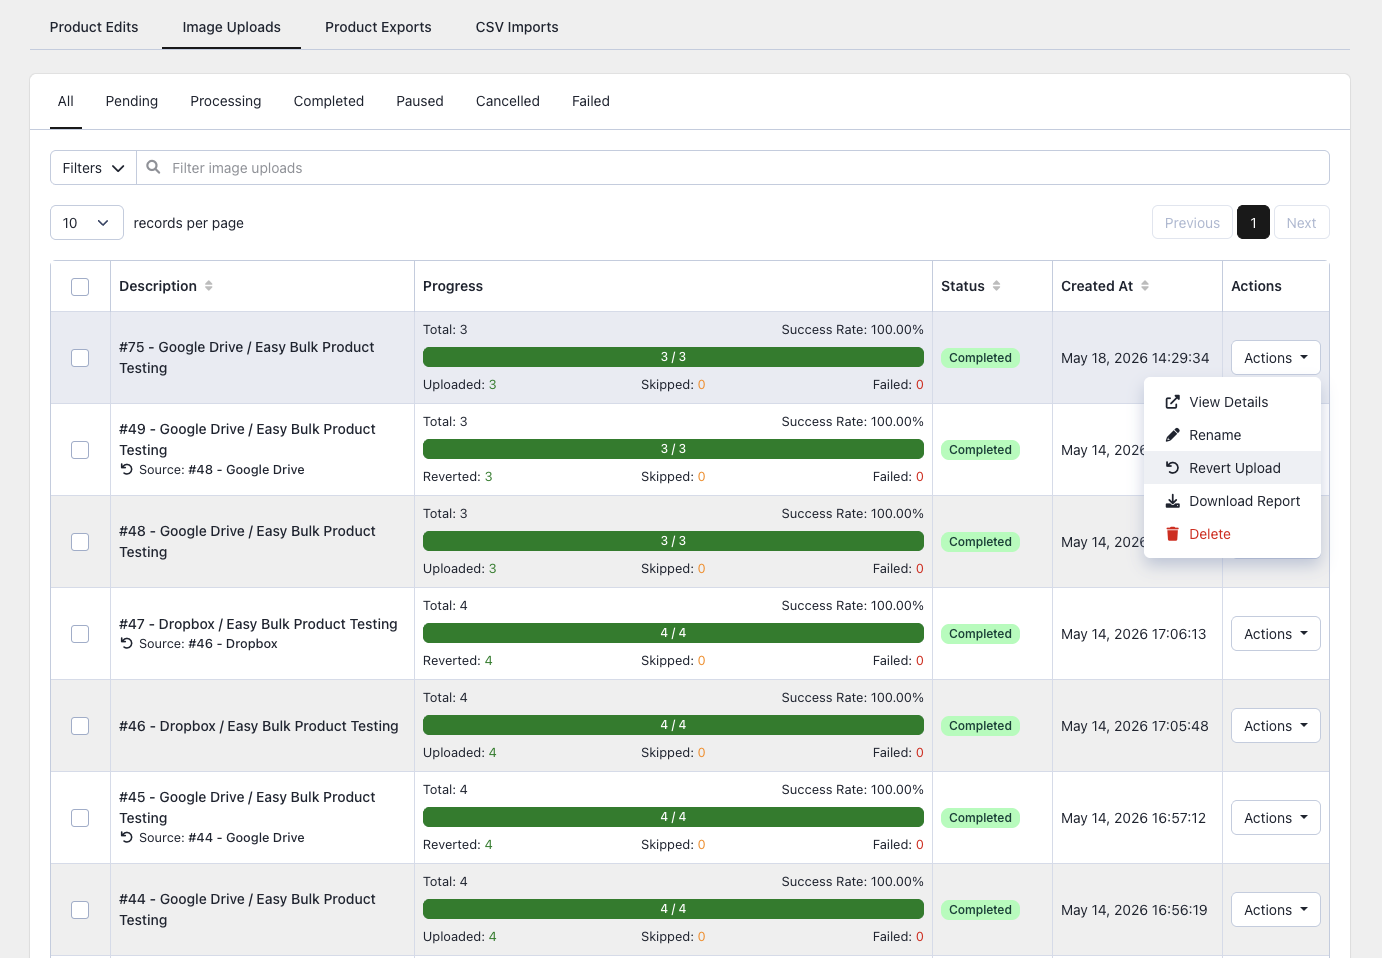
- Go to History > Image Uploads.
- Find the upload batch and click it to view the details.
- Click Revert Upload to remove those specific images from your store.
Note: This only works for uploaded images, not deleted ones.
Helpful Tips
- Match by SKU: This is the most reliable method because SKUs are completely unique, whereas product titles might be similar.
- Organize your folders: Keep images for a single upload batch isolated in their own dedicated cloud folder.
- Always use alt text: Taking five seconds to add a template like
{title} by {vendor}is an easy win for your store’s SEO. - Check the preview: Always review the matched/unmatched preview screen before hitting upload.
Plan Limits
| Feature | Free | Basic | Advanced | Enterprise |
|---|---|---|---|---|
| Image uploads per month | 50 | 3,000 | 10,000 | Unlimited |
| Watermark & Resize | No | No | Yes | Yes |
| Cloud Storage Integration | Yes | Yes | Yes | Yes |
| Alt text editing & Revert | Yes | Yes | Yes | Yes |