This guide covers the basics of editing products in bulk, helping you save time and manage your store efficiently.
What is Bulk Editing?
Imagine you have 500 products in your store and you need to increase all their prices by 10%. Updating each product one by one in Shopify could take hours. With Easy Bulk Product Edit+, you simply select the products, choose to “increase price by 10%”, click start, and the app does the work in under a minute.
Bulk editing allows you to make the exact same change to many products all at once. You can update practically anything about your products: prices, descriptions, tags, images, inventory levels, SEO information, and more.
The 4-Step Workflow
Every edit in the app follows a simple, repeatable 4-step process.

Step 1: Pick Which Products to Change
Before making any updates, you need to tell the app which products to target by using filters. Think of filters as your search criteria to narrow down your product list.
Here are the ways you can filter your products:
- Product Information: Search by Title, URL Handle, Vendor (brand), Product Type, Tags, Collection, Status (Active/Draft/Archived), or Published status.
- Pricing: Search by Price range, Compare-at price (the crossed-out original price), or Cost (your wholesale cost).
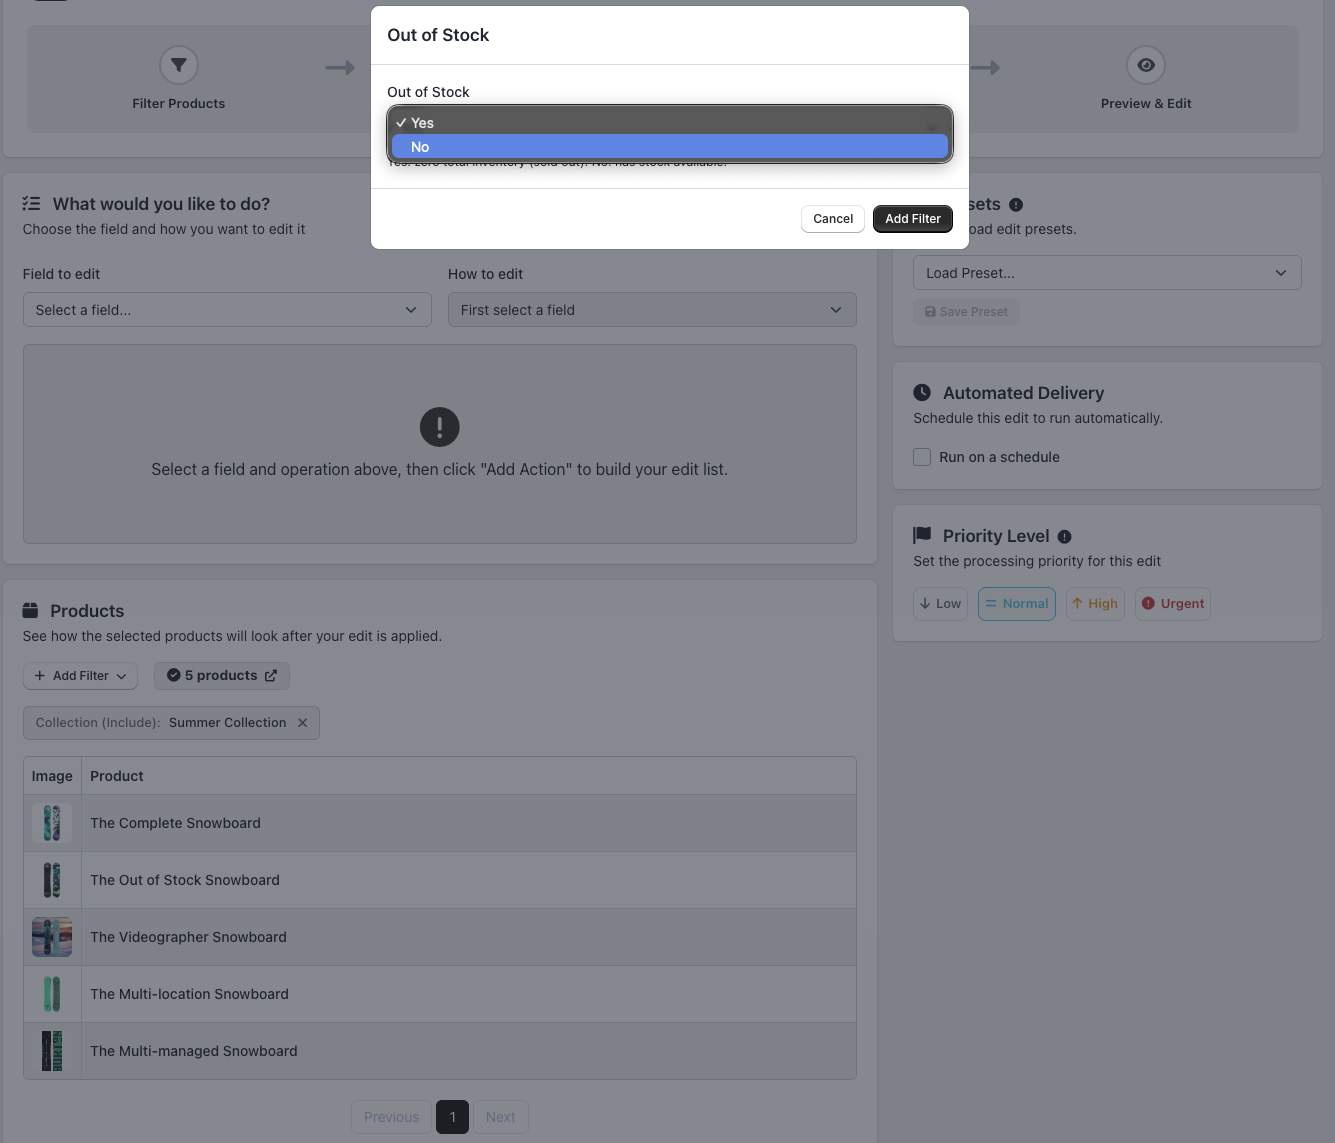
- Inventory: Search by exact Inventory quantity or find products that are Out of stock.
- Dates: Filter by when a product was Created, Updated, or Published.
- Other Details: Filter by Sales Channel, SKU, Barcode, Variant Title, whether it Has images or variants, and specific custom data like Metafields.
You can combine as many filters as you need. For example, you can filter for “All active Nike products in the Summer Collection priced above $50”. The app will show you a live count of matching products so you know exactly how many items will be updated.
Step 2: Choose What to Change
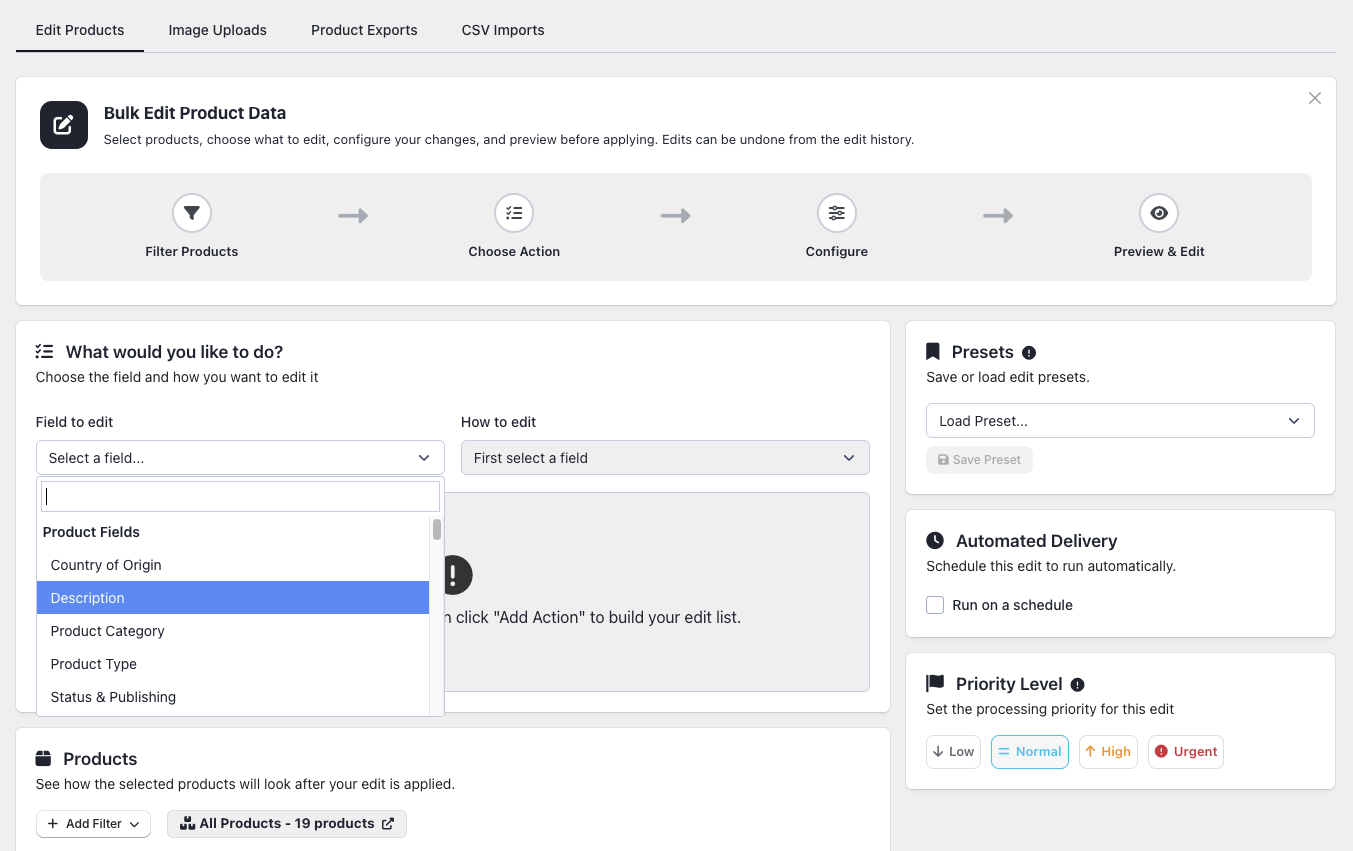
Next, select which part of the product you want to edit. The app organizes these fields into easy-to-find categories:
- Product Info: Update Titles, Descriptions, Tags, Vendors, Types, and Statuses.
- Pricing: Change the selling Price, the Compare-at Price (for displaying discounts), or your internal Cost.
- Inventory & Shipping: Adjust stock levels, SKUs, Barcodes, Weights, and HS Codes.
- Variant Options: Update Option Names (like “Size”) or Values (like “Small”).
- SEO: Improve your Google ranking by updating SEO Page Titles, Descriptions, and URL Handles.
- Images: Add, delete, reorder images, or update Image Alt Text for accessibility.
- Collections: Add, remove, move, or copy products between collections.
Step 3: Choose How to Change It and Enter Your Values
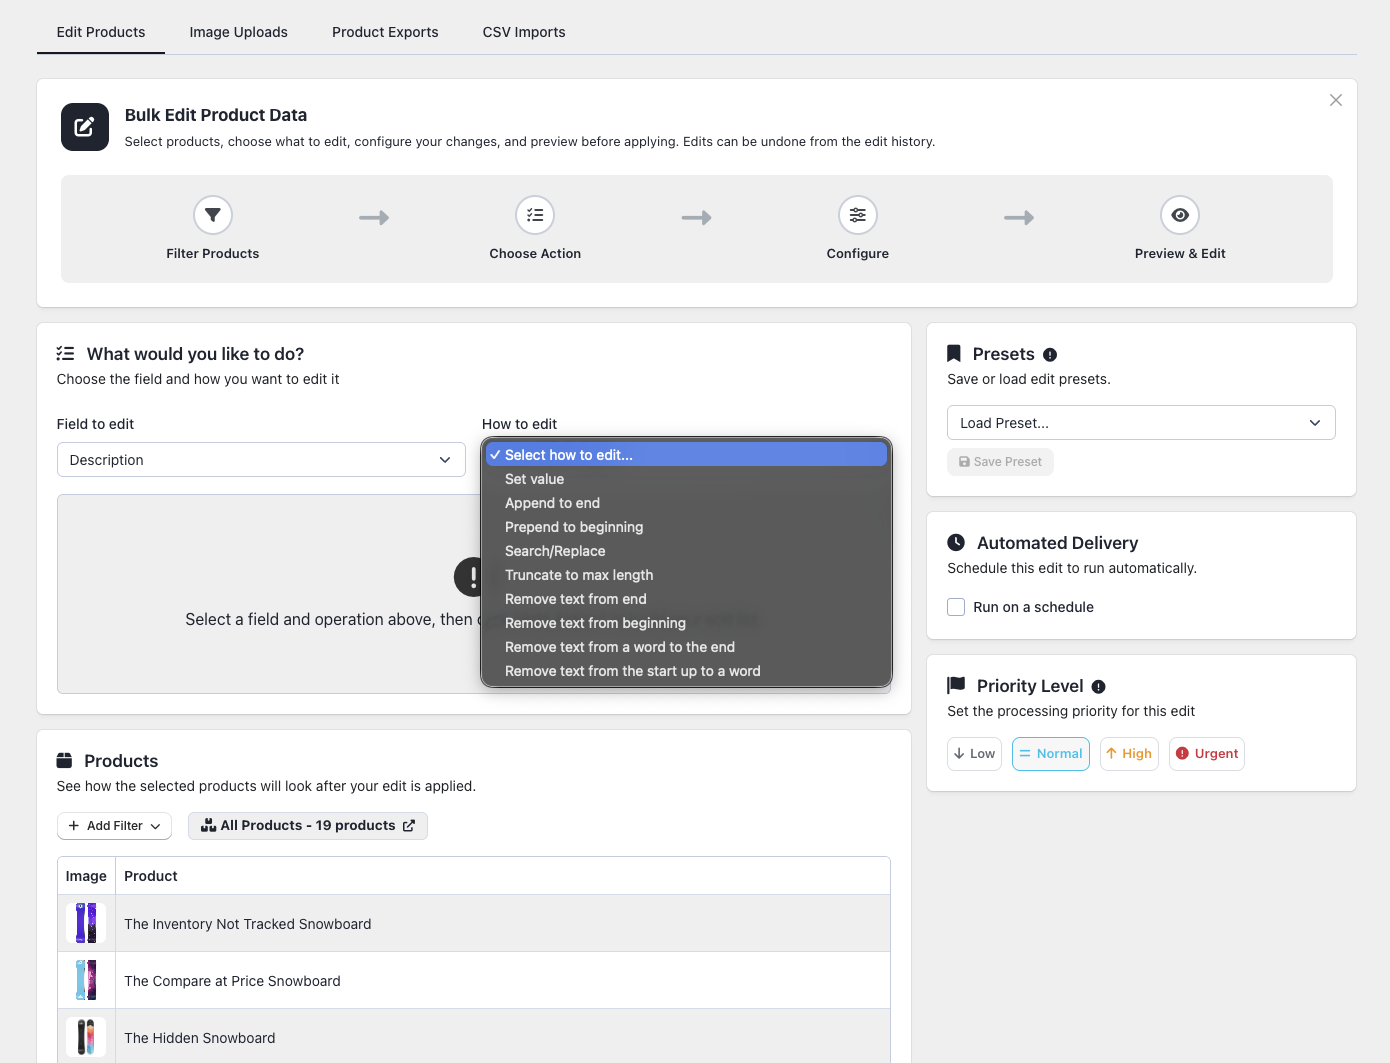
After selecting your field, choose exactly how you want to modify it. The options will magically adjust based on what you are editing:
- For Text (Titles, Descriptions, etc.): You can replace existing text, add text to the beginning or end, find and replace specific words, or cut text down to a maximum length.
- For Prices: You can set an exact value, or increase/decrease prices by a specific dollar amount or percentage. You can even round odd cents to clean numbers like $22.99.
- For Tags: Add new tags, remove specific ones, swap tags, or clear them all completely.
- For Inventory: Set specific stock numbers, increase/decrease by amounts or percentages, or transfer stock between warehouse locations.
Step 4: Preview and Start
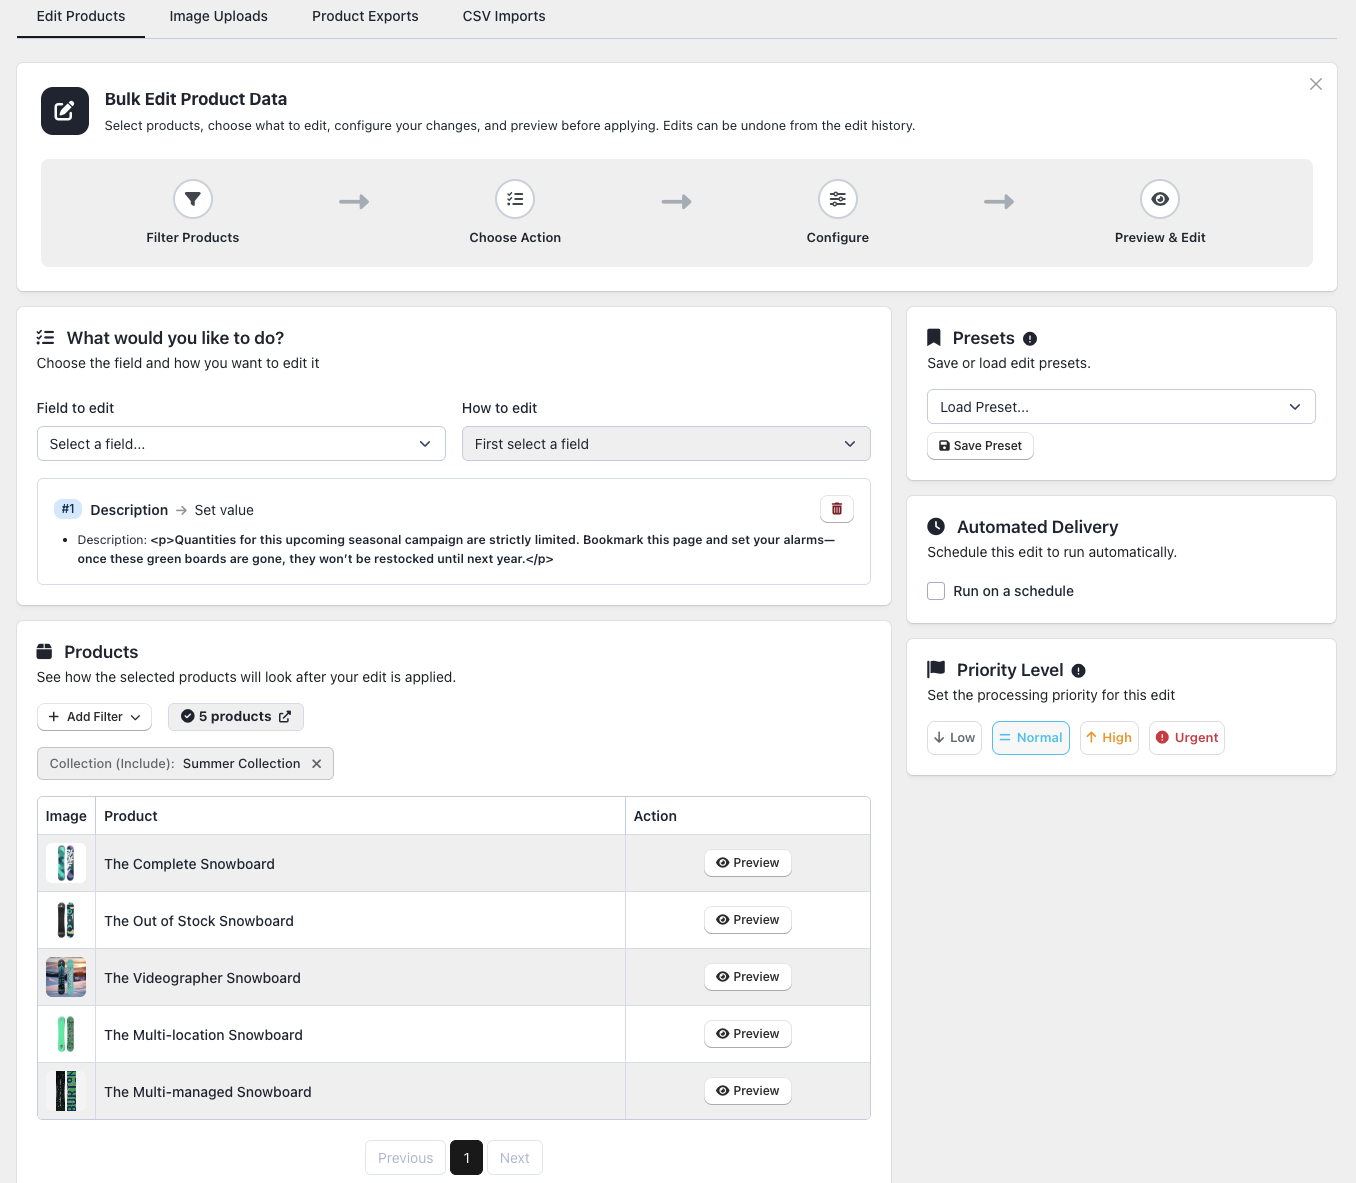
Before any changes go live, the app provides a preview list of the products that will be affected. This is your safety net!
Review the list to ensure the right products are selected, and when you are ready, click Start Edit.
Watching Your Edit Run
Once your edit begins, you will be taken to a progress page. Here you can track the status:
- Progress Bar: Shows exactly how many products have been processed.
- Pause/Resume: Temporarily stop the process at any time without losing your progress, and resume when ready.
- Cancel: Stop the edit entirely. Products already changed will remain changed, but untouched products will be left alone.
After Your Edit is Done
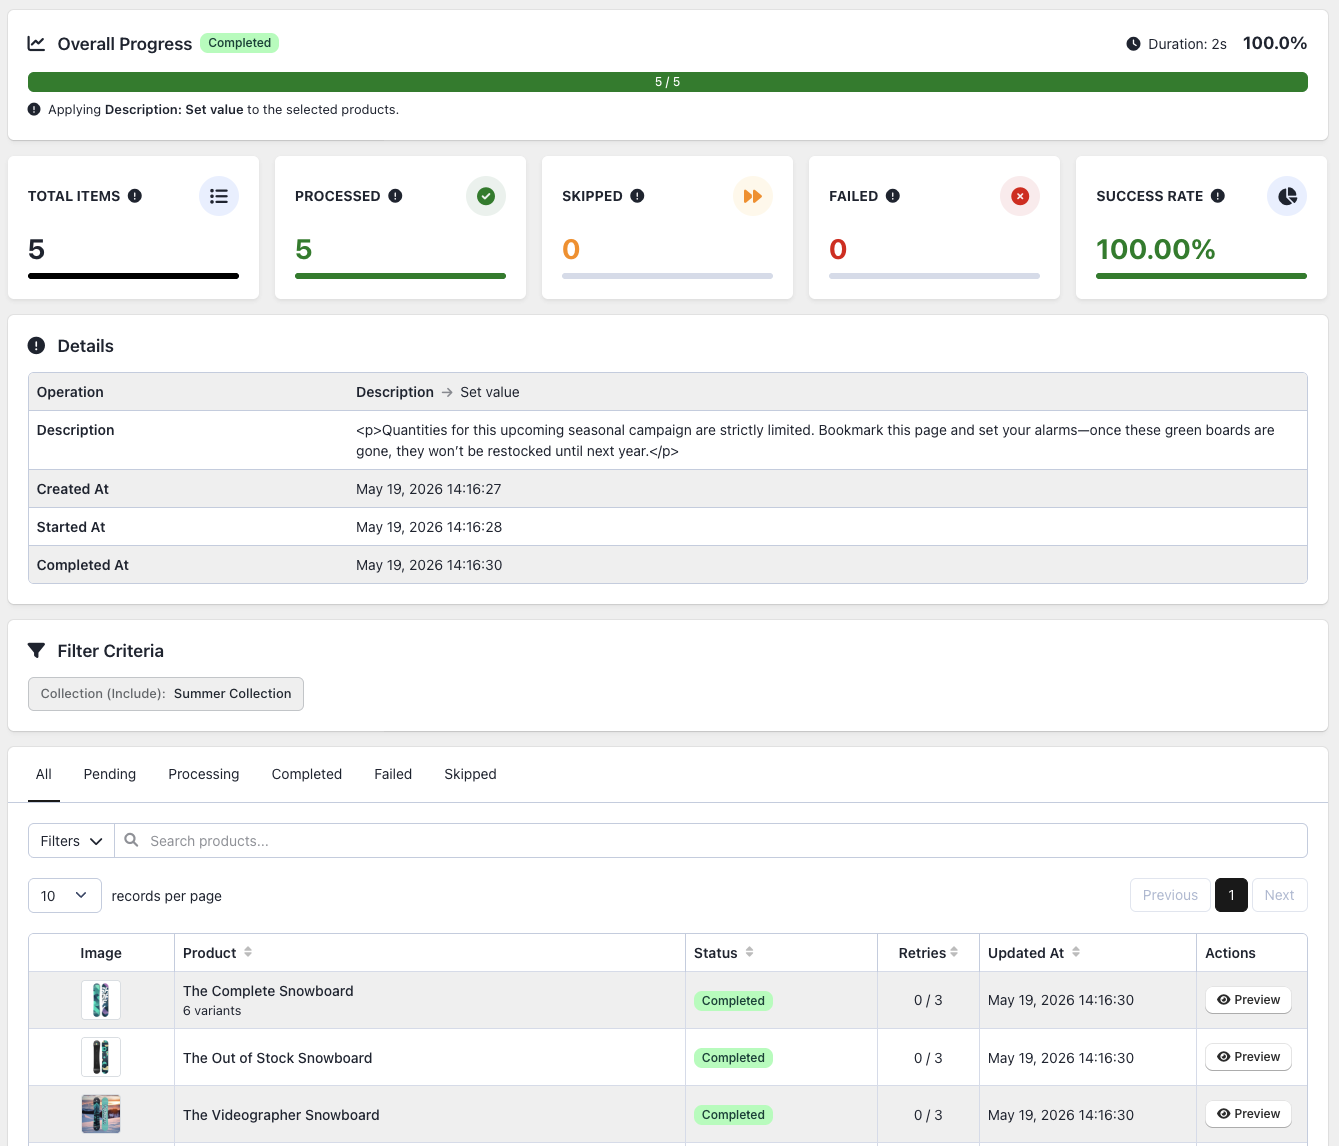
When the process is complete, you will receive a results summary showing how many products were Successful, Failed (with reasons provided), or Skipped.
From here, you can:
- Download Results Report: Get a detailed spreadsheet of every change made.
- Restore Changes: Undo the entire edit with one click to revert products back to their original state.
Tip: You don’t have to watch the progress bar! The app will send you an email notification when the edit finishes, which you can manage in your app settings.
Time-Saver: Saving Your Setup as a Preset
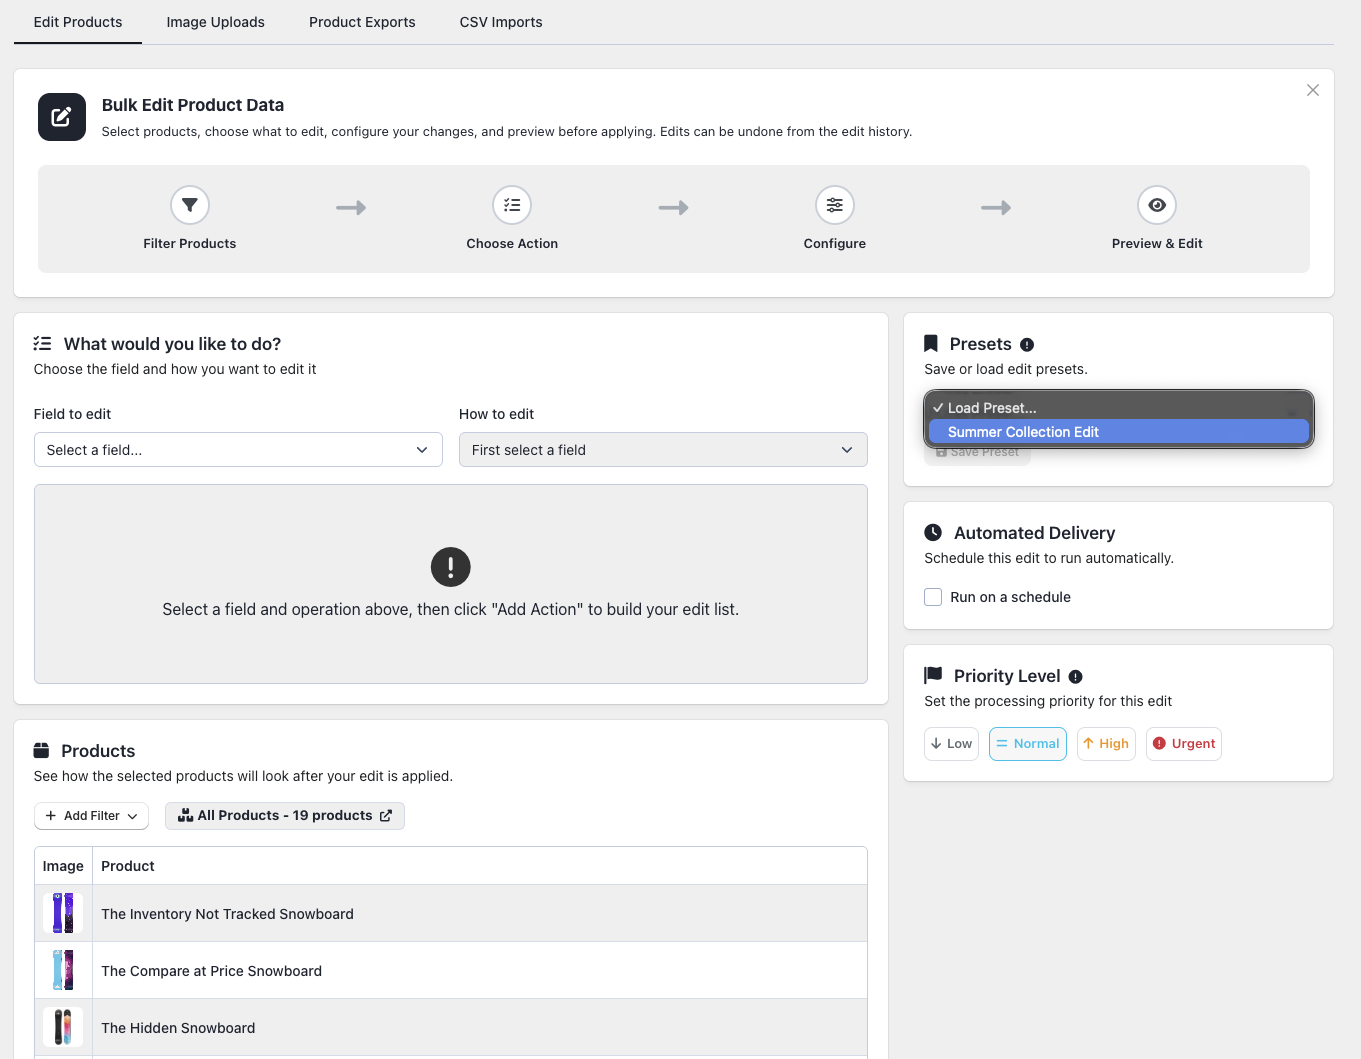
If you frequently run the same type of edit (like a monthly price update), you can save your settings as a Preset.
- Set up your filters and actions normally.
- Click Save Preset and give it a memorable name (e.g., “Monthly Nike Price Update”).
- The next time you need to make this change, simply click Load Preset. All your settings will fill in automatically!
Presets are available on all subscription plans with no limits.
Smart Text Templates
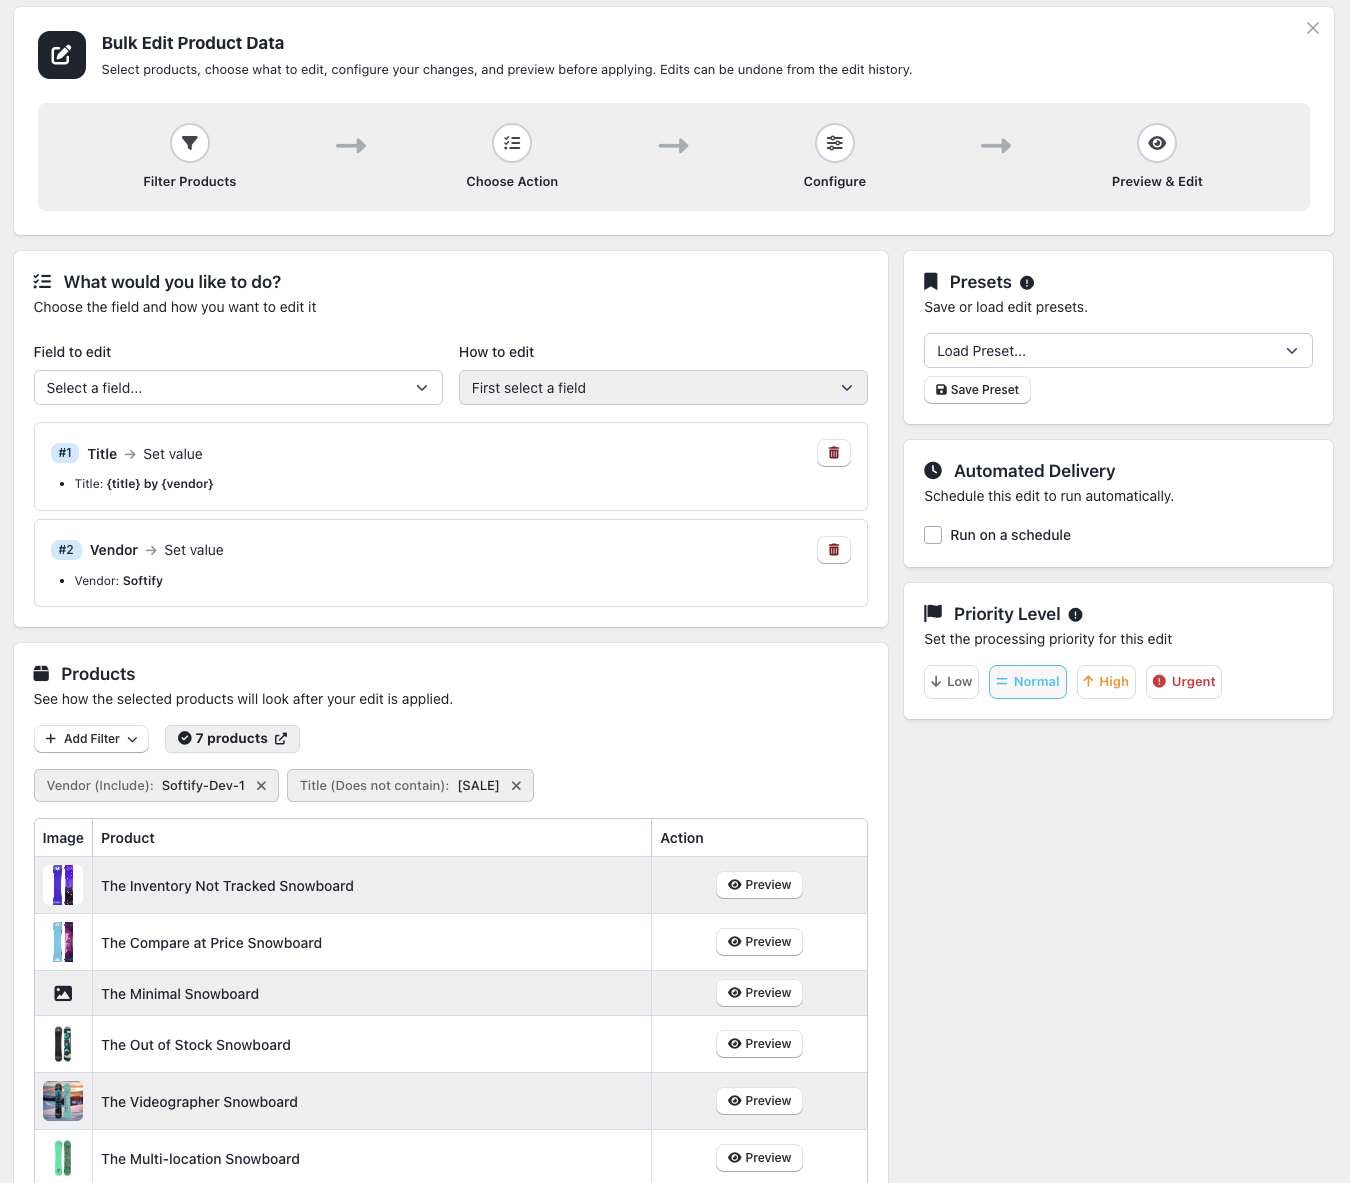
When updating text fields, you can use “Smart Placeholders” to automatically pull unique information for each specific product. This lets you personalize text for hundreds of products instantly.
For example, typing {title} by {vendor} as your new SEO Title will automatically generate “Blue Sneakers by Nike” for one product and “Leather Wallet by Coach” for another.
Popular Placeholders Include:
{title}: The product’s title{vendor}: The brand name{price}: The product’s selling price{tags}: All assigned tags
Plan Limits
All plans give you access to every type of edit. The only difference is the volume of products you can process at once and how long your history is stored.
| Feature | Free | Basic | Advanced | Enterprise |
| Products per edit | 50 | 10,000 | 100,000 | Unlimited |
| Simultaneous edits | 3 | 5 | 10 | Unlimited |
| Edit history kept for | 7 days | 30 days | 90 days | 1 year |
Quick Tips for New Users
- Start small: Test your first edit on just 5-10 products to see exactly how it works without affecting your whole store.
- Use the preview: A quick glance at the preview list can prevent accidental changes.
- Don’t fear mistakes: Every edit is saved in your History page and can be safely reversed using the restore feature.
- Be specific: It’s better to use multiple filters to be highly specific than to accidentally cast your net too wide.