This guide explains how to manage tags across multiple products to keep your store perfectly organized.
What Are Tags and Why Do They Matter?
Tags are like digital sticky notes you attach to your products to help you group and find them easily. They are powerful tools for several reasons:
- Automated Collections: You can create a “Summer Collection” in Shopify that automatically includes any product tagged “summer”. If you add the tag, the product appears in the collection; if you remove it, the product disappears.
- Easy Filtering: Customers can use tags to filter products on your storefront, and you can use them to find specific items in your Shopify admin.
- Internal Organization: You can use hidden tags for your own workflow, like “needs-new-photo” or “low-margin”.
Adding or removing tags one by one can take forever, which is why bulk editing them is a massive time-saver.
Tag Actions Explained
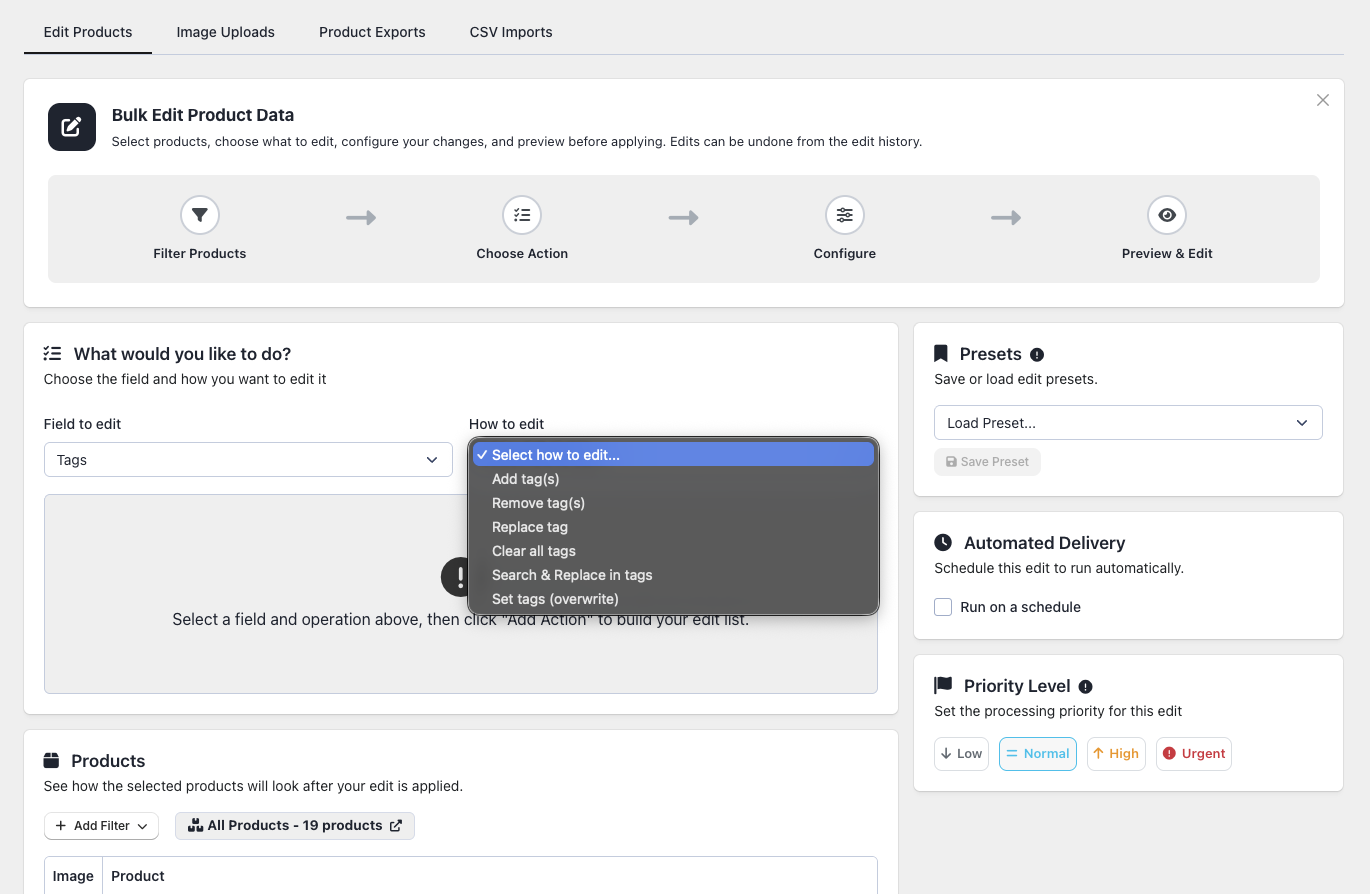
- Add Tags: Add new tags alongside your existing ones. (e.g., Adding “sale” to products that already have “cotton” and “summer” leaves them with all three tags.)
- Remove Tags: Remove only the specific tags you choose, leaving all others untouched.
- Replace a Tag: Swap an old tag for a new one. (e.g., Change “summer-2024” to “summer-2025”.)
- Search & Replace Text Within Tags: Find a specific word or year across multiple tags and update it. (e.g., Searching for “2024” and replacing it with “2025” updates “spring-2024” to “spring-2025” and “fall-2024” to “fall-2025” simultaneously.)
- Set Tags (Use with caution): Erase all existing tags on a product and replace them only with the tags you type.
- Clear All Tags (Use with caution): Strip every single tag from the selected products.
Step-by-Step Examples
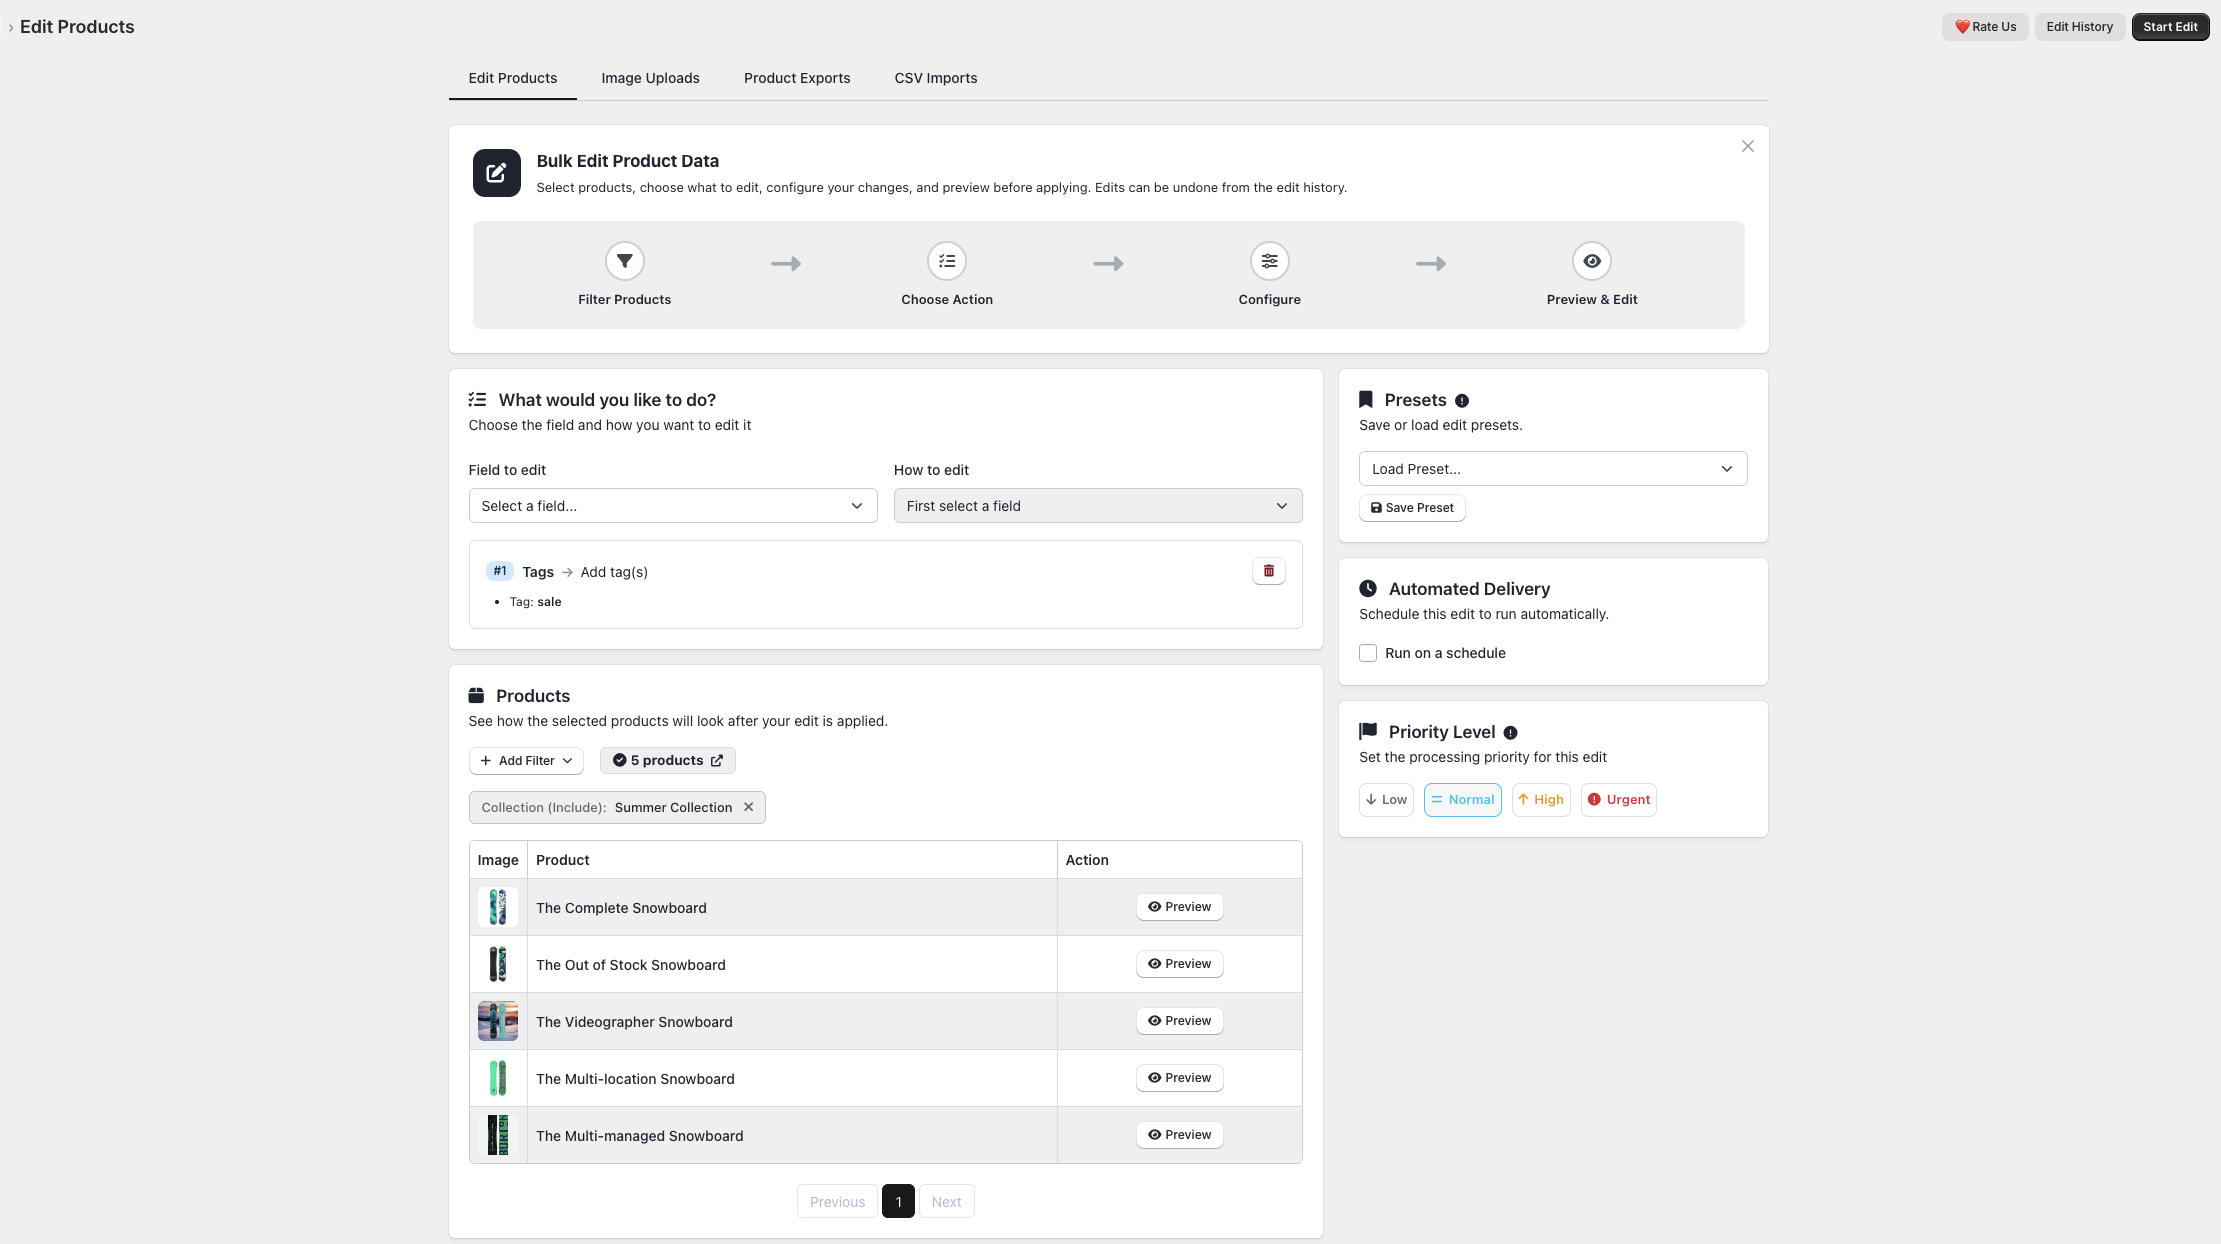
Example 1: “I want to add a ‘sale’ tag to my Summer Collection”
- Open the app and go to Edit Products.
- Click Add Filter, choose Collection, and select “Summer Collection”.
- Set Field to edit to Tags.
- Set How to edit to Add tag(s).
- Type sale in the tag field.
- Click Preview to verify, then click Start Edit.
Tip: To add multiple tags at once, just separate them with commas (e.g.,
sale, featured, summer-2025).
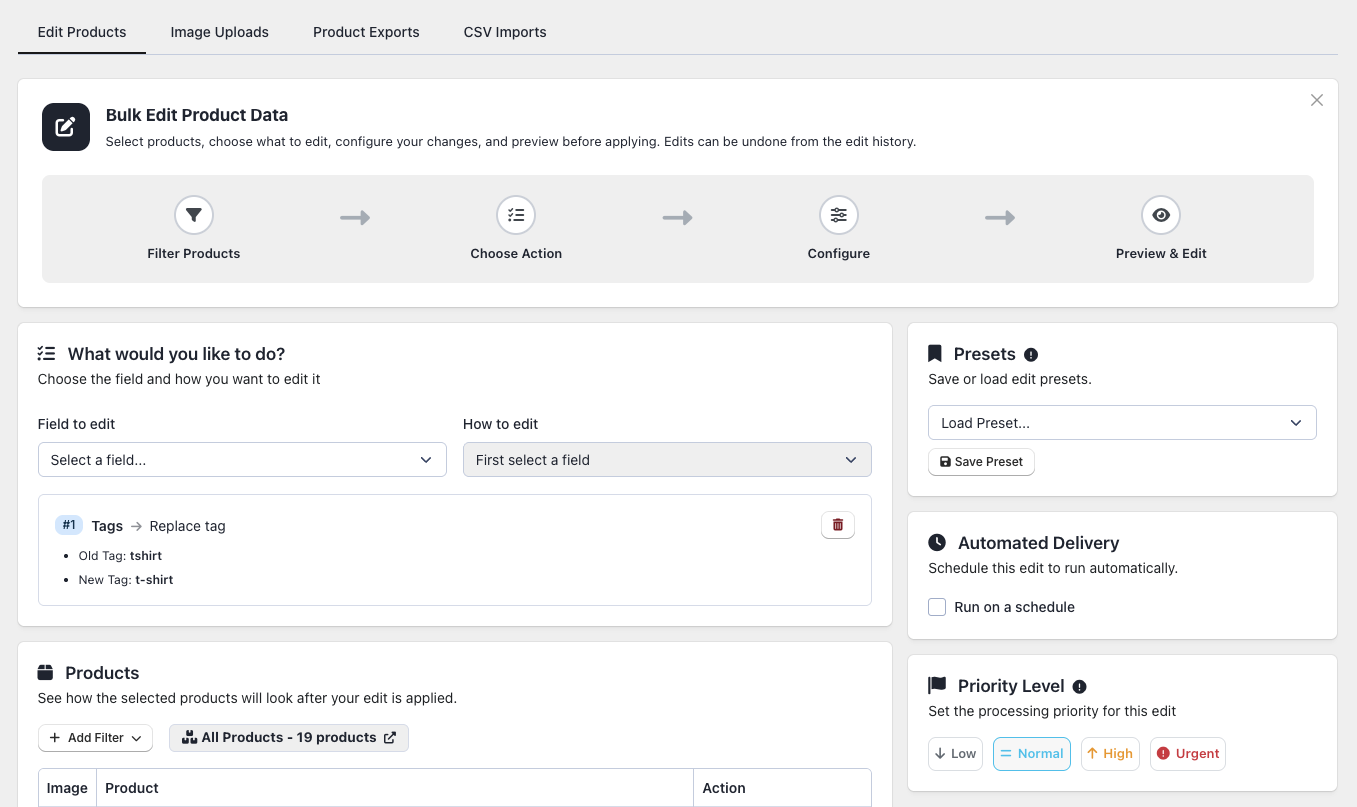
Example 2: “I want to clean up my messy tags (e.g., change ‘tshirt’ to ‘t-shirt’)”
- Set Field to edit to Tags.
- Set How to edit to Replace tag.
- In Find this tag, type
tshirt. - In Replace with, type
t-shirt. - Click Start Edit.
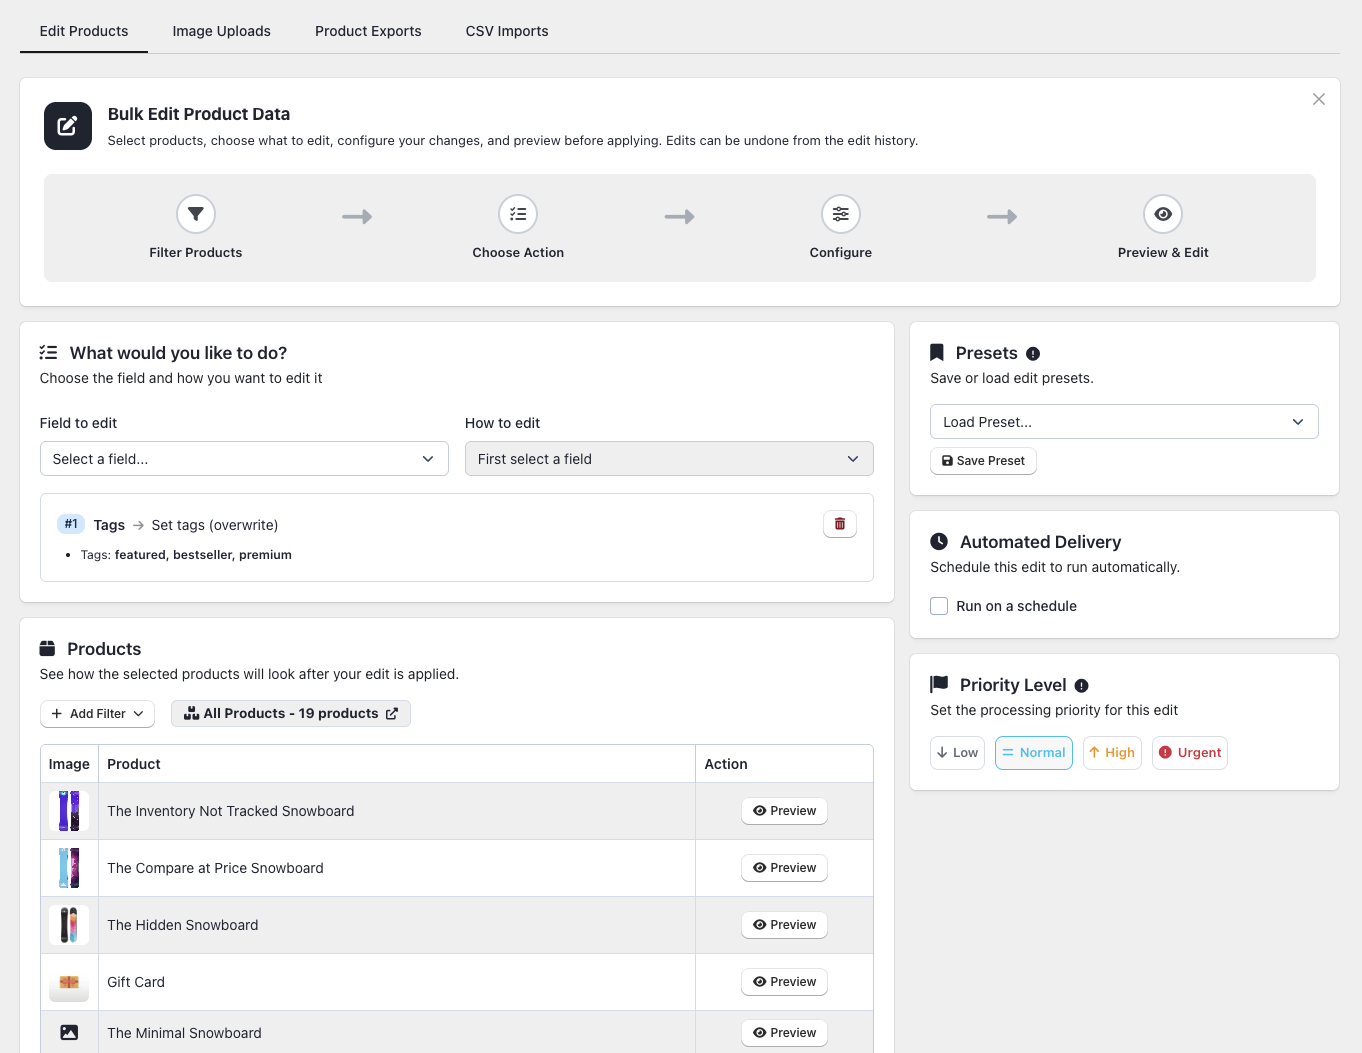
Example 3: “I want these products to ONLY have specific tags”
- Set Field to edit to Tags.
- Set How to edit to Set tags.
- Type your exact tags:
featured, bestseller, premium. - Click Start Edit. (Remember: This deletes all previous tags on those products!)
Common Time-Saving Workflows
- Seasonal Sales: Add a “sale” tag to targeted products so they instantly populate your automated “Sale” collection. When the sale ends, use the Remove action to take the tag off, and they automatically leave the collection.
- Yearly Refresh: At the start of a new year, use “Search & Replace” to instantly update “2024” to “2025” across all your tags.
Helpful Tips
- Capitalization doesn’t matter: Shopify treats “Sale” and “sale” as the same tag, but staying consistent keeps your store looking neat.
- Filter first: Before deleting a tag, use filters to search for that exact tag. This lets you see exactly which products will be affected.
- Mistakes are easily fixed: If you accidentally remove the wrong tag or clear everything, you can always reverse it from your History page.
Plan Limits
Tag editing is available on all plans:
| Plan | Products per Edit |
| Free | 50 |
| Basic | 10,000 |
| Advanced | 100,000 |
| Enterprise | Unlimited |